
Terminal Guide
Ingenico
n ICT250
n IWL220 Bluetooth
n IWL250 3G
n ICT220 with IPP320 PIN

Getting Started
The Ingenico Terminal Guide will help you set up your terminal, understand your terminal’s
functionality, and troubleshoot common payment application and terminal issues.
Please note that terminal options may vary depending on the device and application you are using.
Contents
Navigating and Setting Up Your Ingenico Terminal
n ICT 250
n IWL220 Bluetooth
n IWL250 3G
n ICT220 with IPP320 Pin Pad
n Main Menu
Transactions
n Basic Transactions (Credit and Debit Cards)
n Basic Transactions (Credit Card Only)
n Contactless Payments Transactions
n Gift Card and Stored Value Card Transactions (Optional)
Functions and Features
n Basic Functions and Features
n Clerk Server Management
n Reports
n Settling the Batch
Reference
n Adjusting Hardware Settings
n Common Error Codes
4
5
6
7
8
10
14
15
15
17
18
19
20
22
23

Navigating and Setting Up
Your Ingenico Terminal
4
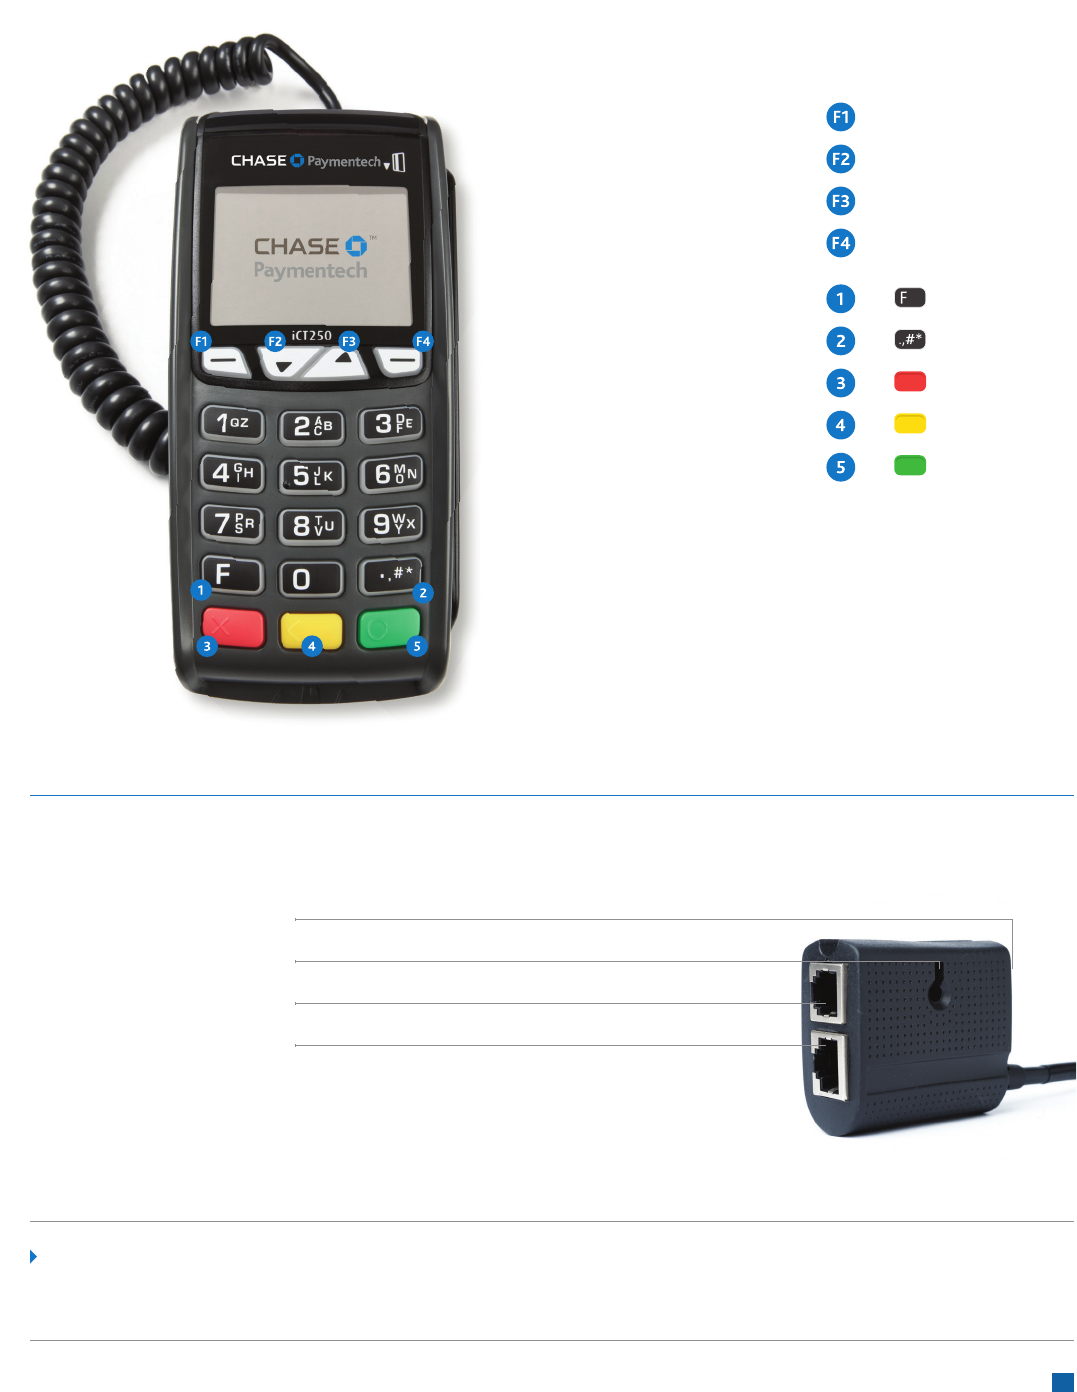
ICT250
How to plug in your ICT250:
To Power Supply
To Cable Mount
To Phone Line
To Internet
Note:
Connect to the phone line, Internet, or both. Insert the supplied zip tie, or screw (not provided),
through the cable mount and affix the device to a flat surface.
Function
Variable key
Scroll key
Scroll key
Variable key
System Menu
Admin Menu
Cancel Key
Clear/Back Key
Enter Key

5
IWL220 Bluetooth
How to plug in your IWL220 Bluetooth:
USB A (not applicable)
USB B (not applicable)
To Phone Line
To Power Supply
To Internet
Note:
Port to the phone line is located beneath the base.
Function
Variable key
Variable key
Scroll key
Scroll key
System Menu
Admin Menu
Cancel Key
Clear/Back Key
Enter Key

6
IWL250 3G
How to plug in your IWL250 3G:
To Power Supply
Note:
To turn ON the terminal, press [ ]. To turn OFF the terminal, press and hold [ ] and the [ ] at the same time. To recharge
the battery, connect a supported wall or car charger to the power supply port, or place the terminal on the charging base.
Function
Variable key
Variable key
Scroll key
Scroll key
System Menu
Admin Menu
Cancel Key
Clear/Back Key
Enter Key

7
ICT220 with IPP320 PIN Pad
How to plug in your ICT220 with IPP320 PIN Pad:
Note:
Connect to the phone line, Internet, or both. Insert the supplied zip tie, or screw (not provided),
through the cable mount and affix the device to a flat surface.
Function
Variable key
Scroll key
Scroll key
Variable key
System Menu
Admin Menu
Cancel Key
Clear/Back Key
Enter Key
To Power Supply
To Cable Mount
To Phone Line
To Internet
ICT220 IPP320 PIN Pad

8
Main Menu
The main menu options on the terminal idle screen may vary depending on whether your terminal is running the
Retail or Restaurant application. Take note of the differences in the menu options.
You can also customize the main menu to your preferred view by leveraging your terminals Menu Hide feature.
This feature allows you to hide the Return, Tab, Gift, TipAdjustment, RetailTip, TransAdjust, PreAuth, and Reprint
options from the main menu.
Retail Main Menu
0 – Sale
1 – Return
2 – Void
3 – Force
4 – Gift
5 – RetailTip
6 – TransAdjust
7 – PreAuth
8 – Settlement
9 – Reprint
10 – Reports
Restaurant Main Menu
0 – Sale
1 – Return
2 – Tab
3 – Void
4 – Force
5 – Gift
6 – TipAdjustment
7 – TransAdjust
8 – PreAuth
9 – Settlement
10 – Reprint
11 – Reports

9
Transactions

10
Basic Transactions (Credit and Debit Cards)
Refer to this section for information on what transactions are available and when to use them.
Begin a Transaction
In general, to begin a transaction, press [ ] to access the Main Menu and then select the transaction type
you wish to perform. Your terminal will guide you through the process
Sale
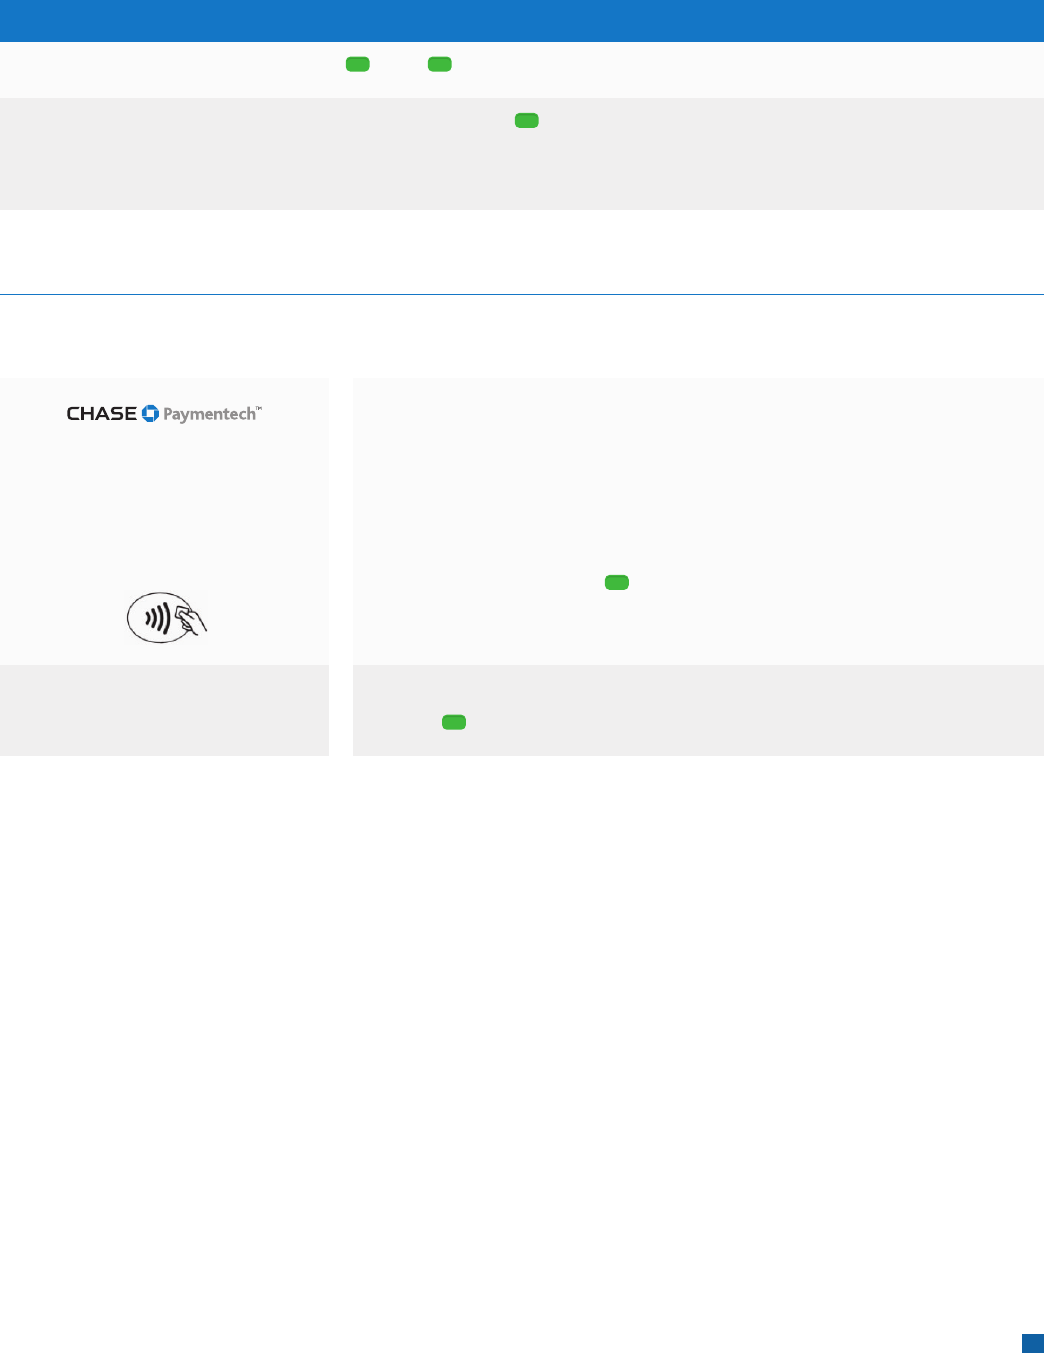
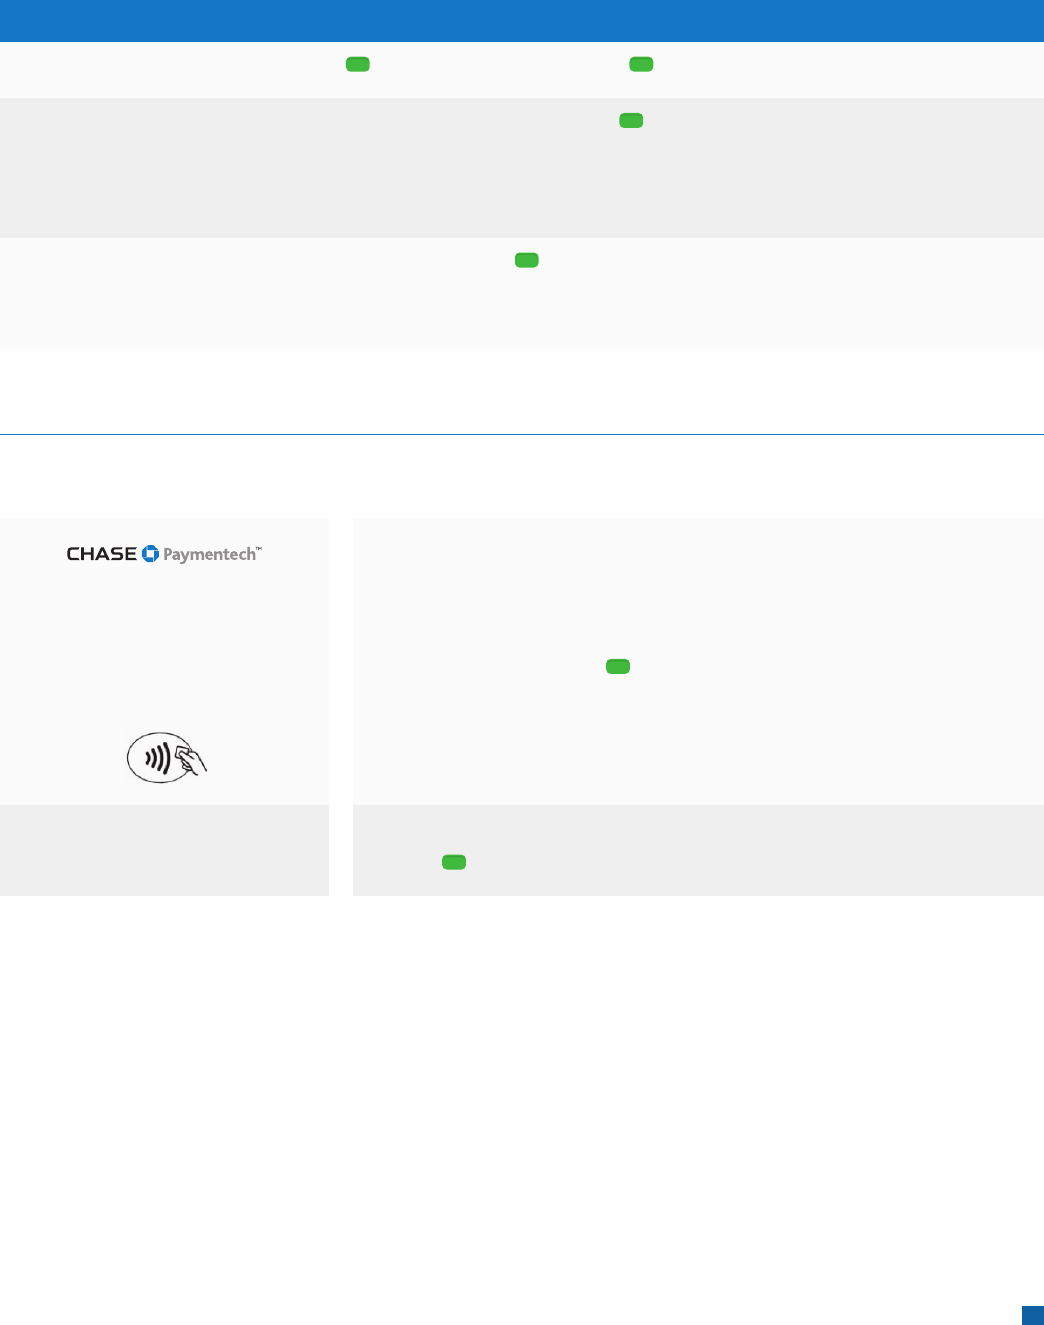
Perform a credit or debit card sale transaction when the card is present.
Display
Idle Screen
SALE
Enter Sale
Amount: $ 0.00
ICT250/IWL220/IWL250/ICT220 w IPP320
Press [ ] and [ ] to select Sale
Key in amount and press [ ]
Customer is prompted to Swipe/Insert/Tap/Key
1. Customer confi rms the sale amount
2. Selects Chequing or Savings (Debit Only)
3. Enter PIN and press [ ]
4. While terminal connects, do not remove card
For contactless (tap) transactions, the customer holds their card
over the terminal until the reader fl ashes and/or beeps.
Sale
Swipe/Insert/Tap/Key
Glisser/Insérer Carte/
Présenter/Taper Carte
Sale/Vente $0.00
APPROVED XXXX
Remove Card
Receipt prints and approval is displayed
Press [ ] to print the customer copy
What the customer sees:
11
Sale (With Tip)
Perform a credit or debit card sale transaction with a tip when the card is present.
Display
Idle Screen
SALE
Enter Sale
Amount: $ 0.00
ICT250/IWL220/IWL250/ICT220 w IPP320
Press [ ] and [ ] to select Sale
Key in amount and press [ ]
Customer is prompted to Swipe/Insert/Tap/Key
1. Customer confi rms the sale amount
2. Customer is prompted to select Tip Method
(per cent, amount, no tip)
3. Selects Chequing or Savings (Debit Only)
4. Enter PIN and press [
]
5. While Terminal connects do, do not remove card.
Sale
Swipe/Insert/Tap/Key
Glisser/Insérer Carte/
Présenter/Taper Carte
Sale/Vente $0.00
APPROVED XXXX
Remove Card
Receipt prints and approval is displayed
Press [ ] to print the customer copy
What the customer sees:
12
Return/Refund
Perform a return to refund money to a cardholder’s account from a sale completed in a closed batch (e.g., previous
day). This function may also be used to adjust a previous transaction.
Display
Idle Screen
RETURN
Enter Supervisor
Password:
*******
RETURN
Enter Return
Amount: $ 0.00
ICT250/IWL220/IWL250/ICT220 w IPP320
Press [ ], scroll to Return then press [ ] to select
Enter Supervisor password and press [ ]
Key in amount and press [ ]
Customer is prompted to Swipe/Insert/Tap/Key
1. Customer confi rms the refund amount
2. Selects Chequing or Savings (Debit Only)
3. Enter PIN and press [ ]
4. While terminal connects, do not remove card
For contactless (tap) transactions, the customer holds their card
over the terminal until the reader fl ashes and/or beeps.
Return
Swipe/Insert/Tap/Key
Glisser/Insérer Carte/
Présenter/Taper Carte
Return/Retour $0.00
APPROVED XXXX
Press Enter
Receipt prints and approval is displayed
Press [ ] to print the customer copy
What the customer sees:

13
Void
Perform a void to reverse a credit or debit sale, force, or return transaction and prevent any funds from transferring
from the cardholder’s account. Only available for transactions in the current batch (e.g., same day).
Display
Idle Screen
Void Pre-Auth
(if applicable)
Yes/No
SEARCH MENU
1 – All
2 – Reference #
3 – Clerk #
4 – Invoice #
Acct: XXXX
TR: Credit Sale
Total: XX.XX
1/4 [
] Select
Confirm Void
$XX.XX
Yes/No
APPROVED XXXXXX
Press [ ]
ICT250/IWL220/IWL250/ICT220 w IPP320
Press [ ], scroll to Void, press [ ] to select
Press [F1] for Yes to void an open pre-auth, or [F4] for No
Note: This prompt appears even when there are no open
pre-auth transactions.
Press [1] to search all the transactions in the batch
Press [2] to search transactions by the reference number
Press [3] to search transactions by the clerk/server number
Press [4] to search transactions by the invoice number
Review the transaction to delete
Press [F4] to select the transaction to void
Confirm the amount to be voided
Press [F1] for Yes or [F4] for No
Receipt prints and approval is displayed
Press [ ] to print the customer copy
Terminal returns to Main Menu
Ref: X
Auth:
XXXXXX

14
Basic Transactions (Credit Card Only)
You can perform additional credit card sale transactions when the credit card is present.
Force
*
Perform a force sale when the terminal cannot reach the host (Chase Paymentech) to authorize
a transaction, or to finalize a Pre-Auth transaction. Contact your voice authorization center for an authorization code,
and then force the transaction.
To force a sale press [ ], use the scroll keys to navigate to the Force option, and press [ ].
Pre-Auth/Pre-Auth Completion (for retail only)
*
A pre-auth transaction provides an approval, but the consumer is not charged for the sale until a pre-auth completion
is performed. The terminal stores up to 1,000 pre-auth transactions.
To perform a Pre-Auth/Pre-Auth Completion press [ ], use the scroll keys to locate the Pre-Auth option, and
press [ ].
Open Tab (for restaurant only)
The Open Tab transaction enables you to preauthorize a transaction for a specific, pre-determined dollar amount.
To use the Open Tab function, press [ ], use the scroll keys to navigate to Tab and then press [ ]. Press [1] – Open.
Close Tab (for restaurant only)
To close an Open Tab and place it in the settlement batch file, a Close Tab transaction is required.
Press [ ] use the scroll keys and locate the Tab option and then press [ ]. Press [2] – Close.
* Purchase and Commercial cards are supported.

15
Contactless Payments Transactions
Your Ingenico terminal automatically accepts contactless payments. During a sale transaction, the terminal will
display the “Tap/Insert/Swipe/Key” prompt and the contactless symbol. At this time, customers with contactless-
enabled cards should touch/tap their card on or in close proximity to the top of the terminal screen for a few seconds.
Your terminal will process contactless payment transactions as if a card were swiped or inserted. As an added security
measure, the terminal will prompt for a card insert or swipe if the transaction amount is over a pre-set threshold.
Note: Contactless option can be disabled, please contact Merchant Support at 1.800.265.5158. Cashback and surcharge
functions require the card to be inserted or swiped.
Gift Card and Stored Value Card Transactions (Optional)
Your Ingenico terminal supports gift card and stored value card (e.g. loyalty card) transactions. If you participate in
a gift or stored value cards program your terminal is capable of performing various transactions for these types of
cards. This guide outlines some of the most common transactions for gift and stored value cards. For more advanced
transactions or additional details, contact your gift and/or store value cards program provider for assistance.
Note: The transactions and menu options outlined below may vary depending on your third party gift or stored value
card program provider or application.
Begin a Gift or Stored Value Card Transaction
To start a gift or stored value card transaction, press [ ] and use the scroll keys to navigate to Gift. Press [ ] to
access the Gift Card Menu.
Issuance/Add Value
This transaction adds value to the gift or stored value card account and can be used to issue and activate a new card,
or to reload an active card with incremental value.
From the Gift Card Menu scroll to Issuance/Add Value and then press [ ] to select.
Activation/Block Activation
The Activation function creates a consumer’s gift or stored value card account by assigning a value to the gift or
stored value card. The Block Activation function is used to activate up to 999 gift or stored value cards for a specific
amount using one transaction flow. Activations/Block Activations can only be performed on cards that have not been
previously activated.
From the Gift Card Menu use the scroll keys to locate Select Activation OR Block Activation and then press [ ].
Redemption
The redemption transaction is performed when a consumer uses the gift or stored value card to purchase goods or
services. The function decreases the value of the consumer’s gift or stored value card account.
To perform a Redemption, from the Gift Card Menu use the scroll keys to navigate to Redemption and then
press the [ ].

16
Functions and Features

17
Basic Functions and Features
This section provides additional information on basic transactions, terminal functions and features, that you may want
to use. Some options may vary depending on the device you are using.
Reprint a Receipt
The Reprint function is accessible through the Main Menu. Press [ ] to access the Main Menu.
Use the scroll keys to navigate to Reprint and press [ ]. You will be prompted to select last receipt,
or enter criteria to search for another receipt to reprint.
Access the Clerk/Server Management Menu
Press [ ] to enter the Admin menu and then select [1] – Server Menu.
Review the Clerk Server Management section on page 18 for additional details.
Access the Reports Menu
Press [ ] to access the Main Menu, use the scroll keys to navigate to the Reports option and then press [ ] to access
the Reports Menu. For your desired report or report category, press the corresponding key and follow the prompts to
view or print your report.
Review the Reports section on page 19 for additional details.
Download Updates
Your terminal will automatically check for software updates every 60 days (which is the default setting). If an update is
available, the terminal will schedule a time to perform the automatic download.
The terminal will not proceed with the download at the scheduled time if there are any transactions in your batch that
need to be settled.
Set a Password
Call our 24/7 Merchant Support and we can outline your options for password settings and help you set-up passwords
for your terminals. Once set-up, this security feature requires a password to be entered to perform specific transactions
on the terminal such as refunds and voids.

18
Clerk/Server Management
To perform a variety of Clerk/Server Management functions access the Clerk/Server Management Menu.
Press [ ] to enter the Admin menu and then select [1] – Server Menu.
Add ID
To add a new clerk or server to your terminal navigate to the Server Menu and select [1] ADD ID.
You will be prompted to create an ID and a password for each new clerk/server.
Delete IDs
To remove a single clerk/server from the terminal go to the Server Menu and select [3] DELETE IDs.
Print ID List
To print a report of clerk/servers currently signed on to the terminal navigate to the Server Menu and select [4] PRINT
ID LIST
Auto Add Clerk/Server
This feature allows you to automatically add new clerks/servers during a transaction. If you toggle the feature off, then
the terminal will not allow a transaction unless a valid clerk-server ID is entered.
To enable the Auto Add Clerk/Server option go to the Server Menu and select [5] Auto Add Clerk/Server.
Clerk Prompt
Enable this feature to have the terminal prompt for a clerk/server ID during each transaction.
To activate this feature go to the Server Menu and select [6] Clerk Prompt.
Clerk Wording
This feature allows you to alternate the terminals verbiage from “clerk”, “server” or “cashier”.
To use this feature go the Server Main Menu and select [7] Clerk Wording

19
Reports
A report is like a snap shot in time of business activities. Use this data to help you make crucial
business decisions.
Access Reports
To get your reports press [ ] to go to the Main Menu, use the scroll keys to navigate to the Reports
Menu and then press [ ] to enter the Reports Menu. For your desired report or report category,
press the corresponding key and follow the prompts to view or print your report.
The following reports are available to you from the Reports Menu:
Reports: Main Menu
Detail Report
Summary Report
Clerk/Server Summary
Condensed Clerk Summary Report
Open Pre-Auth Report
Unadjusted Tip Report
OPEN TAB Report
EMV Report
Recent Error Report
Terminal Config Report
Description
Prints detail information for each transaction and a totals summary
for each card type and issuer.
Prints totals by card type.
Prints a summary report by all or one clerk/server.
Prints a summary report of a clerks daily totals.
Prints a list of all open pre-auth transactions stored in the terminal.
Prints a list of unadjusted transactions by clerk/server, if enabled.
Prints a list of current open tabs.
Prints reports related to EMV chip transactions, parameters, statistics
and key settings.
Displays a log of recent terminal and/or transaction errors.
Prints your terminal connectivity and application version details. You may
be asked to print and refer to the Terminal Config Report when contacting
Merchant Support for assistance with your terminal.

20
Gift and Stored Value Card Reports
Gift and stored value card program subscribers have access to a number of reports to assist with their end of day
reconciliation process.
To access gift card reports press the [ ] to go to the Main Menu, scroll down to the Gift Reports Menu and then press
[ ] to print one of the following reports:
Note: Contact your stored value card provider for information on how to access your stored value card (e.g. loyalty
programs) reports.
Settling the Batch
Your terminal batch contains all the daily transactions that need to be settled. Settlement is the process of managing
your electronic payment transactions so they clear through the payment brands and are funded to your account.
For the Ingenico terminals, there are two settlement options:
n Manual Settlement
n Auto Settlement
Manual Settlement
If your terminal is set to Manual Close, press [ ] to access the Main Menu, use the scroll keys to navigate to
Settlement and press [ ] to select. Then follow the prompts displayed on the terminal display.
Timed Auto Settlement
If your terminal is set to Timed Auto Settle, it will automatically settle transactions in the current batch at a specific,
predetermined time, within a 24-hour period. If the terminal is unplugged or turned off before the set time, the auto
settlement will occur when the terminal is turned on again.
Make sure the Ingenico IWL220 Bluetooth and IWL250 3G terminals are connected to their charging base or a power
supply overnight when set to timed auto settlement.
Gift Card Reports
[1] Gift Card
Detail Report
[2] Gift Card
Summary Report
[3] Clerk/Server
Gift Card Report
Description
Prints detailed information for each transaction and a summary report
of transaction types.
Prints totals by transaction type.
Prints a gift card detail report by clerk/server that includes transaction type,
amount and total.

21
Reference

22
Hardware Settings
Key Beep
Sleep Timer
(IWL220/IWL250 only)
Terminal Shutdown
(IWL220/IWL250 only)
Backlight
Brightness Setting
Press [1] to disable all Key Beeps.
Press [2] to enable all Key Beeps.
Press [3] to enable Key Beeps on invalid entry’s only.
Controls the amount of seconds of inactivity before the terminal
goes into the sleep mode. Key in a value of 10-999 and press [ ].
Press [3] and enter the amount of minutes of inactivity before the
terminal automatically shuts down.
To disable the backlight press [1] - Always Off.
To enable the backlight press [2] - Always On.
To enable the backlight for 45 seconds press [3] - On/Key Press.
Use Toggle Button to increase or decrease brightness.
Reference
Refer to this section to learn more about terminal hardware settings, and how to troubleshoot common error codes.
Adjusting Hardware Settings (e.g. Screen brightness & key beeps)
To adjust the backlight brightness on your terminal, and key beeps (the audio beeps that will sound during transaction
errors), please follow these steps:
1. Press the [ ] - Admin Menu.
2. Press [3] - Setup Menu.
3. Enter your Manager Password as prompted then press [ ].
4. Press [5] - Term Settings (Terminal Settings)
5. Scroll to TermHW (Terminal Hardware) then press [ ].
From there you can scroll and select to adjust the following:

23
Common Error Codes
In the event that your terminal displays an error, refer to these error codes to troubleshoot your terminal.
If the code you are experiencing is not shown, retry the transaction. If the error persists, contact Merchant Support
at 1.800.265.5158.
Error Code
Batch near Max
Settle Batch
Can’t Read Chip
Swipe Allowed
Remove Card
Tap Failed
Please Insert or
Swipe Card
Password Locked
Out Press Enter
PIN Tries
Exceeded
Amount Exceeds
Card Balance
Limit = $X.XX
Exceeds Amount
Authorized Limit
= $X.XX
Invalid Amount
Description
The batch capacity of the terminal
is nearly full.
A chip card was inserted in the chip reader,
but could not be read.
A contactless chip card was tapped however
the amount is over the contactless transac-
tion limit or there is an issue with the card.
More than four invalid attempts have been
made to enter the admin password.
The chip card has recorded too many invalid
PIN entry attempts.
Displayed if a prepaid card is used for
Auth Only, Pre-auth or Open Tab, and is
partially approved (or fully approved but
with $0 remaining balance on the card),
during completion.
Displayed if the final amount exceeds
the original amount authorized on an
Open Tab or Pre-Auth transaction.
This message may appear when closing
the Open Tab or completing the
Pre-Auth transaction.
An amount greater than the cash back limit,
or the ceiling limit for sale or offline trans-
actions, will generate this error.
Action
Complete the transaction and settle
as soon as possible.
The card can now be swiped on
the terminal.
Insert the card.
The admin account will be locked out for
30 minutes or another admin account may
reset the locked account.
Request another form of payment.
Process completion, close tab or force sale
with the originally approved amount on the
Auth Only, Pre-auth or Open Tab. A new
transaction can be processed with another
card to satisfy any balance owing.
Process completion or close tab with the
originally approved amount on the Pre-auth
or Open Tab, or void the original transaction
and re-authorize for the full amount owing.
Retry the transaction with an amount
within the limit.
Note:
To reduce chargeback risks and manage your processing costs, avoid keying transactions when the card is present.
Instead, ask for another method of payment.

24
Notes

25
TM
Trademark of Paymentech, LLC, Chase Paymentech Solutions authorized user. All other trademarks, registered trademarks, product names and logos identified or mentioned
herein are the property of Paymentech, LLC, or their respective owners. © Copyright 2016, Paymentech, LLC. All Rights Reserved.
WK-FG-IN-EN-1116
The Information You Need,
When You Need it.
For Guides and Helpful Information:
chasepaymentech.ca/welcome
Call Merchant Support 24/7:
1.800.265.5158
