
TDS GTNXi Flight Simulator
User’s Manual for Flight Simulator
Embrace a New Level of Innovative Avionics: The GTN Xi 750/650 touchscreen.
Using a large, very high-resolution display, offering you unparalleled vivid, ultra-high resolution
terrain mapping, advanced graphical flight planning capabilities, geo-referenced charts and
many more features, all available at a virtual touch. The GTN Xi will bring a new level of
modernism to your virtual cockpit.
Revision 14 - February 2024

Introduction 2
Product Features 2
Installation Instructions 4
Step 1: Installation of the PC Trainer 6
Step 2: Installation of the TDS GTNXi for Microsoft Flight Simulator 2020® 7
Installing and Using the Pro Upgrade 8
Updating and using the Navigraph navdata 9
Connecting to Navigraph Charts 12
Running the TDS GTNXi and Connecting to Flight Simulator 14
Maintaining Audio Sound when Flight Simulator is not the active window 14
Interface Features 15
Avionics Tab 16
Settings Tab 17
GTNXi Selected Unit to Configure 18
Flight Simulator specific settings 19
Navigation Source Selection 21
Other Configurable Settings 22
Setting a custom transponder VFR Key code in the Transponder Page 22
User Checklists 23
Custom Flight Plans 24
User Waypoints 25
Interfacing with Hardware 26
Sending events to simulate keys/knobs 26
Reading specific TDS GTNXi Data 28
Troubleshooting 30
Uninstallation 30
Log Files 31
Antivirus infection alert 32
FRAPS - Black Screen 33
AVG/Avast Antivirus Users - Black Screen 34
Performance Improvements 35
1

Introduction
The TDS GTNXi puts safety first, as both an intuitive safety navigation device, along with
beautiful, modern mapping features. It includes ultra-high-resolution mapping, terrain
information, mapping features: water bodies, political borders, roads, cities.
Worldwide navigation data is included: airports, waypoints, VOR/NDBs, custom waypoints,
visual reporting points, airport diagrams including taxiways.
To better assist in flying the perfect navigation procedure, geo-referenced charts can be
displayed, or can be incorporated into the map mode.
Version 1.1.0.0 of the TDS GTNXi brings support for the Pro Upgrade, an add-on page to the
TDS GTNXi which features full Navigraph support for both navdata as well as worldwide charts.
Being designed from the ground up as a standalone program that runs alongside Flight
Simulator 2020, you have the ability to run Flight Simulator on one monitor, while the TDSGTXi
can be dragged onto a second monitor.
Starting with version 1.0.1.0, the TDS GTNXi includes full Virtual Cockpit support for add-on
aircraft integration in both drawing the LCD display as well as mouse clickspots! We strongly
recommend that all users download and install this new version. A full list of compatible aircraft
can be found here:
https://tdssim.com/gtnxivcintegration
The TDS GTNXi is more than a GPS unit, it is also an audio panel, giving you the ability to tune
COM and NAV frequencies, retrieve the most used frequencies, decode the Morse code
identifier ( some features are only available in the GTNXi 750). On top of this, both the GTNXi
750 and GTNXi 650 include a full ADS-B transponder which communicates with Flight
Simulator.
The TDS GTNXi is a training add-on, used to help you get familiarized with the system.A very
important training feature is the ability to control the default Flight Simulator Autopilot by using
the NAV function, fly autopilot-coupled IFR approaches in both lateral and vertical modes,
including fully coupled LPV approaches.
Realism Note
This software is designed for entertainment use ONLY, it is not designed as a flight training
device, even though the quality of the product is exceptional and the fidelity of each key, knob,
and digital touchscreen functionality are made to resemble a real GPS unit. The Pro Upgrade
features a fully updateable navigation database and worldwide charts from Navigraph! Some
functionality may not be simulated correctly or simulated at all.
2

Product Features
The TDS GTNXi is a standalone Windows Executable, able to communicate with Microsoft
Flight Simulator (2020), offering you the opportunity to move the GTNXi windows to a second
monitor.
Starting with version 1.0.1.0, the TDS GTNXi can be fully integrated into the virtual cockpit (VC)
of add-on aircraft, both screen display as well as touch screen/mouse control.
Two GTNXi’s units included: GTNXi 750 and GTNXi 650
Included in the TDS GTNXi Flight Sim product are both the GTNXi 750 and GTNXi 650, which
can be displayed at the same time, both communicating with Flight Simulator.
There is also the ability to change the navigation source from the 750 to the 650 when flying,
enabling you to have one flight plan on the GTNXi 750 and another flight plan on the GTNXi
650.
Autopilot
The TDS GTNXi is able to couple to the default Flight Simulator autopilot and send roll and pitch
commands. This includes fully autopilot coupled LPV approaches.
Radios/Audio Panel
The TDS GTNXi are able to control the Flight Simulator COM and NAV radio frequencies.
Additionally, the GTNXi 750 has an integrated Audio Panel, offering you the ability to control
audio navigation sources.
Unprecedented mapping
The TDSGTNXi has an unprecedented, high resolution map, including the ability to display color
terrain, airport diagrams, water bodies, borders and other navigation information data.
Databases/Navigation Charts
The TDSGTNXi has full support for the Navigraph updateable navigation database (AIRAC) as
well worldwide Navigraph Charts. Both features are part of the Pro Upgrade add-on released in
February 2024. More information on the Pro Upgrade can be found in the dedicated section.
Weather
At this point, the TDS GTNXi does not support display of flight simulator weather.
3

ADS-B Traffic Page
The TDS GTNXi has a state of the art ADS-B transponder, giving you the ability to display Flight
Simulator targets on the dedicated traffic page as well as on a main Map overlay.
TAWS - Situational Awareness
TAWS-A, TAWS-B, Terrain Proximity, HTERRAIN Proximity, HTAWS-B
Ability to select between Female and Male voice.
Additional Features
● Selected Altitude Range Arc - Receives data from the Flight Simulator Autopilot Altitude
Selector Knob and displays the projected range arc on where you will reach the
specified altitude, in both climb and descent.
● Dimmable Display - Easily customisable from the GTNXi interface
● Ability to modify sound volume - Easily customisable from the GTNXi interface
Simulator Requirement:
The TDS GTNXi for Flight Simulator is compatible with Microsoft Flight Simulator (2020)
Minimum System Requirements:
Microsoft Windows 10 64 Bit Version 1909 (November 2019 Update), Intel Core i5-8400 or AMD
Ryzen 5 1500X, 16GB RAM, NVIDIA GTX 970 or AMD Radeon RX 590 with at least 4GB
Memory, HDD Space: 4GB
4

Installation Instructions
The TDS GTNXi can be easily downloaded and installed by following these simple instructions:
All download/installation procedures are performed via the proprietary TDS GPS Manager
application. The application can be downloaded from the sales website, after purchasing the
product.
After the application is downloaded, run it from the Downloads folder or the selected download
location, file name:
TDSGPSManager.exe
A login screen will be presented where the user has to input the login credentials (email
address/password) which were used to register on the sales website, before purchasing the
TDS GTNXi.
In case you do not remember the login credentials, please visit the My Account section of the
sales website for more information:
http://www.tdssim.com
5

After successfully logging on, the GTNXi page will display. The first step is to install the required
PC Trainer, this is done by pressing the Download and Install button.
Step 1: Installation of the PC Trainer
The first step is to download the PC Trainer, please wait for the download to complete, a
progress percentage will be displayed on the screen.
After the download has completed, the installation will start automatically, press Next to advance
through the installation screens in order to complete the installation of the PC Trainer.
Once the PC Trainer installation is complete, the actual GTNXi PC Trainer will download. After it
has downloaded, the installation for this component will start, press Next to advance.
A complete PC Trainer installation can be confirmed by the version number on the left side of
the interface and the yellow button displaying Reinstall.
A copy of the PC Trainer will be saved in this location:
C:\ProgramData\TDS\Trainers
6

Step 2: Installation of the TDS GTNXi for Microsoft Flight Simulator 2020®
To download and install the TDSGTNXi for Flight Simulator, press the yellow Download and
Install button to the right of the Flight Simulator label. The entire procedure is done
automatically, at the end of the installation a message box will appear, confirming the installation
status.
The default installation directory of the TDS GTNXi for Flight Simulator:
C:\ProgramData\TDS\GTNXi\FlightSimEXE
In case the Windows ProgramData directory has been moved to a different location, you can
access the TDS GTNXi installation folder by running the Run command(Windows + R key on
the keyboard) and typing:
%PROGRAMDATA%\TDS\GTNXi\FlightSimEXE
7

Installing and Using the Pro Upgrade
The Pro Upgrade is an add-on package for the TDS GTNXi which brings Navigraph support for
both navdata as well as navigation charts!
Installation of the Pro Upgrade is automatic, as part of the TDS GTNXi Flight Sim version
1.1.0.0 (or higher) and the TDS GPS Manager version 1.0.1.1 (or higher)
We recommend downloading the latest TDS GPS Manager from the My Account section of the
TDS Sim Software sales website:
https://tdssim.com/Account/login
If you have a previous version of the TDS GTNXi, just use the Upgrade/Reinstall button on the
TDS GPS Manager.
The image above shows a correctly installed Pro Upgrade, the status Installed being displayed
below the Installed Version. In addition, the TDS GTNXi Main Interface displays the Pro
Upgrade installation status on the left side, right below the NAVIGRAPH CHARTS tab, as shown
in the images of the next section.
8

Updating and using the Navigraph navdata
The TDS GTNXi Pro Upgrade offers support for Navigraph navdata, so you will always be able
to fly using current navdata. There are no limitations to the Navigraph navdata as opposed to
the already supplied TDS GTNXi navdata, which will ensure that the best possible experience is
offered to TDS GTNXi users.
Important Note: An active Navigraph Unlimited or Navigraph Basic subscription is
required, which can be obtained from:
https://navigraph.com/
The TDS GTNXi comes preloaded with the Navigraph AIRAC cycle 2302 (February 2023).
Updating to the latest AIRAC cycle is performed from the Navigraph Hub, which can be
obtained from here:
https://navigraph.com/downloads
After downloading and installing the Navigraph Hub, the TDS GTNXi is found in the Microsoft
Flight Simulator - Installed outside Simulator tab
Important Note: In order to update the navigation database in the TDS GTNXi, both the
TDS GTNXi as well as Microsoft Flight Simulator need to be closed.
9

Upon startup of the TDS GTNXi, the database loading takes about 10 seconds, during this time
the TDS GTNXi screens will be black as well as the TDS GTNXi interface displaying the
information that the Navigraph database is preparing.
After the database has been loaded, the correct AIRAC cycle can be confirmed from the startup
- Database Info page, as pictures below.
10

The top row of the database info will change to Navigraph DB if the Navigraph navigation
database is used and has correctly loaded; if the PC Trainer database is used, the database
name is: Navigation
If the TDS GTNXi is already started and in the Home page, the database cycle can always be
confirmed from the System - System Status - Database Info section.
Even though navigation databases do not expire or automatically disable themselves in the TDS
GTNXi, we strongly encourage using up to date navigation data for the best possible
experience.
The location of the Navigraph database is:
C:\Users\%username%\AppData\Roaming\TDS\GTNXi\Database\MSFS
Where %username% is your username.
File name: NavigraphDB.dat
By manually renaming/removing the NavigraphDB.dat file, the PC Trainer database will be
used. This process must be performed with the TDS GTNXi closed.
11

Connecting to Navigraph Charts
Connecting to Navigraph Charts needs to be done via the TDS GTNXi main interface,
NAVIGRAPH CHARTS tab, as pictured below.
Important Note: An active Navigraph Unlimited subscription is required, which can be
obtained from Navigraph:
https://navigraph.com/
There are two connection options available: scanning the provided QR code with a phone/tablet
and then logging in to the Navigraph Account or clicking on the link to the right side and logging
in to the Navigraph Account, then approving the TDS GTNXi.
The connection code is provided in case a manual input is needed due to unforeseen
circumstances, but it should not be used as the link generated by us contains all this
information, in order to facilitate a connection to Navigraph.
Once a connection to Navigraph has been established, the NAVIGRAPH CHARTS tab will
display the Navigraph logo as well as the current charts cycle. The connection token is saved
between TDS GTNXi sessions, so there is no need to reconnect each time you start the TDS
GTNXi. The time that the connection token can be used depends on the Navigraph server.
12

The Chart Selection option on the bottom of the interface allows for selection of the default
FliteCharts, in case the user does not have a Navigraph Unlimited subscription. While we
strongly advise using up to date navigation data and charts, this option is available for those
wanting to use the provided North American FliteCharts. While the selection between the two
options can be done in flight, we recommend making the selection before flight and keeping the
selection within the flight.
Important Note: As in real life, charts can only be displayed on GTN750Xi units. The 650Xi
units being smaller in size, do not support charts.
13
Running the TDS GTNXi and Connecting to Flight Simulator
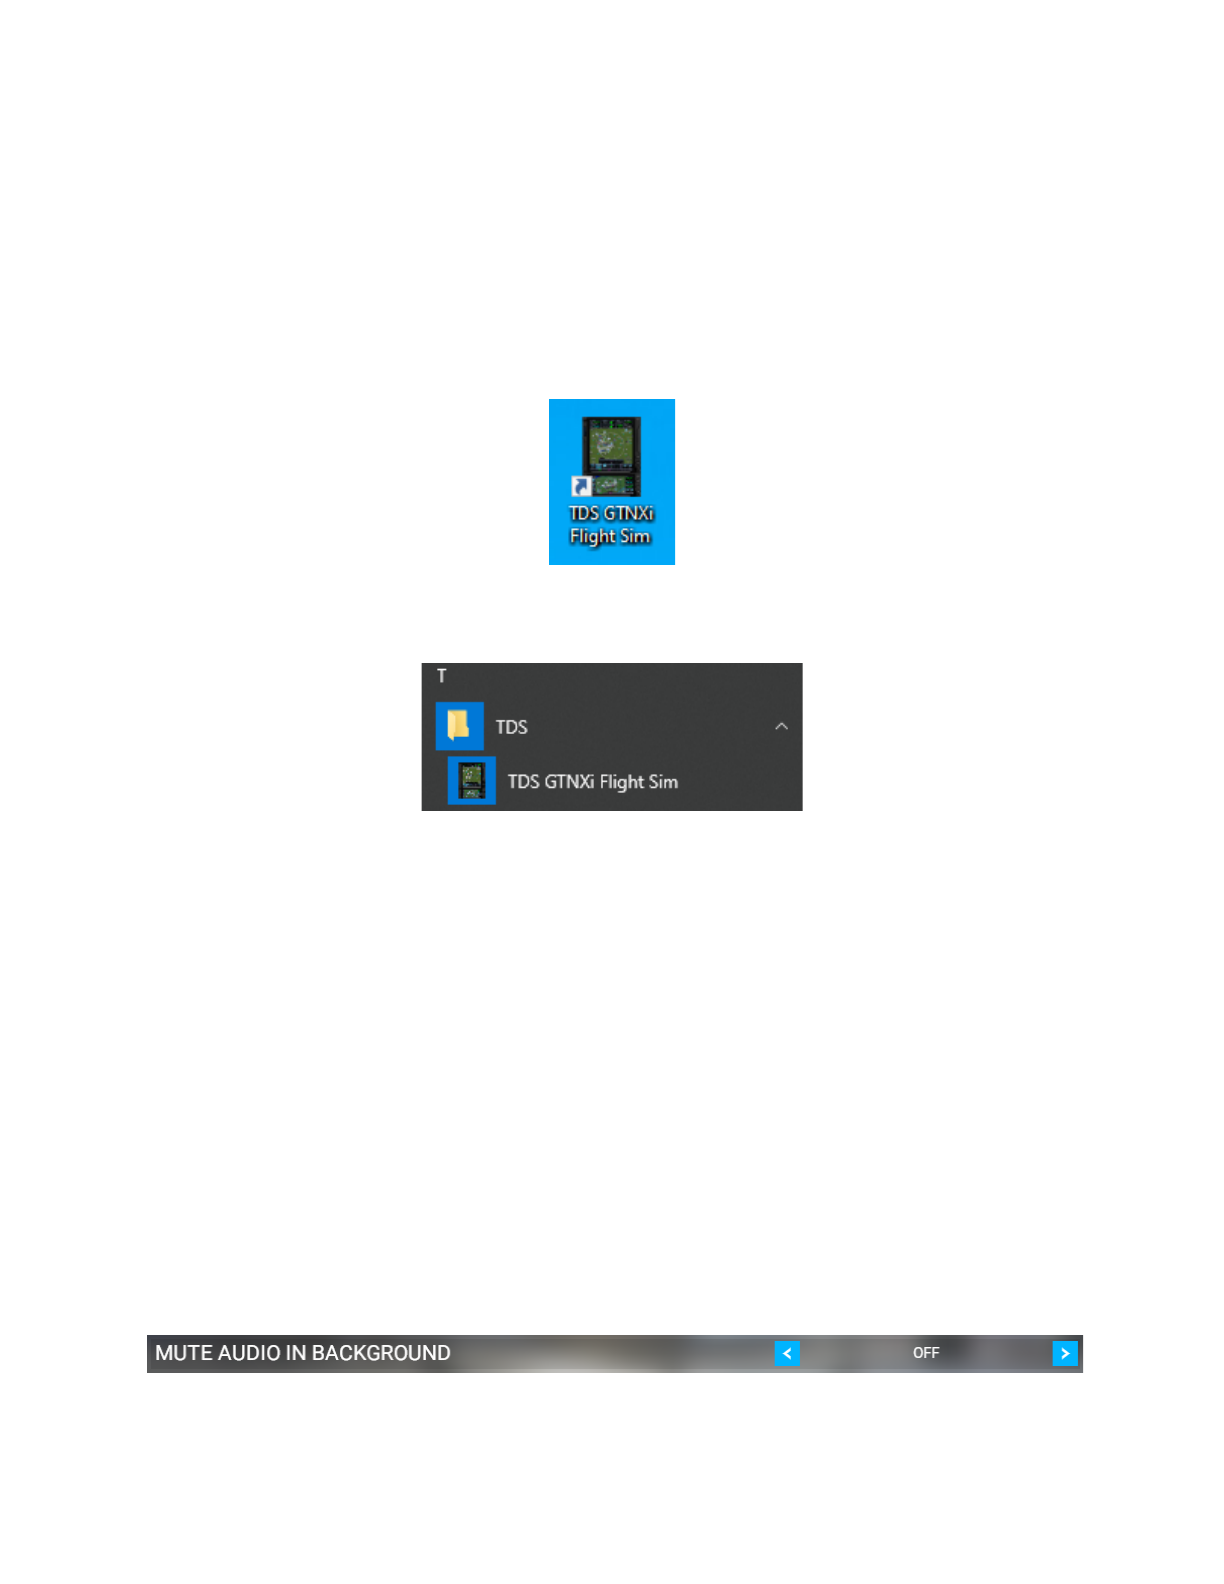
Once the TDSGTNXi for Flight Simulator has been installed, a shortcut will be placed on the
desktop, which can be used to start the TDS GTNXi. If you are going to use the TDS GTNXi in
the Virtual Cockpit as an integrated solution, there is no need to start the standalone desktop
shortcut as the startup processes are done automatically by Flight Simulator. At the moment, it
is not possible to run both standalone as well as Virtual Cockpit Integrated at the same time.
Additionally, a shortcut is added in the Windows Start Menu, under the folder name TDS.
The TDS GTNXi and Flight Simulator must run on the same computer as Flight Simulator; the
connection will be established automatically, as soon as Flight Simulator is running in Flight
Mode, there is no user intervention needed.
Maintaining Audio Sound when Flight Simulator is not the active window
To maintain Flight Simulator sound when the window is not active, please follow these
instructions:
With Flight Simulator loaded on the main menu startup screen, go to the Options tab,
GENERAL, then select SOUND.
Make sure that "MUTE AUDIO IN BACKGROUND" is set to OFF.
14

Interface Features
The TDS GTNXi Flight Simulator interface is split into two tabs:
● Avionics Tab
● Settings Tab
On the bottom right of the interface is the Flight Simulator connection status.
A green indication with the text: “Flight Simulator is connected” means that the TDSGTNXi is
communicating properly with Flight Simulator.
A red indication with the text: “Flight Simulator is not running” means that the TDSGTNXi is not
communicating properly with Flight Simulator.
15

Avionics Tab
This tab lets you show and hide the respective GTNXi window, either GTNXi 750 or GTNXi 650.
Both units can be shown and used in flight, in parallel.
Clicking on the GTN750Xi button will display a second window which shows the GTNXi 750
Clicking on the GTN650Xi button will display a third window, which shows the GTNXi 650
16

Settings Tab
The TDSGTNXi provides you the option to customize the product to best suit your specific
needs.
General Page settings:
● Navigation Source Selection
● RealSimGear Hardware Compatibility
The settings for each unit are split into two types:
● Flight Simulator specific settings
● Device Settings
All settings can be configured from the User Interface, Settings Tab or from the INI File.
We suggest that you configure them from the User Interface.
The location of the INI File is:
C:\ProgramData\TDS\GTNXi\FlightSimEXE\TDSGTN.ini
17

Checking the box RealSimGear Hardware Compatibility provides compatibility with
RealSimGear hardware
GTNXi Selected Unit to Configure
18

Flight Simulator specific settings
Connect GPS to
Autopilot
Provides the ability to send roll and pitch commands to the Flight
Simulator Autopilot when the VLOC/GPS switch is in GPS Mode.
There are two autopilot driving options:
● NAV = using the autopilot navigation mode (NAV and APR
buttons), the preferred method because it provide glidepath
support for LPV approaches
● HDG = a fallback state that drives the heading bug, it does not
provide glidepath support for LPV approaches
Radio Selection
Provides the ability to select between COM1/NAV1 and COM2/NAV2
Connect GPS to
HSI OBS
(auto-slew)
Checking this box correlates the MSFS HSI OBS Source with the
GTNXi Course, whenever a new waypoint is being entered.
Connect GPS to
VOR# OBS
Checking this box gives you the ability to change the OBS value of the
GTNXi by using the Flight Simulator VOR CDI knob. The VOR source
(VOR1 or VOR2) can be selected from the VLOC Source setting below.
With the box unchecked, you can change the GTNXi OBS value using
the on screen type-in pop-up
19

Device Settings
Digital Fuel Computer
Provides external sensor fuel data to the respective GTNXi unit
Air Data Computer
Provides external sensor air data to the respective GTNXi unit
TAWS Mode
Select the TAWS mode: Terrain Proximity, TAWS-A, TAWS-B,
HTAWS-B, H-Terrain Proximity
TAWS Voice Type
Select the TAWS voice: Female, Male
Transponder Settings
Select the default Transponder VFR button code: 1200 (US), 7000
(EU), INI File
Note: INI File is a custom user option, please read the chapter titled
“Setting a custom transponder VFR Key code in the Transponder
Page”
Airplane Type
Change the airplane type icon in map mode
Airplane Color
Select the airplane color between: white and magenta
Fuel Type
Select the fuel type: AVGAS, JET-A, JET-B, DIESEL
Play Key Sounds
Play key sounds on the touchscreen
Play Audio Sounds
Play TAWS sounds from the respective GTNXi unit
Show Bezel
Provides the ability to show/hide the GTNXi bezel
Lock Aspect Ratio
Keep the aspect ratio to 1:1 when resizing the GTNXi Window
Hide Window Frame
Checking this box will hide the Windows title bar and lateral frames,
providing a GTNXi only window. The only possibility to move the
window is to show the bezel and drag the window from a non-GTNXi
touchscreen clickspot
Custom Time Zone
Offset
Ability to set and remember a custom local offset (time zone) from
the System | Setup page
Reset Window
Position
Resets the GTNXi window to the default position/size
20

Navigation Source Selection
The TDSXi provides you with the ability to select the GPS Navigation source to drive the
autopilot. The current options include:
● TDS GTNXi 750 Unit 1
● TDS GTNXi 650 Unit 1
● Flight Simulator GPS
The active Navigation Source is displayed on the main TDS GTNXi interface, SETTINGS tab.
The message “Navigation Source: Undefined” is displayed when there is no connection to
Flight Simulator.
To cycle between the available navigation sources, push the invisible button located on the top
right corner of the GTN750Xi or GTN650Xi, as shown below:
21

Other Configurable Settings
Setting a custom transponder VFR Key code in the Transponder Page
Setting a custom transponder VFR key code is done via the INI file, which is located here:
C:\ProgramData\TDS\GTN\FlightSimEXE\TDSGTN.ini
To change the code for the desired unit: GTN750.1 or GTN650.1, please add this line:
Transponder.CustomVFRCode = 7000
Please note, the Transponder Settings option from the Main Interface / Settings tab must be set
to “INI File”, the corresponding ini file setting is: Transponder.VFRCode = 0
The range of the Transponder code must be from 0000 to 7777, with all digits starting at 0 and
ending at 7. This means that the GTNXi will not accept any values of 8 or 9 in any digit places!
22

User Checklists
The GTNXi supports an electronic version of your aircraft’s checklists. Checklists are stored in
groups and as you complete a checklist item, you can advance to the next one.
When the GTNXi automatically detects the presence of a checklist file (checklist.ace), the
Checklists key appears in the Utilities page:
Checklists are created using the Aviation Checklist Editor, found online at this link:
https://www8.garmin.com/support/download_details.jsp?id=5075
The file called checklist.ace must be saved in this location:
C:\ProgramData\TDS\GTNXi
The GTNXi will automatically load the user checklist on startup.
23

Custom Flight Plans
The GTNXi supports custom flight plans. The method is similar to importing flight plans from a
datacard. They permit the user to create custom flight plans using flight planner tools and save
them to separate files, which are used by the GTNXi. These flight plans can be previewed,
activated or stored inside the GTNXi Flight Plan Catalog.
The flight plans must have the file format: .gfp and are stored at this location:
They are stored in this folder:
C:\ProgramData\TDS\GTNXi\FPL
Upon installation of the TDS GTNXi, a FPL folder will be created automatically containing a
sample flight plan from CYOW to CYTZ, thanks to community member Les O’Reilly:
https://www.youtube.com/c/LesOReilly
Please note, the TDS GTNXi reads flight plans on startup, so if you have added a flight plan
while the TDS GTNXi is running, you must restart the program for the new flight plan to be
loaded.
To activate a flight plan in the GTNXi, from the Home page, access the Flight Plan page, then
click on the Menu key. Then access the Catalog function, then click on the Menu key. A pop-up
menu should appear with an Import key.
Clicking on the Import key will display a list of all .gfp flight plans stored in the FPL folder. Select
the desired flight plan to preview it, then you have the option to Store it inside the GTNXi’s flash
memory or automatically Activate it, so it can be flown.
24

User Waypoints
The GTNXi supports the ability to import user created waypoints from a file. The method is
similar to importing user waypoints from a datacard. Each user waypoint will have a name,
latitude longitude and optional comment.
Note: If a user waypoint is within 0.0001 degrees of latitude and longitude of a GTNXi database
waypoint, then the GTNXi’s database waypoint will be used.
To create a user.wpt file, open a spreadsheet program and each row contains an individual
entry.
Column A: Waypoint Name
Column B: Comment
Column C: Latitude (decimal degrees)
Column D: Longitude (decimal degrees)
The file must be saved a .csv file (comma separated values), then renamed to user.wpt
The file called user.wpt must be saved in this location:
C:\ProgramData\TDS\GTNXi
To import user waypoints, from the Home screen, press the Waypoints key to access the
Waypoints page. When the GTNXi automatically detects the presence of a user waypoints file
(user.wpt), the Import Waypoints key automatically appears:
Click on the Import Waypoints key to automatically import the waypoints, which will be
imported in the User Waypoint page.
25

Interfacing with Hardware
Sending events to simulate keys/knobs
The TDS GTNXi supports accepting MSFS events(K events) in order to control the keys/knobs.
The events used by the TDS GTNXi are regular MSFS events. Such events can be triggered via
XML/JS code, Spad.neXt, MobiFlight.
It is important to note that besides the actual event, a specified value must be sent. The value
can be obtained from the table below, which describes the exact unit that the user wants to
control.
Four devices can be controlled by using this method:
GTN750Xi Unit 1
GTN750Xi Unit 2
GTN650Xi Unit 1
GTN650Xi Unit 2
GPS_PAGE_KNOB_DEC
GPS_PAGE_KNOB_INC
Bottom Right Inner Knob Decrease and
Increase where:
0 = GTN750Xi Unit 1
16 = GTN750Xi Unit 2
8 = GTN650Xi Unit 1
24 = GTN650Xi Unit 2
GPS_GROUP_KNOB_DEC
GPS_GROUP_KNOB_INC
Bottom Right Outer Knob Decrease and
Increase where:
0 = GTN750Xi Unit 1
16 = GTN750Xi Unit 2
8 = GTN650Xi Unit 1
24 = GTN650Xi Unit 2
GPS_CURSOR_BUTTON
Bottom Right Knob Push where:
4 = GTN750Xi Unit 1 UP
20 = GTN750Xi Unit 2 UP
12 = GTN650Xi Unit 1 UP
28 = GTN650Xi Unit 2 UP
2 = GTN750Xi Unit 1 DOWN
18 = GTN750Xi Unit 2 DOWN
10 = GTN650Xi Unit 1 DOWN
26

26 = GTN650Xi Unit 2 DOWN
GPS_MENU_BUTTON
Home Key where:
4 = GTN750Xi Unit 1 UP
20 = GTN750Xi Unit 2 UP
12 = GTN650Xi Unit 1 UP
28 = GTN650Xi Unit 2 UP
2 = GTN750Xi Unit 1 DOWN
18 = GTN750Xi Unit 2 DOWN
10 = GTN650Xi Unit 1 DOWN
26 = GTN650Xi Unit 2 DOWN
GPS_DIRECTTO_BUTTON
DTO Key where:
4 = GTN750Xi Unit 1 UP
20 = GTN750Xi Unit 2 UP
12 = GTN650Xi Unit 1 UP
28 = GTN650Xi Unit 2 UP
2 = GTN750Xi Unit 1 DOWN
18 = GTN750Xi Unit 2 DOWN
10 = GTN650Xi Unit 1 DOWN
26 = GTN650Xi Unit 2 DOWN
GPS_BUTTON2
Top Left Knob, where:
2 = GTN750Xi Unit 1 Decrease
4 = GTN750Xi Unit 1 Increase
18 = GTN750Xi Unit 2 Decrease
20 = GTN750Xi Unit 2 Increase
10 = GTN650Xi Unit 1 Decrease
12 = GTN650Xi Unit 1 Increase
26 = GTN650Xi Unit 2 Decrease
28 = GTN650Xi Unit 2 Increase
GPS_BUTTON1
Top Left Knob Push where:
4 = GTN750Xi Unit 1 UP
20 = GTN750Xi Unit 2 UP
12 = GTN650Xi Unit 1 UP
28 = GTN650Xi Unit 2 UP
2 = GTN750Xi Unit 1 DOWN
18 = GTN750Xi Unit 2 DOWN
10 = GTN650Xi Unit 1 DOWN
26 = GTN650Xi Unit 2 DOWN
27
Reading specific TDS GTNXi Data
The TDS GTNXi provides L: variables to those interested in this data, to drive custom
solutions/AirManager.
TDSGTNXI_INSTALLED
1 means that the TDSGTNXI WASM Module
is running
TDSGTNXI_LateralValueActive
If true, there is valid lateral navigation data
TDSGTNXI_LateralValueMeters
Lateral Deviation Value in Meters
TDSGTNXI_LateralDeviationScaleNM
Lateral Deviation Scale in Nautical Miles
TDSGTNXI_APCourseToFly
The deviation from the desired course to fly to
actual track, in radians
TDSGTNXI_ApproachType
Oceanic = 0
Enroute = 1
Terminal = 2
Departure = 3
Missed Approach = 4
LNAV = 5
LNAV+V = 6
LNAV/VNAV = 7
LP = 8
LPV = 9
VISUAL = 10
TDSGTNXI_GlidePathValueActive
If true, there is a valid vertical navigation data
TDSGTNXI_GlidePathValueMeters
Glide Path Vertical Deviation in Meters
TDSGTNXI_GlidePathValueAngle
Glide Path Angle, working range is between
-1.0 to +1.0
TDSGTNXI_ToFromFlag
0 = TF Flag Inactive; 1 = TF Flag To; 2 = TF
Flag From
TDSGTNXI_NextWaypointDistanceNM
Distance to Next Waypoint in Nautical Miles
TDSGTNXI_NextWaypointDesiredTrackVal
Desired Track Value to Next Waypoint in
Degrees
TDSGTNXI_NextWaypointBearingVal
Bearing Value to Next Waypoint in Degrees
TDSGTNXI_TotalDistanceNM
Total Flight Plan Distance in Nautical Miles
28

TDSGTNXI_TotalETE
Total Flight Plan ETE in seconds with the
value being calculated past 30 knots ground
speed, otherwise an invalid value of 359999.0
is displayed
TDSGTNXI_TotalETA
Total Flight Plan ETA in seconds based on
Zulu Time with the value being calculated
past 30 knots ground speed, otherwise an
invalid value of 359999.0 is displayed
TDSGTNXI_OBSModeActive
If true, then OBS Mode is active inside the
GTNXi
TDSGTNXI_InstrumentPanelSelfTest
If true, then Instrument Panel Self Test is
active inside the GTNXi
29
Troubleshooting
Uninstallation
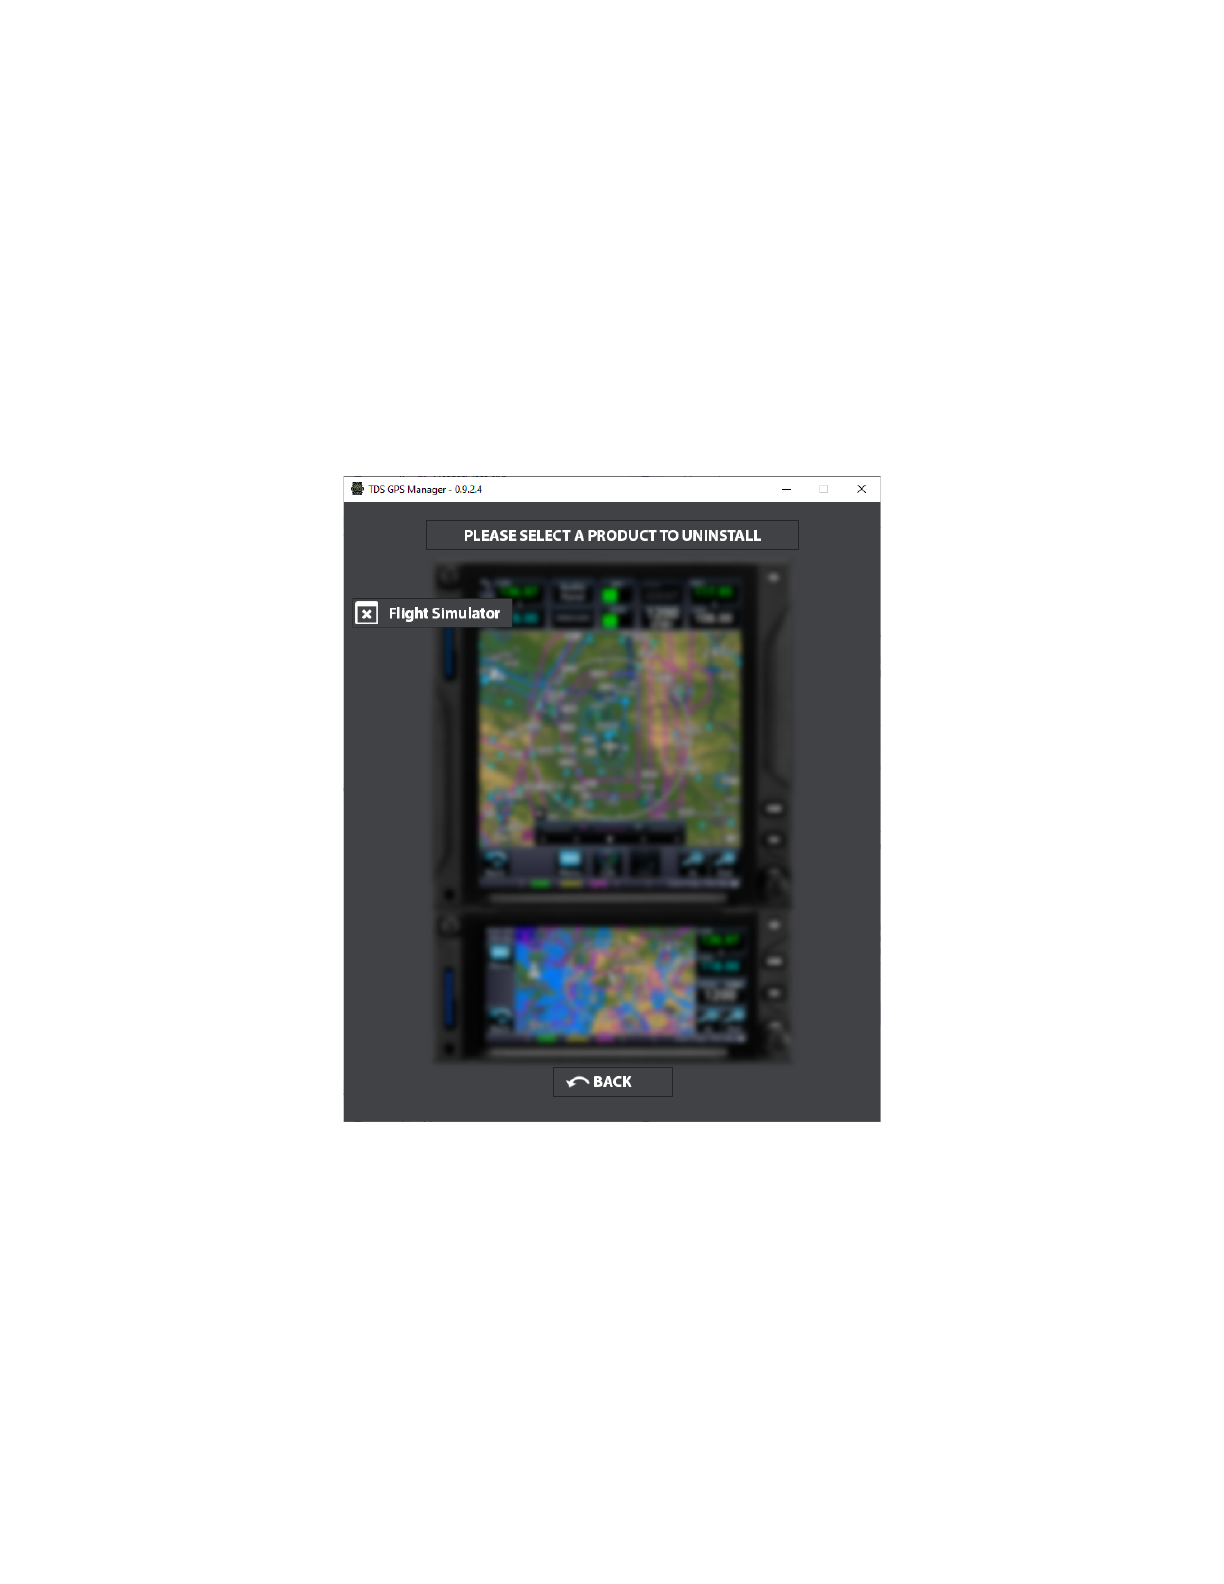
The TDS GTNXi can be easily and quickly uninstalled from the TDS GPS Manager.
To uninstall the TDS GTNXi, open the TDS GPS Manager, login using your credentials, then
access the Settings tab. You should see a screen as shown below, just select Flight Simulator
and confirm the uninstall action.
30

Log Files
The TDS GTNXi provides the ability to log information, warning and errors. The information is
saved into log files, as described below:
● TDSGTNXiExeLog.txt for the main executable
● TDSGTNXi750Unit1Log.txt for the GTNXi 750 Unit 1
● TDSGTNXi650Unit1Log.txt for the GTNXi 650 Unit 1
These Files are saved in the Windows Documents folder.
They provide the information needed to troubleshoot most problems.
31

Antivirus infection alert
During the installation or when running the TDS GTNXi, your antivirus may display an alert that
a file may be infected with a virus. This is a false positive alert, all TDS GTNXi files are
checked before being packaged and they do not contain any viruses.
These alerts are false positives and TDS GTNXi all files quarantined/deleted by the antivirus
should be restored.
The files that may be quarantined/deleted by the antivirus program are:
TDSGTNXiFlightSimEXE.exe
TDSGTNServices.dll
Both files are located here:
C:\ProgramData\TDS\GTNXi\FlightSimEXE
In case the antivirus has quarantined/deleted any one of the two files, please restore the file
from the quarantine or reinstall the TDS GTNXi from the TDS GPS Manager.
For all problems/questions regarding antivirus alerts, please post in the support forum.
32

FRAPS - Black Screen
The TDS GTNXi is currently incompatible with FRAPS, the incompatibility will lead to black
screens on both GTNXi displays. The solution is to close FRAPS when using the TDS GTNXi
33

AVG/Avast Antivirus Users - Black Screen
In the very rare case when AVG/Avast Antivirus is installed and the customer experiences the
GTNXi black screen, the solution is to add an antivirus exception for the TDS GTNXI Flight Sim
installation folder and the PC Trainer executable folder or to temporarily disable real-time
protection to confirm that this is the correct fix.
Since this is a moderately complex process, we suggest contacting tech support for instructions.
This problem has only been encountered with AVG/Avast Antivirus!
34

Performance Improvements
Below is a three step guide on improving performance of the TDS GTNXi within MSFS. We
recommend that all users apply these performance improvements for a much improved
experience.
Thanks to AirborneGeek for creating a YouTube video explaining all these performance steps in
details:
https://www.youtube.com/watch?v=naIefIcBvWw
Step 1:
Thanks to TDS GTNXi user and streamer Clumsy:
https://www.twitch.tv/theclumsygeek
And with the great assessment pointed by Ryan Butterworth
We have been able to find a proper solution for customers experiencing performance
degradation (FPS decrease) within MSFS and the TDS GTNXi.
As this problem occurs only on some machines and we can't correlate the exact cause, we can't
have a general fix, but we can point users who experience problems to this fix.
To resolve the problem, you must add an exclusion to Windows Defender for two processes:
gtn_simulator.exe and FlightSimulator.exe
As described here:
https://support.microsoft.com/en-us/wind...01afe13b26
35

When clicking on Add Exclusion, select Process and then type the name and the extension, as
shown above or in the screenshot below.
Step 2:
Enable a different drawing algorithm inside MSFS. With the Developer Mode active, access the
Options Menu, then under the Experimental section, check the "Use NanoVG for XML gauges"
This should decrease the load on the Main Thread and hopefully provide a performance
increase using the TDS GTNXi as a VC Integrated option.
Step 3:
Make sure to disable GPU Hardware Scheduling, then reboot the PC for the changes to take
effect:
https://www.makeuseof.com/windows-10-gpu...urning-on/
Important Note: Starting with version 1.0.2.5 of the TDS GTNXi, this is not needed
anymore as the TDS GTNXi works very well with GPU Hardware Scheduling (HAGS)
36

Tech Support
To obtain tech support for the TDS GTNXi, please post your questions to the support forum:
forum.tdssim.com
You can also obtain support in the official TDS Sim Software GTNXi Discord channel:
https://discord.gg/NupgPCUgsH
To keep up to date with news, pictures and all other TDS SIm Software information, you can
visit and Like our Facebook page:
https://www.facebook.com/tdssimsoftware
We stand by our products and we will treat all tech support questions with utmost importance.
We do our best to answer your question promptly.
For all other inquiries, please email us at:
37
