
| March 2021 | 3725-49157-001A
TECHNICAL REFERENCE
GETTING HELP
For more information about installing, configuring, and
administering Poly/Polycom products or services, go to
Polycom Support.
Plantronics, Inc. (Poly – formerly Plantronics and Polycom)
345 Encinal Street
Santa Cruz, California
95060
© 2020 Plantronics, Inc. All rights reserved. Poly, the
propeller design, and the Poly logo are trademarks of
Plantronics, Inc. All other trademarks are the property of
their respective owners.
OBi Device

1
Before You Begin . . . . . . . . . . . . . . . . . . . . . . . . . . . . . . . . . . . . . . . . . . . . . . . . . . . 6
Audience, Purpose, and Required Skills . . . . . . . . . . . . . . . . . . . . . . . . . . . . . . . . . . . . . . . . . . 6
Related Poly and Partner Resources . . . . . . . . . . . . . . . . . . . . . . . . . . . . . . . . . . . . . . . . . . . . 6
Getting Started . . . . . . . . . . . . . . . . . . . . . . . . . . . . . . . . . . . . . . . . . . . . . . . . . . . . . 7
System Configuration Parameters . . . . . . . . . . . . . . . . . . . . . . . . . . . . . . . . . . . . . . . . . . . . . . . 7
Canonical Fashion . . . . . . . . . . . . . . . . . . . . . . . . . . . . . . . . . . . . . . . . . . . . . . . . . . . . . . . 8
Literal Fashion . . . . . . . . . . . . . . . . . . . . . . . . . . . . . . . . . . . . . . . . . . . . . . . . . . . . . . . . . . . 8
Boolean Values . . . . . . . . . . . . . . . . . . . . . . . . . . . . . . . . . . . . . . . . . . . . . . . . . . . . . . . . . . 8
Multiple Choice Values . . . . . . . . . . . . . . . . . . . . . . . . . . . . . . . . . . . . . . . . . . . . . . . . . . . . 9
Parameter Values . . . . . . . . . . . . . . . . . . . . . . . . . . . . . . . . . . . . . . . . . . . . . . . . . . . . . . . . 9
XML Usage . . . . . . . . . . . . . . . . . . . . . . . . . . . . . . . . . . . . . . . . . . . . . . . . . . . . . . . . . . . . . 9
Phone Settings . . . . . . . . . . . . . . . . . . . . . . . . . . . . . . . . . . . . . . . . . . . . . . . . . . . . . . . . . . . . . 9
DigitMap and OutboundCallRoute . . . . . . . . . . . . . . . . . . . . . . . . . . . . . . . . . . . . . . . . . . . 9
Primary Line . . . . . . . . . . . . . . . . . . . . . . . . . . . . . . . . . . . . . . . . . . . . . . . . . . . . . . . . . . . 10
Network Directory . . . . . . . . . . . . . . . . . . . . . . . . . . . . . . . . . . . . . . . . . . . . . . . . . . . . . . . 10
Buddy List . . . . . . . . . . . . . . . . . . . . . . . . . . . . . . . . . . . . . . . . . . . . . . . . . . . . . . . . . . . . . 11
User Preferences Settings . . . . . . . . . . . . . . . . . . . . . . . . . . . . . . . . . . . . . . . . . . . . . . . . 11
Page Groups 1 and 2 . . . . . . . . . . . . . . . . . . . . . . . . . . . . . . . . . . . . . . . . . . . . . . . . . . . . 11
Line Keys . . . . . . . . . . . . . . . . . . . . . . . . . . . . . . . . . . . . . . . . . . . . . . . . . . . . . . . . . . . . . 11
Input Methods . . . . . . . . . . . . . . . . . . . . . . . . . . . . . . . . . . . . . . . . . . . . . . . . . . . . . 12
Local Interface Input Modes . . . . . . . . . . . . . . . . . . . . . . . . . . . . . . . . . . . . . . . . . . . . . . . . . . 12
USB Keyboard . . . . . . . . . . . . . . . . . . . . . . . . . . . . . . . . . . . . . . . . . . . . . . . . . . . . . . . . . . . . . 12
IVR-Based Local Configuration . . . . . . . . . . . . . . . . . . . . . . . . . . . . . . . . . . . . . . . 14
Main Menu . . . . . . . . . . . . . . . . . . . . . . . . . . . . . . . . . . . . . . . . . . . . . . . . . . . . . . . . . . . . . . . . 14
IVR System Settings . . . . . . . . . . . . . . . . . . . . . . . . . . . . . . . . . . . . . . . . . . . . . . . . . . . . . . . . 15
Network Settings . . . . . . . . . . . . . . . . . . . . . . . . . . . . . . . . . . . . . . . . . . . . . . . . . . . . . . . . . . . 16
SIP Service Provider Settings . . . . . . . . . . . . . . . . . . . . . . . . . . . . . . . . . . . . . . . . . . . . . . . . . 18
OBiTALK Settings . . . . . . . . . . . . . . . . . . . . . . . . . . . . . . . . . . . . . . . . . . . . . . . . . . . . . . . . . . 21
Additional IVR Operation Options . . . . . . . . . . . . . . . . . . . . . . . . . . . . . . . . . . . . . . . . . . . . . . 23
Disabling or Protecting Phone Web Pages Access . . . . . . . . . . . . . . . . . . . . . . . . . . . . . . . . . 31
Service Providers . . . . . . . . . . . . . . . . . . . . . . . . . . . . . . . . . . . . . . . . . . . . . . . . . . 32
SIP Service Provider Features . . . . . . . . . . . . . . . . . . . . . . . . . . . . . . . . . . . . . . . . . . . . . . . . 32
Use SPn as a Proxy for a SIP IP Phone . . . . . . . . . . . . . . . . . . . . . . . . . . . . . . . . . . . . . . 32
Network Settings . . . . . . . . . . . . . . . . . . . . . . . . . . . . . . . . . . . . . . . . . . . . . . . . . . . 34
Default DHCP Settings . . . . . . . . . . . . . . . . . . . . . . . . . . . . . . . . . . . . . . . . . . . . . . . . . . . . . . 34
DNS Lookup of SIP Servers . . . . . . . . . . . . . . . . . . . . . . . . . . . . . . . . . . . . . . . . . . . . . . . . . . 34

2
DNS NAPTR Support . . . . . . . . . . . . . . . . . . . . . . . . . . . . . . . . . . . . . . . . . . . . . . . . . . . . . . . 34
SIP Registration . . . . . . . . . . . . . . . . . . . . . . . . . . . . . . . . . . . . . . . . . . . . . . . . . . . . . . . . . . . . 35
Registration Period . . . . . . . . . . . . . . . . . . . . . . . . . . . . . . . . . . . . . . . . . . . . . . . . . . . . . . 35
SIP Proxy Server Redundancy and Dual REGISTRATION . . . . . . . . . . . . . . . . . . . . . . . 36
SIP Outbound Proxy Server . . . . . . . . . . . . . . . . . . . . . . . . . . . . . . . . . . . . . . . . . . . . . . . 37
SIP Privacy . . . . . . . . . . . . . . . . . . . . . . . . . . . . . . . . . . . . . . . . . . . . . . . . . . . . . . . . . . . . 37
NAT Traversal Considerations . . . . . . . . . . . . . . . . . . . . . . . . . . . . . . . . . . . . . . . . . . . . . . . . 38
STUN and ICE . . . . . . . . . . . . . . . . . . . . . . . . . . . . . . . . . . . . . . . . . . . . . . . . . . . . . . . . . 39
RTP Statistics – the X-RTP-Stat Header . . . . . . . . . . . . . . . . . . . . . . . . . . . . . . . . . . . . . 39
Provisioning Scripts and Macros . . . . . . . . . . . . . . . . . . . . . . . . . . . . . . . . . . . . . 41
Provisioning Scripts . . . . . . . . . . . . . . . . . . . . . . . . . . . . . . . . . . . . . . . . . . . . . . . . . . . . . . . . . 41
Provisioning Script Operations . . . . . . . . . . . . . . . . . . . . . . . . . . . . . . . . . . . . . . . . . . . . . 42
SYNC . . . . . . . . . . . . . . . . . . . . . . . . . . . . . . . . . . . . . . . . . . . . . . . . . . . . . . . . . . . . . 43
RPT (Report Configuration and Status) . . . . . . . . . . . . . . . . . . . . . . . . . . . . . . . . . . . 44
FWU (Firmware Update) . . . . . . . . . . . . . . . . . . . . . . . . . . . . . . . . . . . . . . . . . . . . . . . 45
WAIT . . . . . . . . . . . . . . . . . . . . . . . . . . . . . . . . . . . . . . . . . . . . . . . . . . . . . . . . . . . . . . 45
EXIT . . . . . . . . . . . . . . . . . . . . . . . . . . . . . . . . . . . . . . . . . . . . . . . . . . . . . . . . . . . . . . 46
GOTO . . . . . . . . . . . . . . . . . . . . . . . . . . . . . . . . . . . . . . . . . . . . . . . . . . . . . . . . . . . . . 46
SET . . . . . . . . . . . . . . . . . . . . . . . . . . . . . . . . . . . . . . . . . . . . . . . . . . . . . . . . . . . . . . . 46
CLR . . . . . . . . . . . . . . . . . . . . . . . . . . . . . . . . . . . . . . . . . . . . . . . . . . . . . . . . . . . . . . 46
Operation Error Codes . . . . . . . . . . . . . . . . . . . . . . . . . . . . . . . . . . . . . . . . . . . . . . . . . . . 47
Provisioning Script Examples . . . . . . . . . . . . . . . . . . . . . . . . . . . . . . . . . . . . . . . . . . . . . . 47
Example 1: (FirmwareURL) Upgrade to Specific Firmware . . . . . . . . . . . . . . . . . . . . 48
Example 2: (ConfigURL) Sync to a Specific Profile . . . . . . . . . . . . . . . . . . . . . . . . . . 48
Example 3: (FirmwareURL) Upgrade to Specific Firmware - Current Version . . . . . . 48
Example 4: (ConfigURL) Download with Two Profiles Sequentially . . . . . . . . . . . . . . 48
Example 5: (ConfigURL) Retry Sync with Exponential Back-Off . . . . . . . . . . . . . . . . 48
Script Execution Model . . . . . . . . . . . . . . . . . . . . . . . . . . . . . . . . . . . . . . . . . . . . . . . . . . . 49
Macros . . . . . . . . . . . . . . . . . . . . . . . . . . . . . . . . . . . . . . . . . . . . . . . . . . . . . . . . . . . . . . . . . . . 49
Parameter Macro Expansion . . . . . . . . . . . . . . . . . . . . . . . . . . . . . . . . . . . . . . . . . . . . . . . 50
User-Defined Macros . . . . . . . . . . . . . . . . . . . . . . . . . . . . . . . . . . . . . . . . . . . . . . . . . . . . 51
Call Routing . . . . . . . . . . . . . . . . . . . . . . . . . . . . . . . . . . . . . . . . . . . . . . . . . . . . . . . 53
Basic Incoming Call Handling . . . . . . . . . . . . . . . . . . . . . . . . . . . . . . . . . . . . . . . . . . . . . . . . . 53
Inbound Call Route Configuration . . . . . . . . . . . . . . . . . . . . . . . . . . . . . . . . . . . . . . . . . . . 54
InboundCallRoute Examples . . . . . . . . . . . . . . . . . . . . . . . . . . . . . . . . . . . . . . . . . . . 56
Basic Outgoing Call Handling . . . . . . . . . . . . . . . . . . . . . . . . . . . . . . . . . . . . . . . . . . . . . . . . . 56
Outbound Call Route Configuration . . . . . . . . . . . . . . . . . . . . . . . . . . . . . . . . . . . . . . . . . 56
OutboundCallRoute Examples . . . . . . . . . . . . . . . . . . . . . . . . . . . . . . . . . . . . . . . . . . 57

3
Digit Map Configuration . . . . . . . . . . . . . . . . . . . . . . . . . . . . . . . . . . . . . . . . . . . . . . . . . . . . . . 58
Match Against Multiple Rules in a Digit Map . . . . . . . . . . . . . . . . . . . . . . . . . . . . . . . . . . . 60
Example of Forcing an Interdigit Timeout with a Pound(#) Key . . . . . . . . . . . . . . . . . 61
Invoking a Second Dial Tone in a Digit Map . . . . . . . . . . . . . . . . . . . . . . . . . . . . . . . . 62
Changing an Interdigit Long Timer Dynamically After a Partial Match . . . . . . . . . . . . 62
User-Defined Digit Maps . . . . . . . . . . . . . . . . . . . . . . . . . . . . . . . . . . . . . . . . . . . . . . . . . . 63
Example of a User Defined Digit Map For IPv4 Dialing . . . . . . . . . . . . . . . . . . . . . . . 63
Call Settings . . . . . . . . . . . . . . . . . . . . . . . . . . . . . . . . . . . . . . . . . . . . . . . . . . . . . . 64
Call States . . . . . . . . . . . . . . . . . . . . . . . . . . . . . . . . . . . . . . . . . . . . . . . . . . . . . . . . . . . . . . . . 64
Caller ID . . . . . . . . . . . . . . . . . . . . . . . . . . . . . . . . . . . . . . . . . . . . . . . . . . . . . . . . . . . . . . . . . . 65
Calling Line ID Display . . . . . . . . . . . . . . . . . . . . . . . . . . . . . . . . . . . . . . . . . . . . . . . . . . . 65
Call Forward Numbers . . . . . . . . . . . . . . . . . . . . . . . . . . . . . . . . . . . . . . . . . . . . . . . . . . . . . . . 65
Multicast Paging Groups . . . . . . . . . . . . . . . . . . . . . . . . . . . . . . . . . . . . . . . . . . . . . . . . . . . . . 66
Media Loopback Service . . . . . . . . . . . . . . . . . . . . . . . . . . . . . . . . . . . . . . . . . . . . . . . . . . . . . 67
Shared Line and Shared Call Appearances (SCA) . . . . . . . . . . . . . . . . . . . . . . . . . . . . . . . . . 68
SCA States . . . . . . . . . . . . . . . . . . . . . . . . . . . . . . . . . . . . . . . . . . . . . . . . . . . . . . . . . . . . 68
Line Seize . . . . . . . . . . . . . . . . . . . . . . . . . . . . . . . . . . . . . . . . . . . . . . . . . . . . . . . . . . . . . 70
Busy Lamp Field (BLF) . . . . . . . . . . . . . . . . . . . . . . . . . . . . . . . . . . . . . . . . . . . . . . . . . . . . . . 70
SIP for Busy Lamp Field . . . . . . . . . . . . . . . . . . . . . . . . . . . . . . . . . . . . . . . . . . . . . . . . . . 71
Call Park . . . . . . . . . . . . . . . . . . . . . . . . . . . . . . . . . . . . . . . . . . . . . . . . . . . . . . . . . . . . . . . . . 73
Call Diversion History . . . . . . . . . . . . . . . . . . . . . . . . . . . . . . . . . . . . . . . . . . . . . . . . . . . . . . . 73
Hold and Talk Event Package . . . . . . . . . . . . . . . . . . . . . . . . . . . . . . . . . . . . . . . . . . . . . . . . . 73
Advice of Charges (AOC) . . . . . . . . . . . . . . . . . . . . . . . . . . . . . . . . . . . . . . . . . . . . . . . . . . . . 73
System Settings . . . . . . . . . . . . . . . . . . . . . . . . . . . . . . . . . . . . . . . . . . . . . . . . . . . 74
Codec Profiles . . . . . . . . . . . . . . . . . . . . . . . . . . . . . . . . . . . . . . . . . . . . . . . . . . . . . . . . . . . . . 74
Tones . . . . . . . . . . . . . . . . . . . . . . . . . . . . . . . . . . . . . . . . . . . . . . . . . . . . . . . . . . . . . . . . . . . . 74
Tone Examples . . . . . . . . . . . . . . . . . . . . . . . . . . . . . . . . . . . . . . . . . . . . . . . . . . . . . . . . . 74
Dial Tone Example . . . . . . . . . . . . . . . . . . . . . . . . . . . . . . . . . . . . . . . . . . . . . . . . . . . 74
Busy Tone Example . . . . . . . . . . . . . . . . . . . . . . . . . . . . . . . . . . . . . . . . . . . . . . . . . . 75
Prompt Tone Example . . . . . . . . . . . . . . . . . . . . . . . . . . . . . . . . . . . . . . . . . . . . . . . . 75
SIT Tone Example . . . . . . . . . . . . . . . . . . . . . . . . . . . . . . . . . . . . . . . . . . . . . . . . . . . 75
Stutter Tone Example . . . . . . . . . . . . . . . . . . . . . . . . . . . . . . . . . . . . . . . . . . . . . . . . . 75
Tone Patterns . . . . . . . . . . . . . . . . . . . . . . . . . . . . . . . . . . . . . . . . . . . . . . . . . . . . . . . . . . . . . 76
Field–1 Composition . . . . . . . . . . . . . . . . . . . . . . . . . . . . . . . . . . . . . . . . . . . . . . . . . . . . . 76
Field–2 Composition . . . . . . . . . . . . . . . . . . . . . . . . . . . . . . . . . . . . . . . . . . . . . . . . . . . . . 76
Field–3 to Field–6 Composition . . . . . . . . . . . . . . . . . . . . . . . . . . . . . . . . . . . . . . . . . . . . . 76
Tone Examples . . . . . . . . . . . . . . . . . . . . . . . . . . . . . . . . . . . . . . . . . . . . . . . . . . . . . . . . . 77
Dial Tone . . . . . . . . . . . . . . . . . . . . . . . . . . . . . . . . . . . . . . . . . . . . . . . . . . . . . . . . . . 78

4
Busy Tone . . . . . . . . . . . . . . . . . . . . . . . . . . . . . . . . . . . . . . . . . . . . . . . . . . . . . . . . . 78
Prompt Tone . . . . . . . . . . . . . . . . . . . . . . . . . . . . . . . . . . . . . . . . . . . . . . . . . . . . . . . . 78
SIT Tone . . . . . . . . . . . . . . . . . . . . . . . . . . . . . . . . . . . . . . . . . . . . . . . . . . . . . . . . . . . 78
Stutter Tone . . . . . . . . . . . . . . . . . . . . . . . . . . . . . . . . . . . . . . . . . . . . . . . . . . . . . . . . 79
Ring Tones and Ring Patterns . . . . . . . . . . . . . . . . . . . . . . . . . . . . . . . . . . . . . . . . . . . . . . . . 79
Field–1 Composition . . . . . . . . . . . . . . . . . . . . . . . . . . . . . . . . . . . . . . . . . . . . . . . . . . . . . 79
Field–2 to Field–5 Composition . . . . . . . . . . . . . . . . . . . . . . . . . . . . . . . . . . . . . . . . . . . . . 79
Distinctive Ring Tones and Patterns . . . . . . . . . . . . . . . . . . . . . . . . . . . . . . . . . . . . . . . . . . . . 80
Preloaded Ringtones . . . . . . . . . . . . . . . . . . . . . . . . . . . . . . . . . . . . . . . . . . . . . . . . . . . . . 80
Star Codes . . . . . . . . . . . . . . . . . . . . . . . . . . . . . . . . . . . . . . . . . . . . . . . . . . . . . . . . . . . . . . . . 80
Preprogrammed Star Codes . . . . . . . . . . . . . . . . . . . . . . . . . . . . . . . . . . . . . . . . . . . . . . . 81
Star Code Script Variables (VAR) . . . . . . . . . . . . . . . . . . . . . . . . . . . . . . . . . . . . . . . . . . . 82
Star Code Script Actions (ACT) . . . . . . . . . . . . . . . . . . . . . . . . . . . . . . . . . . . . . . . . . . . . 83
Star Code Script Format . . . . . . . . . . . . . . . . . . . . . . . . . . . . . . . . . . . . . . . . . . . . . . . . . . 84
Star Code Script Examples . . . . . . . . . . . . . . . . . . . . . . . . . . . . . . . . . . . . . . . . . . . . 84
Line Keys and Virtual Line Keys . . . . . . . . . . . . . . . . . . . . . . . . . . . . . . . . . . . . . . 85
Line Key Window Customization . . . . . . . . . . . . . . . . . . . . . . . . . . . . . . . . . . . . . . . . . . . . . . . 85
Example: Call Appearance Line Key Settings . . . . . . . . . . . . . . . . . . . . . . . . . . . . . . . . . . 89
Line Key Tabs . . . . . . . . . . . . . . . . . . . . . . . . . . . . . . . . . . . . . . . . . . . . . . . . . . . . . . . . . . . . . 90
Calls App Behavior . . . . . . . . . . . . . . . . . . . . . . . . . . . . . . . . . . . . . . . . . . . . . . . . . . . . . . . . . 90
Feature Keys . . . . . . . . . . . . . . . . . . . . . . . . . . . . . . . . . . . . . . . . . . . . . . . . . . . . . . 91
Feature Key Functions . . . . . . . . . . . . . . . . . . . . . . . . . . . . . . . . . . . . . . . . . . . . . . . . . . . . . . 91
Feature Key Configuration Parameters . . . . . . . . . . . . . . . . . . . . . . . . . . . . . . . . . . . . . . . . . 102
Softkeys . . . . . . . . . . . . . . . . . . . . . . . . . . . . . . . . . . . . . . . . . . . . . . . . . . . . . . . . . 104
Softkey Specification . . . . . . . . . . . . . . . . . . . . . . . . . . . . . . . . . . . . . . . . . . . . . . . . . . . . . . . 104
Softkey Set Parameter Syntax . . . . . . . . . . . . . . . . . . . . . . . . . . . . . . . . . . . . . . . . . . . . 104
Assignable Softkeys . . . . . . . . . . . . . . . . . . . . . . . . . . . . . . . . . . . . . . . . . . . . . . . . . . . . . . . 104
Broadsoft Server Features . . . . . . . . . . . . . . . . . . . . . . . . . . . . . . . . . . . . . . . . . . 117
ACD Agent State . . . . . . . . . . . . . . . . . . . . . . . . . . . . . . . . . . . . . . . . . . . . . . . . . . . . . . . . . . 117
Recording Calls . . . . . . . . . . . . . . . . . . . . . . . . . . . . . . . . . . . . . . . . . . . . . . . . . . . . . . . . . . . 118
Menu Customization Parameters . . . . . . . . . . . . . . . . . . . . . . . . . . . . . . . . . . . . 119
Main Menu Item IDs . . . . . . . . . . . . . . . . . . . . . . . . . . . . . . . . . . . . . . . . . . . . . . . . . . . . . . . 120
Net Services Menu Item IDs . . . . . . . . . . . . . . . . . . . . . . . . . . . . . . . . . . . . . . . . . . . . . . . . . 121
Preferences Menu Item IDs . . . . . . . . . . . . . . . . . . . . . . . . . . . . . . . . . . . . . . . . . . . . . . . . . . 122
Settings Menu Item IDs . . . . . . . . . . . . . . . . . . . . . . . . . . . . . . . . . . . . . . . . . . . . . . . . . . . . . 125
Product Info Menu Item IDs . . . . . . . . . . . . . . . . . . . . . . . . . . . . . . . . . . . . . . . . . . . . . . . . . . 125

5
Phone Fonts . . . . . . . . . . . . . . . . . . . . . . . . . . . . . . . . . . . . . . . . . . . . . . . . . . . . . 127
Built-In Fonts . . . . . . . . . . . . . . . . . . . . . . . . . . . . . . . . . . . . . . . . . . . . . . . . . . . . . . . . . . . . . 127
Factory-Installed Fonts . . . . . . . . . . . . . . . . . . . . . . . . . . . . . . . . . . . . . . . . . . . . . . . . . . . . . 127
Custom Fonts . . . . . . . . . . . . . . . . . . . . . . . . . . . . . . . . . . . . . . . . . . . . . . . . . . . . . . . . . . . . 128
Font Storage . . . . . . . . . . . . . . . . . . . . . . . . . . . . . . . . . . . . . . . . . . . . . . . . . . . . . . . . . . . . . 128
Spanish Dictionary File . . . . . . . . . . . . . . . . . . . . . . . . . . . . . . . . . . . . . . . . . . . . 130

6
Before You Begin
This guide provides technical reference information for OBi devices.
Audience, Purpose, and Required Skills
This guide is for a technical audience. You must be familiar with the following concepts before beginning:
● Current telecommunications practices, protocols, and principles
● Telecommunication basics, audio teleconferencing, and voice or data equipment
● OpenSIP networks and VoIP endpoint environments
Related Poly and Partner Resources
See the following sites for information related to this release.
● The Poly Online Support Center
is the entry point to online product, service, and solution support
information including Video Tutorials, Documents & Software, Knowledge Base, Community
Discussions, Poly University, and additional services.
● The Poly Document Library
provides support documentation for active products, services, and
solutions. The documentation displays in HTML format so you can easily access and view installation,
configuration, or administration content from any online device.
● The Poly Community
provides access to the latest developer and support information. Create an
account to access Poly support personnel and participate in developer and support forums. You can
find the latest information on hardware, software, and partner solutions topics, share ideas, and solve
problems with your colleagues.
● The Poly Partner Networks
is a program where resellers, distributors, solutions providers, and unified
communications providers deliver high-value business solutions that meet critical customer needs,
making it easy for you to communicate face-to-face with the applications and devices you use every
day.
● The Poly
Services help your business succeed and get the most out of your investment through the
benefits of collaboration.

7
Getting Started
Before you use your OBi Edition phone, take a few moments to familiarize yourself with its features and user
interface.
The terms “the phone” and “your phone” refer to any of the OBi Edition VVX business IP phones. Unless
specifically noted in this guide, all phone models operate in similar ways.
As you read this guide, keep in mind that certain features are configurable by your system administrator or
determined by your network environment. As a result, some features may not be enabled or may operate
differently on your phone. Additionally, the examples and graphics in this guide may not directly reflect what
is displayed or is available on your phone screen.
The OBi Edition phones share the same functionalities with all other Polycom business IP phones:
● Support for all standard SIP-based IP PBX and ITSPs/VSPs.
● Support for 3CX PBX and uaCSTA interoperability.
● Suited for all service provider and enterprise deployment environments, regardless of size.
● Ideal for self-service installations. Home users, small business owners, or corporate IT departments
can easily install, set up, and manage these phones.
● Seamless integration with popular softswitch architectures
● Cloud management enabled via OBiTALK.com
with both a user portal and an ITSP partner portal with
an optional REST API.
System Configuration Parameters
This guide provides system configuration parameters and their values in the following formats:
● Canonical fashion
● Literal fashion
Both notational conventions point to the same parameters, but their appearances are different.
The canonical fashion simplifies locating parameters on your device’s system web interface, the PDMS-SP
service, or in the Polycom OBihai Data Model
—a collective list of configuration parameters, syntaxes, and
valid values for your device.
An area available only to service providers, the https://www1.OBiTALK.com ITSP portal may also
be used by service providers for phone provisioning, management, and troubleshooting. The
OBiTALK ITSP portal can be used independently as the sole system for secure management of
OBi Edition phones or in conjunction with an existing centralized provisioning system managed by
the service provider.

Getting Started
8
Canonical Fashion
The following example shows the canonical fashion format.
Parameter Group Name::
ParameterName
=
Parameter Value
Literal Fashion
The following example shows the literal fashion format. Use the literal fashion when provisioning systems.
ParameterGroupName.ParameterName.
Parameter Value
When using the literal fashion in your XML, you must exactly match the text string for
ParameterGroupName.ParameterName.
Parameter Value
. However, text formatting such as bold face
isn’t required and the system removes it when it processes your script or app.
Boolean Values
Parameters that take a Boolean value have a check box next to the parameter name in the system web
interface. Throughout this document, we refer to a Boolean value as “enable or disable” or “yes or no”, but
the only valid Boolean parameter values to use in a phone configuration file is either
true/false
or
Parameter Element Description
ParameterGroupName The heading of the parameter group on the left side panel of the device’s
system web interface or the PDMS-SP service web page. This string may
contain spaces.
ParameterName
The name of the parameter as shown on the system web interface. This string
can’t contain spaces. ParameterGroupName and
ParameterName
are
separated by two colons (::).
Parameter Value
The assigned value of the named parameter. This string may contain spaces.
You can omit ParameterGroupName or its top-level headings when the
context is clear. For example:
• SP1 Service::
AuthUserName
=
4082224312
• ITSP Profile A > SIP::
ProxyServer
=
sip.myserviceprovider.com
•
ProxyServerPort
=
5082
Parameter Element Description
ParameterGroupName. The name of the first parameter group in the literal fashion. This string can’t
contain spaces and always ends with a period. You can use more than one
ParameterGroupName. The ParameterGroupName. Case-sensitive.
ParameterName.
The name of the parameter. This string can’t contain spaces and always ends
with a period. The ParameterName. Case-sensitive.
Parameter Value
The assigned value of the named parameter. This string may contain spaces.
The
Parameter Value
isn’t case-sensitive, but it must exactly match the value you
want to set when one or more choices are available.

Getting Started
9
True/False
(case-sensitive). This is equivalent to selecting or clearing the check box in the system web
interface.
Multiple Choice Values
You must provision parameters that take one of several valid options from a drop-down menu on the
configuration message with string values that exactly match one of those choices. Otherwise, the system
uses the default choice. Matching the provisioned value against valid strings is case-sensitive and doesn’t
allow extra spaces.
Parameter Values
When entering a parameter value from the system web interface or via provisioning, avoid adding extra
white spaces before or after the parameter value. If the value is a comma-separated list of strings or contains
attributes after a comma or semicolon, avoid adding extra white spaces before and after the delimiter.
For example: CertainParameter
= 1,2,3,4;a;b;c
If a parameter value can include white spaces, such as X_STUNServerPort, use just a single space and
no extra space before and after the value.
For example: X_STUNServerPort
= UDP listen port of the STUN Server
XML Usage
When you write or edit XML for your device, use an XML editor that automatically checks your syntax.
You can also use the template for the VVX D230 Obihai Data Model
to get started.
Phone Settings
Settings are divided into the following groups:
● Phone Settings
● Line Keys
● Programmable Keys
● Sidecar 1 and Sidecar 2
DigitMap and OutboundCallRoute
The DigitMap controls what number you can dial and applies the given transformation to the dialed number.
It can refer to the DigitMap parameter values in other parameter groups for better readability and
organization. The OutboundCallRoute determines which service to use based on the dialed number,
after validation and transformation by the DigitMap.

Getting Started
10
Primary Line
You can select the Primary Line for the Phone and for the AA, respectively, using the Phone
Settings::PrimaryLine and Auto Attendant::PrimaryLine parameters. The primary line is the default
line to use when there is no explicitly selected line and no line-selection prefix (line access code) has been
dialed. For example, when going off-hook to get Dialtone, the phone tries to allocate a call key that is bound
to the primary line for the call, if one is available.
You can make one of the SP Services, OBiTALK or TG1/TG2 as the Primary Line for outbound calls. The
Primary Line for the Phone and the Auto Attendant is configured separately. The following list summarizes
the choices available for selection as the primary line:
● SP1 Service
● SP2 Service
● SP3 Service
● SP4 Service
● SP5 Service
● SP6 Service
● OBiTALK Service
● Trunk Group 1
● Trunk Group 2
You can select a specific Line to use when making a call explicitly by pressing a call key or line monitor key
bound to that line or a softkey corresponding to that line. You can also dial a Line’s access code before the
destination number. The default service route access codes are defined as:
● ** 1 for SP1
● ** 2 for SP2
● ** 3 for SP3
● ** 4 for SP4
● ** 9 for OBiTALK
Service route access codes for calling from the Phone can be customized if necessary by modifying Phone
Settings::DigitMap and Phone Settings::OutboundCallRoute. Service route access codes for calling
via the Auto Attendant can be customized if necessary by modifying Auto Attendant::DigitMap and Auto
Attendant::OutboundCallRoute.
Network Directory
The Enable option in this group is for the enabling and displaying the Network Directory option on the Main
menu. The VoiceService option determines which SP service’s network directory function to invoke when
the Main menu option is selected by the user.
The phone handles the PrimaryLine setting by substituting internally all occurrences of pli with
the abbreviated name of the trunk named as the primary line in the DigitMap and
OutboundCallRoute parameters of the same parameter group.

Getting Started
11
Buddy List
The Enable option in this group is for the enabling and displaying of the Buddy List option on the Main menu.
The VoiceService option determines which SP service’s buddy list function to invoke when the Main menu
option is selected by the user.
User Preferences Settings
The CallForwadUnconditionalFeatureProvider determines which CallForwardUnconditional
parameter the Call Forward option under User Preferences should control. Note that this is the same setting
the Call Forward softkey (in the Home Screen) controls. There is the Phone version and also one version
for each voice service. If an SPn service is selected and if the SPn – Network Provided
Services::CallFowardAlways is true, then the user preferences and softkey option reflect and controls
the setting of the feature at the server side.
The DoNotDisturbFeatureProvider determines which
DoNotDisturb
parameter the Do Not Disturb option
under User Preferences should control. There is the Phone version and also one version for each voice
service. If an SPn service is selected and if the SPn – Network Provided Services::
DoNotDisturb
is true,
then the user preferences option reflects and controls the setting of the feature at the server side.
Page Groups 1 and 2
GroupName is a nickname to refer to the page group; not used anywhere at the moment.
MulticastAddress and MulticastPort define the multicast address of the group to join, and TTL sets the
TTL value of the outgoing multicast packets. ParticipantName is a name to identify to the group the user
of this phone via RTCP messages.
To use a page group effectively, there must be a feature key assigned with the corresponding page group
function. You can press the key once to talk to the group, or use PTT to talk if the PushToTalk option is also
enabled in the page group configuration.
Line Keys
This group is used for the configuration of the Line Keys as Feature Keys.
There are twelve (12) physical Line Keys (LKs) on the VVX 450, six (6) on the VVX 350, four (4) on the
VVX 250, and two (2) on the VVX 150. On the VVX 450, the line keys are split half and half to the left and
right of the LCD display. On the VVX 350, VVX 250, and VVX 150, the line keys are on the left side of the
display.
Only one Network Directory option can be shown on the Main menu. The Name parameter is
reserved for future use.
Only one Buddy List option can be shown on the Main menu. The Name parameter is reserved for
future use.

12
Input Methods
You can input information directly into your phone using different options in your phone’s keypad or using
an optional USB keyboard.
Local Interface Input Modes
The phone supports four input modes:
● Numeric (123): Each key press inputs the corresponding digit 0 to 9, *, and #.
● Alphanumeric (abc): Each key press provides a set of ASCII characters to input.
● Capitalized Alphanumeric (Abc): Same as alphanumeric mode, except the ASCII character options
defaults to a capital letter.
● IPv4 Address (IPv4): Same as numeric, but * maps to a dot (.) and # maps to a colon (:) (to enter an
IPv4 address).
You can change between input modes by pressing the Mode softkey (by default, the label is Switch Mode).
USB Keyboard
You can connect a USB keyboard to a USB port at the back of on your phone and use it to enter standard
ASCII text. The keyboard icons display in the notification area of the screen when a keyboard is connected,
and the keyboard highlight icon indicates that caps lock is on. For input box that shows an input mode
switch, just use the ‘123’ mode when entering text from the USB keyboard to allow normal text input (without
selection of an input symbol from a table as in Abc/abc mode).
You can use the USB Keyboard and Phone Keypad at the same time.
The following table includes shortcuts you can to emulate phone key presses or phone action from a USB
keyboard.
USB Keyboard Shortcuts
USB Keyboard Key Phone Key USB Keyboard Key Phone Action
ESC Cancel/Back Tab Focus next menu item on the
screen.
Enter OK/Select Ctrl Tab Next Line Key Page
Home Home Ctrl Alt Del Reboot
Up/Down Up/Down Navigation PgUp Set cursor to first input
character

Input Methods
13
Left/Right Left/Right Navigation PgDn Set cursor to the last input
character
F1/F2/F3/F4 Softkey 1/2/3/4 End Set cursor to the last input
character of the current row
Ctrl
F1/F2/F3/F4//F5/F6
Line Key 1/2/3//4/5/6 Backspace Backspace
Ctrl s/S Speaker Del Backspace
Ctrl h/H Headset
Ctrl m/M Mute
Ctrl 1/2/3/4/5/6/7/8 Programmable Key
1/2/3/4/5/6/7/8
Ctrl + Vol Up
Ctrl - Vol Down
USB Keyboard Shortcuts
USB Keyboard Key Phone Key USB Keyboard Key Phone Action

14
IVR-Based Local Configuration
OBi devices have a built-in interactive voice response (IVR) for checking and setting a small but essential
subset of configuration parameters. Configuration via the IVR is a legacy configuration method inherited
from older OBi products that don’t have a display.
The IVR is an instance of an automated attendant (AA). For example, VVX business IP phones, OBi Edition,
offer two instances of AA, referred to as AA1 and AA2. The IVR for configuration purposes is AA2, which
we’ll just refer to as the IVR to avoid confusion with AA1, which is the AA used to handle phone calls.
To invoke the IVR, pick up the phone, dial * * *, and follow the announced instructions. In order for the * * *
number to work, make sure the digit map pattern *** is included in the Phone Settings::DigitMap
parameter, and the rule,
{***:aa2}
is included in the Phone Settings::OutboundCallRoute parameter.
The standard (non-customized) default values of these parameters are, respectively:
([1-9]x?*(Mpli)|[1-9]S9|[1-9][0-9]S9|***|**0|**1(Msp1)|**2(Msp2)|**3(Msp3)|**4(Msp4)|*
*9(Mpp)|(Mpli))
and
{([1-9]x?*(Mpli)):pp},{**0:aa},{***:aa2},{(<**1:>(Msp1)):sp1},
{(<**2:>(Msp2)):sp2},{(<**3:>(Msp3)):sp3},{(<**4:>(Msp4)):sp4},
{(<**9:>(Mpp)):pp},{(Mpli):pli}
For the meaning of these values, see User-Defined Digit Maps and Call Routing.
Some parameter changes require a reboot to take effect. Changes made from the OBiTALK Configuration
web page trigger the phone to reboot automatically (after any current calls end).
Main Menu
The Main menu after starting the IVR is a list of operations that users can select by entering the
corresponding 1-digit option number (as listed below):
Integrated Voice Response Operations
Selection Announcement What Can You Do?
1 Basic Network Status
Reads the IP address and DHCP status.
Press 0 to repeat the information.
2 Advanced Network Status
Reads the primary and back-up DNS server,
primary and back-up NTP server.
Press 0 to repeat the information.
3 DHCP Current Value
Reads the current value and you have the
option to change the value.
Press 1 to enter a new value.
Press 2 to set the default value.
Press 0 to repeat the information.

IVR-Based Local Configuration
15
IVR System Settings
Configure system options through the system settings sub-menu. Note that the handset doesn’t announce
the available settings in the sub-menu.
4 IP Address Current Value
Reads the current value and you have the
option to change the value. If you elect to enter
a new value (static IP address), DHCP is
disabled.
Press 1 to enter a new value.
Press 2 to set the default value.
Press 0 to repeat the information.
5 Password Current Value
Reads the current IVR password value and you
have the option to change the value.
Press 1 to enter a new value.
Press 2 to set the default value.
Press 0 to repeat the information.
6 Please Wait (while OBi is checking for software
update)…
One of the following messages plays:
• Software Update Available. Press 1 to
update software
• Software Update Not Available.
If an update is available, press 1 to proceed with
the update. The software update process starts
as soon as you hang up the phone.
Warning: Once the software upgrade process
starts, the device’s power LED blinks rapidly.
Please make sure the power and network cable
stay connected to the unit until the process is
complete.
8 Restore Factory Default Press 1 to confirm device restore to factory
default settings.
Press # to return to device configuration menu.
Press # # to exit IVR.
9 Reboot OBi Device Press 1 to confirm device reboot.
Press # to return to device configuration menu.
Press # # or hang up to exit IVR.
0 Additional Options
Access other configuration options of your
phone.
Enter option followed by the # key.
Integrated Voice Response Operations (continued)
Selection Announcement What Can You Do?

IVR-Based Local Configuration
16
Network Settings
Configure network options through the network settings submenu.
To configure network settings with IVR:
1 Dial ***0 from the handset.
2 Enter the number for the configuration menu you want to access, followed by the # key.
System Settings Submenus
Menu
Selection Setting Description
1 Firmware Version Current firmware version.
• Press 0 to repeat the information.
• Press # to enter another configuration menu
selection.
2 IVR Password Current IVR password.
• Press 0 to repeat the information.
• Press 1 to enter a new value.
• Press 2 to set the default value.
• Press # to enter another configuration menu
selection.
3 Debug Level Current debug level.
• Press 0 to repeat the information.
• Press 1 to enter a new value.
• Press 2 to set the default value.
• Press # to enter another configuration menu
selection.
4 Syslog Server IP Address Current syslog server IP address.
• Press 0 to repeat the information.
• Press 1 to enter a new value.
• Press 2 to set the default value.
• Press # to enter another configuration menu
selection.
5 Syslog Server Port Current syslog server port value.
• Press 0 to repeat the information.
• Press 1 to enter a new value.
• Press 2 to set the default value of 514.
• Press # to enter another configuration menu
selection.

IVR-Based Local Configuration
17
WAN Settings Options
Menu Selection Setting Description
20 DHCP Configuration Current DHCP configuration value.
• Press 0 to repeat the information.
• Press 1 to enter a new value.
• Press 2 to set the default value.
• Press # to enter another configuration menu
selection.
21 IP Address Current IP address.
• Press 0 to repeat the information.
• Press 1 to enter a new value.
• Press 2 to set the default value.
• Press # to enter another configuration menu
selection.
22 Default Gateway Current default internet gateway.
• Press 0 to repeat the information.
• Press 1 to enter a new value.
• Press 2 to set the default value.
• Press # to enter another configuration menu
selection.
23 Subnet Mask Current subnet mask.
• Press 0 to repeat the information.
• Press 1 to enter a new value.
• Press 2 to set the default value.
• Press # to enter another configuration menu
selection.
24 DNS Server (Primary) Current primary DNS server.
• Press 0 to repeat the information.
• Press 1 to enter a new value.
• Press 2 to set the default value.
• Press # to enter another configuration menu
selection.
25 LLDP Discovery (Enable/Disable) Current LLDP Discovery configuration value.
• Press 0 to repeat the information.
• Press 1 to enter a new value.
• Press 2 to set the default value.
Press # to enter another configuration menu
selection.

IVR-Based Local Configuration
18
SIP Service Provider Settings
Configure SIP service provider options through the SIP service provider settings submenu.
To configure SIP service provider settings with IVR:
1 Dial ***0 from the handset.
2 Enter the number for the configuration menu you want to access, followed by the # key.
26 NTP Server (Primary) Current primary NTP server.
• Press 0 to repeat the information.
• Press 1 to enter a new value.
• Press 2 to set the default value.
• Press # to enter another configuration menu
selection.
27 CDP (Enable/Disable) Common values included in CDP broadcast
messages are:
• System Type and Model
• Duplex/Speed Setting
• VLAN Setting
• PoE Class (Power Draw).
SP1 Configuration Settings
Menu Selection Setting Description
100 Enable Service Provider 1 (SP1) Current SP1 value.
• Press 0 to repeat the information.
• Press 1 to enter a new value.
• Press 2 to set the default value.
• Press # to enter another configuration
menu selection.
101 Registration State of SP1 SP1 registration state.
• Press 0 to repeat the information.
• Press # to enter another configuration
menu selection.
102 SP1 User ID SP1 user ID value.
• Press 0 to repeat the information.
• Press 1 to enter a new value.
• Press 2 to set the default value.
• Press # to enter another configuration
menu selection.
WAN Settings Options (continued)
Menu Selection Setting Description

IVR-Based Local Configuration
19
167 SP1 Block Caller ID Enable • Press 0 to repeat the information.
• Press 1 to enter a new value.
• Press 2 to set the default value.
• Press # to enter another configuration
menu selection.
168 SP1 Block Anonymous Call Enable • Press 0 to repeat the information.
• Press 1 to enter a new value.
• Press 2 to set the default value.
• Press # to enter another configuration
menu selection.
172 SP1 Call Forward ALL – Enable / Disable • Press 0 to repeat the information.
• Press 1 to enter a new value.
• Press 2 to set the default value.
• Press # to enter another configuration
menu selection.
173 SP1 Call Forward ALL Number • Press 0 to repeat the information.
• Press 1 to enter a new value.
• Press 2 to set the default value.
• Press # to enter another configuration
menu selection.
174 SP1 Call Forward on Busy – Enable /
Disable
• Press 0 to repeat the information.
• Press 1 to enter a new value.
• Press 2 to set the default value.
• Press # to enter another configuration
menu selection.
175 SP1 Call Forward on Busy Number • Press 0 to repeat the information.
• Press 1 to enter a new value.
• Press 2 to set the default value.
• Press # to enter another configuration
menu selection.
176 SP1 Call Forward on No Answer – Enable /
Disable
• Press 0 to repeat the information.
• Press 1 to enter a new value.
• Press 2 to set the default value.
• Press # to enter another configuration
menu selection.
177 SP1 Call Forward on No Answer Number • Press 0 to repeat the information.
• Press 1 to enter a new value.
• Press 2 to set the default value.
• Press # to enter another configuration
menu selection.
SP1 Configuration Settings (continued)
Menu Selection Setting Description

IVR-Based Local Configuration
20
SP2 Configuration Settings
Menu Selection Setting Description
200 Enable Service Provider 2 (SP2). Current SP2 value.
• Press 0 to repeat the information.
• Press 1 to enter a new value.
• Press 2 to set the default value.
• Press # to enter another configuration menu
selection.
201 Registration State of SP2 SP2 registration state.
• Press 0 to repeat the information.
• Press # to enter another configuration menu
selection.
202 SP2 User ID SP2 user ID value.
• Press 0 to repeat the information.
• Press 1 to enter a new value.
• Press 2 to set the default value.
• Press # to enter another configuration menu
selection.
267 SP2 Block Caller ID Enable • Press 0 to repeat the information.
• Press 1 to enter a new value.
• Press 2 to set the default value.
• Press # to enter another configuration menu
selection.
268 SP2 Block Anonymous Call Enable • Press 0 to repeat the information.
• Press 1 to enter a new value.
• Press 2 to set the default value.
• Press # to enter another configuration menu
selection.
272 SP2 Call Forward ALL – Enable / Disable • Press 0 to repeat the information.
• Press 1 to enter a new value.
• Press 2 to set the default value.
• Press # to enter another configuration menu
selection.
273 SP2 Call Forward ALL Number • Press 0 to repeat the information.
• Press 1 to enter a new value.
• Press 2 to set the default value.
• Press # to enter another configuration menu
selection.

IVR-Based Local Configuration
21
OBiTALK Settings
You can configure OBiTALK options through the OBiTALK settings submenu.
To configure OBiTALK settings with IVR:
1 Dial ***0 from the handset.
2 Enter the number for the configuration menu you want to access, followed by the # key.
274 SP2 Call Forward on Busy – Enable /
Disable
• Press 0 to repeat the information.
• Press 1 to enter a new value.
• Press 2 to set the default value.
• Press # to enter another configuration menu
selection.
275 SP2 Call Forward on Busy Number • Press 0 to repeat the information.
• Press 1 to enter a new value.
• Press 2 to set the default value.
• Press # to enter another configuration menu
selection.
276 SP2 Call Forward on No Answer – Enable /
Disable
• Press 0 to repeat the information.
• Press 1 to enter a new value.
• Press 2 to set the default value.
• Press # to enter another configuration menu
selection.
277 SP2 Call Forward on No Answer Number • Press 0 to repeat the information.
• Press 1 to enter a new value.
• Press 2 to set the default value.
• Press # to enter another configuration menu
selection.
SP2 Configuration Settings (continued)
Menu Selection Setting Description

IVR-Based Local Configuration
22
OBiTALK Service Options
Menu Selection Setting Description
900 Enable OBiTALK Service Current OBiTALK service value.
• Press 0 to repeat the information.
• Press 1 to enter a new value.
• Press 2 to set the default value.
• Press # to enter another configuration menu
selection.
901 Registration State of OBiTALK OBiTALK registration state.
• Press 0 to repeat the information.
• Press # to enter another configuration menu
selection.
967 OBiTALK Block Caller ID Enable • Press 0 to repeat the information.
• Press 1 to enter a new value.
• Press 2 to set the default value.
• Press # to enter another configuration menu
selection.
968 OBiTALK Block Anonymous Call Enable • Press 0 to repeat the information.
• Press 1 to enter a new value.
• Press 2 to set the default value.
• Press # to enter another configuration menu
selection.
972 OBiTALK Call Forward ALL – Enable /
Disable
• Press 0 to repeat the information.
• Press 1 to enter a new value.
• Press 2 to set the default value.
• Press # to enter another configuration menu
selection.
973 OBiTALK Call Forward ALL Number • Press 0 to repeat the information.
• Press 1 to enter a new value.
• Press 2 to
set the default value.
• Press # to enter another configuration menu
selection.
974 OBiTALK Call Forward on Busy – Enable /
Disable
• Press 0 to repeat the information.
• Press 1 to enter a new value.
• Press 2 to set the default value.
• Press # to enter another configuration menu
selection.
975 OBiTALK Call Forward on Busy Number • Press 0 to repeat the information.
• Press 1 to enter a new value.
• Press 2 to set the default value.
• Press # to enter another configuration menu
selection.

IVR-Based Local Configuration
23
Additional IVR Operation Options
Many IVR operations options are defined in Menus 1 – 9. There are many other operations available to be
programmed into your phone—for example, options for syslog, WAN configuration, and Service Provider
configuration. Additional IVR operations options are accessible through Menu 0.
This section provides the full list of additional operations you can program into your phone’s IVR keys.
Note: Unlike the options in Menus 1 – 9, the options in Menu 0 are not announced.
To access additional IVR operation options:
1 Enter * * * 0 #.
2 Enter the IVR operations option number, followed by #.
3 Follow any additional prompts, as desired.
4 When prompted, enter the number of the operations option, followed by #.
To see the full list of IVR operations options available in Menu 0, refer to the VXX OBi Edition Technical
Reference Guide.
976 OBiTALK Call Forward on No Answer –
Enable / Disable
• Press 0 to repeat the information.
• Press 1 to enter a new value.
• Press 2 to set the default value.
• Press # to enter another configuration menu
selection.
977 OBiTALK Call Forward on No Answer
Number
• Press 0 to repeat the information.
• Press 1 to enter a new value.
• Press 2 to set the default value.
• Press # to enter another configuration menu
selection.
OBiTALK Service Options (continued)
Menu Selection Setting Description

IVR-Based Local Configuration
24
Syslog IVR Operation Options
Selection
(Always
Press “#”
After
Entering
Selection)
Announcement What Can You Do?
1 Firmware Version
Reads the current value of the firmware
version.
Press 0 to repeat the information.
Press # to enter another configuration selection.
2 IVR Password
Reads the current value of the IVR password.
Press 1 to enter a new value.
Press 2 to set the default value.
Press 0 to repeat the information.
Press # to enter another configuration selection.
3 Debug Level
Reads the current value of the debug level.
Press 1 to enter a new value.
Press 2 to set the default value.
Press 0 to repeat the information.
Press # to enter another configuration selection.
4 Syslog Server IP Address
Reads the current IP address of the syslog
server.
Press 1 to enter a new value.
Press 2 to set the default value.
Press 0 to repeat the information.
Press # to enter another configuration selection.
5 Syslog Server Port
Reads the current value of the syslog server
port.
Press 1 to enter a new value.
Press 2 to set the default value of 514.
Press 0 to repeat the information.
Press # to enter another configuration selection.
WAN Settings Options
Selection
(Always
Press “#”
After
Entering
Selection)
Announcement What Can You Do?
20 DHCP Configuration
Reads the current value of the DHCP
configuration.
Press 1 to enter a new value.
Press 2 to set the default value.
Press 0 to repeat the information.
Press # to enter another configuration selection.
21 IP Address
Reads the current value of the IP address.
Press 1 to enter a new value.
Press 2 to set the default value.
Press 0 to repeat the information.
Press # to enter another configuration selection.

IVR-Based Local Configuration
25
22 Default Gateway
Reads the current value of the default internet
gateway.
Press 1 to enter a new value.
Press 2 to set the default value.
Press 0 to repeat the information.
Press # to enter another configuration selection.
23 Subnet Mask
Reads the current value of the subnet mask.
Press 1 to enter a new value.
Press 2 to set the default value.
Press 0 to repeat the information.
Press # to enter another configuration selection.
24 DNS Server (Primary)
Reads the current value of the primary DNS
server.
Press 1 to enter a new value.
Press 2 to set the default value.
Press 0 to repeat the information.
Press # to enter another configuration selection.
26 NTP Server (Primary)
Reads the current value of the primary NTP
server.
Press 1 to enter a new value.
Press 2 to set the default value.
Press 0 to repeat the information.
Press # to enter another configuration selection.
SP1 Options
Selection
(Always
Press “#”
After
Entering
Selection)
Announcement What Can You Do?
100 Enable Service Provider One (SP1)
Reads the current value.
Press 1 to enter a new value.
Press 2 to set the default value.
Press 0 to repeat the information.
Press # to enter another configuration selection.
101 Registration State of SP1
Reads the current value.
Press 0 to repeat the information.
Press # to enter another configuration selection.
102 SP1 User ID
Reads the current value.
Press 1 to enter a new value.
Press 2 to set the default value.
Press 0 to repeat the information.
Press # to enter another configuration selection.
WAN Settings Options (continued)
Selection
(Always
Press “#”
After
Entering
Selection)
Announcement What Can You Do?

IVR-Based Local Configuration
26
167 SP1 Block Caller ID Enable Press 1 to enter a new value.
Press 2 to set the default value.
Press 0 to repeat the information.
Press # to enter another configuration selection.
168 SP1 Block Anonymous Call Enable Press 1 to enter a new value.
Press 2 to set the default value.
Press 0 to repeat the information.
Press # to enter another configuration selection.
172 SP1 Call Forward ALL – Enable / Disable Press 1 to enter a new value.
Press 2 to set the default value.
Press 0 to repeat the information.
Press # to enter another configuration selection.
173 SP1 Call Forward ALL Number Press 1 to enter a new value.
Press 2 to set the default value.
Press 0 to repeat the information.
Press # to enter another configuration selection.
174 SP1 Call Forward on Busy – Enable / Disable Press 1 to enter a new value.
Press 2 to set the default value.
Press 0 to repeat the information.
Press # to enter another configuration selection.
175 SP1 Call Forward on Busy Number Press 1 to enter a new value.
Press 2 to set the default value.
Press 0 to repeat the information.
Press # to enter another configuration selection.
176 SP1 Call Forward on No Answer – Enable /
Disable
Press 1 to enter a new value.
Press 2 to set the default value.
Press 0 to repeat the information.
Press # to enter another configuration selection.
177 SP1 Call Forward on No Answer Number Press 1 to enter a new value.
Press 2 to set the default value.
Press 0 to repeat the information.
Press # to enter another configuration selection.
SP1 Options (continued)
Selection
(Always
Press “#”
After
Entering
Selection)
Announcement What Can You Do?

IVR-Based Local Configuration
27
SP2 Options
Selection
(Always
Press “#”
After
Entering
Selection)
Announcement What Can You Do?
200 Enable Service Provider Two (SP2)
Reads the current value.
Press 1 to enter a new value.
Press 2 to set the default value.
Press 0 to repeat the information.
Press # to enter another configuration selection.
201 Registration State of SP2
Reads the current value.
Press 0 to repeat the information.
Press # to enter another configuration selection.
202 SP2 User ID
Reads the current value.
Press 1 to enter a new value.
Press 2 to set the default value.
Press 0 to repeat the information.
Press # to enter another configuration selection.
267 SP2 Block Caller ID Enable Press 1 to enter a new value.
Press 2 to set the default value.
Press 0 to repeat the information.
Press # to enter another configuration selection.
268 SP2 Block Anonymous Call Enable Press 1 to enter a new value.
Press 2 to set the default value.
Press 0 to repeat the information.
Press # to enter another configuration selection.
272 SP2 Call Forward ALL – Enable / Disable Press 1 to enter a new value.
Press 2 to set the default value.
Press 0 to repeat the information.
Press # to enter another configuration selection.
273 SP2 Call Forward ALL Number Press 1 to enter a new value.
Press 2 to set the default value.
Press 0 to repeat the information.
Press # to enter another configuration selection.
274 SP2 Call Forward on Busy – Enable / Disable Press 1 to enter a new value.
Press 2 to set the default value.
Press 0 to repeat the information.
Press # to enter another configuration selection.
275 SP2 Call Forward on Busy Number Press 1 to enter a new value.
Press 2 to set the default value.
Press 0 to repeat the information.
Press # to enter another configuration selection.

IVR-Based Local Configuration
28
276 SP2 Call Forward on No Answer – Enable /
Disable
Press 1 to enter a new value.
Press 2 to set the default value.
Press 0 to repeat the information.
Press # to enter another configuration selection.
277 SP2 Call Forward on No Answer Number Press 1 to enter a new value.
Press 2 to set the default value.
Press 0 to repeat the information.
Press # to enter another configuration selection.
OBiTALK Service Options
Selection
(Always
Press “#”
After
Entering
Selection)
Announcement What Can You Do?
900 Enable OBiTALK Service
Reads the current value.
Press 1 to enter a new value.
Press 2 to set the default value.
Press 0 to repeat the information.
Press # to enter another configuration selection.
901 Registration State of OBiTALK
Reads the current value.
Press 0 to repeat the information.
Press # to enter another configuration selection.
967 OBiTALK Block Caller ID Enable Press 1 to enter a new value.
Press 2 to set the default value.
Press 0 to repeat the information.
Press # to enter another configuration selection.
968 OBiTALK Block Anonymous Call Enable Press 1 to enter a new value.
Press 2 to set the default value.
Press 0 to repeat the information.
Press # to enter another configuration selection.
972 OBiTALK Call Forward ALL – Enable / Disable Press 1 to enter a new value.
Press 2 to set the default value.
Press 0 to repeat the information.
Press # to enter another configuration selection.
SP2 Options (continued)
Selection
(Always
Press “#”
After
Entering
Selection)
Announcement What Can You Do?

IVR-Based Local Configuration
29
973 OBiTALK Call Forward ALL Number Press 1 to enter a new value.
Press 2 to set the default value.
Press 0 to repeat the information.
Press # to enter another configuration selection.
974 OBiTALK Call Forward on Busy – Enable /
Disable
Press 1 to enter a new value.
Press 2 to set the default value.
Press 0 to repeat the information.
Press # to enter another configuration selection.
975 OBiTALK Call Forward on Busy Number Press 1 to enter a new value.
Press 2 to set the default value.
Press 0 to repeat the information.
Press # to enter another configuration selection.
976 OBiTALK Call Forward on No Answer – Enable
/ Disable
Press 1 to enter a new value.
Press 2 to set the default value.
Press 0 to repeat the information.
Press # to enter another configuration selection.
977 OBiTALK Call Forward on No Answer Number Press 1 to enter a new value.
Press 2 to set the default value.
Press 0 to repeat the information.
Press # to enter another configuration selection.
Auto Attendant Options
Selection
(Always
Press “#”
After
Entering
Selection)
Announcement What Can You Do?
80 Enable / Disable Auto Attendant. Press 1 to enter a new value.
Press 2 to set the default value.
Press 0 to repeat the information.
Press # to enter another configuration selection.
OBiTALK Service Options (continued)
Selection
(Always
Press “#”
After
Entering
Selection)
Announcement What Can You Do?

Polycom, Inc. 30
Device Configuration Web Pages
The following table lists all the settings available from device configuration web pages.
Device Configuration Web Pages
Configuration Page Available Settings
Status System Status
Call Status
Call History
SP Services Stats
OBiWiFi Configuration Wi-Fi Settings
Wi-Fi Access Points
System Management WAN Settings
Auto Provisioning
Device Admin
Device Update
Service Providers ITSP Profile A (repeated for ITSP Profile B, C, D, E, and F)
• General
• SIP
• RTP
Voice Services SP1 Service
SP2 Service
SP3 Service
SP4 Service
SP5 Service
SP6 Service
OBiTALK Service
Auto Attendant
Gateways and Trunk Groups

Polycom, Inc. 31
Disabling or Protecting Phone Web Pages
Access
The computer where the web browser runs on in this case is usually on the same LAN as the phone. Here,
security is usually not a big concern as long as the LAN is secured from public ‘hostile’ networks. Obviously,
this is not the preferred method for a service provider to manage a deployed phone. In fact, most service
providers would rather disable this capability on the phone so that the end user cannot tamper with its
configuration. However, a service provider may still use the phone web page in a lab environment when
initially experimenting with the phone parameter settings for eventual locked-down remote
mass-provisioning or to prepare a phone before it is shipped out to an end-user, then switch to remote
provisioning after deploying the unit.
IP Phone Phone Settings
Left Line Keys
Right Line Keys — on right side of phone screen (available only on VVX 450, OBi
Edition)
Programmable Keys
Side Car 1
Side Car 2
LED Settings
Side Car 1
Side Car 2
Softkeys Keys
LDAP
Line Key Customization
Screen Item Customization
Codec Profiles Codec Profile A
Codec Profile B
Tone Settings Tone Profile A
Tone Profile B
Ring Settings Ring Profile A
Ring Profile B
Star Codes Star Code Profile A
Star Code Profile B
User Settings User Preferences
Speed Dials
User Defined Digit Maps
Device Configuration Web Pages (continued)
Configuration Page Available Settings

32
Service Providers
Use the following information for SIP-based configurations. Each ITSP configuration is grouped together as
an ITSP profile. OBi devices refer to them as ITSP Profile A through ITSP Profile H.
Voice Services:
● SP1–8
● OBiTALK
SIP Service Provider Features
You can configure up to four SIP accounts or SIP Trunks on your system. For the purposes of this guide and
elsewhere on the system web interface, documentation, and the OBiTALK portal, the term ITSP describes
the logical entity providing the SIP Trunk service to your system. When your system is used with an IP PBX,
the IP PBX takes the place of the ITSP if it’s the entity providing the SIP Trunk account credential and
connectivity to your system.
Each ITSP configuration is grouped together as an ITSP Profile, referred to as ITSP Profiles A through H.
The SP service account specifics are grouped under the heading SPn Service, where n = 1–8. An ITSP
Profile includes such parameters as ProxyServer, OutboundProxy, and DigitMap, but doesn’t include
account-specific parameters. An SP Service includes account-specific parameters such as AuthUserName
(usually the phone number of the account), AuthPassword, CallerIDName, and X_ServProfile
(which ITSP Profile to assume). If the SP Services use the same ITSP, then only one ITSP Profile needs to
be configured with all SP Services referred to the same profile.
From your system’s point of view, the SPn Service using ITSP Profile X is enabled with the following minimal
settings:
● ITSP Profile X – SIP::ProxyServer = Not Blank
● SPn Service::Enabled = Yes
● SPn Service::AuthUsername = Not Blank
where X = A–H and n = 1–8. Otherwise, the service is considered to be disabled.
Use SPn as a Proxy for a SIP IP Phone
An SP service can be set up as a proxy for a legacy IP phone to let the phone access OBiTALK on your
system. This proxy mode of operation must be explicitly enabled in the SP ‘s configuration on your system.
It’s disabled by default. The IP phone using this proxy service is the local_client of the SP service. It must
be installed on the LAN side of your system.
In this mode, SPn accepts SIP Registration from the client system from the LAN side, which must use the
same user-id and password as this SPn’s AuthUserName and AuthPassword parameters for

Service Providers
33
authentication. This client system can also send SIP INVITE to your system at this SP to make calls. This
SP’s InboundCallRoute must be set up with the proper routing rule to handle calls from the local_client.
Send the SIP Proxy Server parameter on the client system to:
<obi-number>.pnn.obihai.com:<spn-user-agent-port>
where <obi-number> is the 9-digit OBi number of this system, and <spn-user-agent-port> is SPn’s
X_UserAgentPort parameter.
For example, SP1 has a local_client with the user-id 4086578118. The client wishes to make and receive
calls on SP3. The SP1 InboundCallRoute shall include the following rule:
{4086578118>:sp3}
The SP3 InboundCallRoute shall be: {sp1(408657118@local_client)}
For more information on SPn services parameters and OBiTALK calling features parameters, see the D230
Parameter Reference Guide.

34
Network Settings
You can control how your OBi device accesses the web and your network.
Default DHCP Settings
When you initialize a network connection to a configuration server, your device extracts DHCP Option 160
from a DHCP offer by default.
Your device also prioritizes DHCP Option 160 ahead of other options in the
ConfigURL
parameter using the
following parameters and macros:
● Option 160 is added to the System Management > WAN Settings > DHCP Client
Settings::
ExtraOptions
parameter.
● The System Management > Auto Provisioning > ITSP Provisioning::
ConfigURL
parameter
includes the $
DHCPOPT160/$MAC.xml;$DHCPOPT160/$DM.xml;$DHCPOPT160;
tftp://$DHCPOPT66/$DM.xml;$DHCPOPT66/$DM.xml;$DHCPOPT66
macro string.
Don’t reconfigure these default settings.
DNS Lookup of SIP Servers
When sending out SIP requests to the server, your system looks up the IP address of the server using
standard DNS query if the server is specified as a domain name instead of an IP address. If an Outbound
Proxy Server is configured, it’s used instead of the SIP Proxy Server or SIP Registration Server. The
resolution of the server domain name into IP address is performed in the following manner:
● Try looking up the name as DNS A Record. If not found,
● Try looking up the name as DNS SRV Record. If not found,
● Try looking up the name as DNS SRV Record with “_sip._udp.“ prepended to the host name. If not
found, fail the request.
If the result from the DNS query is an SRV record, the server port is taken from that record also. The server
port value configured on your system is ignored. Otherwise, the server port is taken from the configured
value or uses port 5060 if none is specified.
DNS NAPTR Support
This feature enables DNS Name Authority Pointer (NAPTR) lookup for SIP proxy servers or outbound
proxies. Combining NAPTR with SRV records enables chaining multiple records. With NAPTR lookup, your
system can discover:
● The hosts to access the SIP service for a given domain

Network Settings
35
● The SIP transport, preference, and order of each host
● The types of DNS records to use for each listed host (SRV or A record)
The following list describes the basic NAPTR feature:
● You can enable NAPTR for each ITSP Profile.
● If enabled, the phone only attempts NAPTR lookup of the domain name specified in the
OutboundProxy parameter (if configured).Otherwise the phone uses the ProxyServer parameter
(on the corresponding ITSP Profile x – SIP web page).
The phone doesn’t fall back to perform regular DNS SRV or DNS A record lookup if NAPTR records
aren’t available.
● You can use NAPTR lookup whether or not you enable the X_ProxyServerRedundancy
parameter, although best practices are to enable the X_ProxyServerRedundancy parameter with
NAPTR lookup.
● If a NAPTR record indicates to look up the host name as an SRV record, the phone considers the
host name to be complete and doesn’t add a prefix when querying the DNS server for its SRV record,
regardless the settings of the X_DnsSrv and X_DnsSrvAutoPrefix parameters.
● When more than one UDP, TCP, or TLS options are available and all are at the same order and
preference, the phone considers UDP the highest priority, then TCP, then TLS.
● With NAPTR enabled, the phone can fail over and fall back among UDP/TCP/TLS transports or
change to a different transport based on the result of each NAPTR lookup (which is renewed at half
of TTL value from the DNS server).
This feature complies with RFC 2915.
SIP Registration
You can configure your systems to register periodically with a SIP Proxy Server or SIP Registration Server.
The SIP Proxy Server and SIP Registration Server can be different systems, although in practice they’re
usually the same. SIP Proxy Server is a required parameter that you must configure on your system. The
Registration Server is optional and assumed to be the same as the SIP Proxy Server if it isn’t configured on
your system.
The main purpose of registration is to create and maintain a dynamic binding of the SIP account to your
system’s local contact address. The service provider can also rely on this periodic message to infer if your
system is online and functional. Each system takes only one local IP address that is either statically
assigned in your system’s configuration, or dynamically obtained from a local DHCP server. The SPn
services (for n = 1 through 8) each use a different local contact port for sending and receiving SIP messages
(defaults are 5060, 5061, 5062, and 5063).
Note that dynamic address binding through periodic registration isn’t strictly necessary if the local IP address
of your system doesn’t change. Your system’s contact address can be statically configured on the
Registration Server.
Registration Period
The server determines the actual Expires value. The server may reject the REGISTER request with 423 with
a Min-Expires header value (in seconds). If that happens, your phone quickly retries with an Expires header
value equal to the Min-Expires header value from the server. When the server accepts the registration, it
replies with a 2xx response for the REGISTER and includes an Expires parameter value in the Contact

Network Settings
36
header that matches the Contact your phone uses in the REGISTER request. However, if it isn’t found in
the Contact, your phone takes the server-supplied Expires value from the Expires header of the 2xx
response. If still not found, your phone assumes the server-supplied value is 3600 seconds.
If the server-supplied Expires value is less than the Expires header value used by your phone, it takes the
server version to compute the next renewal interval. Otherwise, your phone uses its own Expires header
value to do the same.
SIP Proxy Server Redundancy and Dual
REGISTRATION
Server Redundancy specifically refers to your phone’s capability to:
● Look for a working server to REGISTER with from a list of candidates
● Switch to another server once the server that it currently registers to becomes unresponsive
Other SIP requests, such as INVITE or SUBSCRIBE, are sent to the same server that your phone currently
registers to.
If the Outbound Proxy Server is provided, server redundancy is applied to the Outbound Proxy Server
instead of the REGISTRATION server. Server redundancy behavior is enabled by enabling the ITSP Profile
X – SIP::X_ProxyServerRedundancy parameter (which is disabled by default).
Another requirement for using the server redundancy feature is that the underlying server must be
configured in your system as a domain name instead of an IP address. This allows your system to collect a
list of candidate servers based on DNS query.
The domain name can be looked up as DNS A record or DNS SRV record. For A records, all the IP
addresses returned by the DNS server are considered to have the same priority. For SRV records, the hosts
returned by the DNS server can be each assigned a different priority.
After a list of candidate servers is obtained, your system first looks for a working server according to the
stated priority. A working server means one that your system can successfully register to. This is the primary
server. Your system maintains registration with the primary server the usual way. However, if no working
server is found after traversing the entire list, your system takes a short break and repeats the search in the
same order.
While maintaining registration with the primary server, your system continually attempts to fall back to one
of the candidate servers that has higher priority than the primary server, if any. The list of candidate servers
that your system is trying to fall back on is known as the primary fallback list, which may be empty.
In addition, your system can be configured to maintain a secondary registration with a server that has lower
or equal priority than the primary server. Secondary registration can be enabled by setting the parameter
X_SecondaryRegistration to True. If X_ProxyServerRedundancy is False, however,
X_SecondaryRegistration doesn’t take any effect. If this feature is enabled, as soon as a primary
server is found, your system searches for a working secondary server in the same manner from the list of
candidate servers that are of lower or equal priority than the primary server. In the same way, once your
system finds a secondary server, it forms a secondary fallback list to continually attempt to fall back on if the
list isn’t empty.
The server shouldn’t supply explicitly or implicitly an Expires value that is larger than what your
phone has asked for, as that would be a protocol violation. Your phone, however, ignores such an
error.

Network Settings
37
You can configure the intervals for checking the primary fallback list and the secondary fallback list in the
X_CheckPrimaryFallbackInterval and X_CheckSecondaryFallbackInterval parameters.
These parameters are specified in seconds and the default value is 60 for both.
Notes:
● Existence of a secondary server implies a primary server exists.
● If the secondary server exists, it immediately becomes the primary server when the current primary
server fails. Your system then starts searching for a new secondary server if the candidate set isn’t
empty.
● The candidate list can change (be lengthened, shortened, have its priority changed, and so forth) on
every DNS renewal (based on the entry’s TTL). Your system rearranges the primary and secondary
servers and fallback lists accordingly, whichever applies.
If server redundancy is disabled, your system resolves only one IP address from the server’s domain name,
and won’t try other IP addresses if the server isn’t responding.
SIP Outbound Proxy Server
An outbound proxy server can be configured on your system such that all outbound requests are sent via
the outbound proxy server instead of directly to the SIP Proxy Server or Registration Server.
If the outbound proxy server is listening at a nonstandard port, the correct port value must be specified in
the OutboundProxyPort parameter. The OutboundProxy can use a different transport protocol from the
ProxyServer. The transport protocol to use to communicate with the OutboundProxy can be set in the
OutboundProxyTransport parameters. If OutboundProxyTransport is TCP or TLS, your system
initiates a TCP or TLS connection only with the OutboundProxy. All subsequent messages exchanged
between your system and the servers MUST use the same connection. If the connection is closed for any
reason, your system attempts to re-establish the connection with the OutboundProxy following an
exponential back-off retry pattern.
Even though your system only exchanges messages directly with the OutboundProxy, the ProxyServer,
ProxyServerPort, and ProxyServerTransport parameters are still very much relevant and
important, since the SIP requests sent by your system to the server are formed based on these values, not
based on the OutboundProxy value. The OutboundProxy value should never appear in the SIP requests
generated by your system, unless the OutboundProxy parameter has the same value as ProxyServer.
Some server implementations include the outbound proxy server in a Record-Route header such that your
system shouldn’t respect the locally configured OutboundProxy value after the initial INVITE is sent for a
new call. This behavior can be achieved by enabling the ITSP Profile X –
SIP::X_BypassOutboundProxyInCall option. However, this option has no effect when the
OutboundProxyTransport is TCP or TLS, as your system always uses the same connection to send
messages to the server.
SIP Privacy
Your system observes inbound caller privacy and decodes caller’s name and number from SIP INVITE
requests by checking the FROM, P-Asserted-Identity (PAID for short), and Remote-Party-ID (RPID for short)
message headers. All these headers can carry caller’s name and number information.

Network Settings
38
If PAID is present, the device takes the name and number from it. Otherwise, it takes the name and number
from RPID if it’s present, or from the FROM header otherwise. RPID, if present, includes the privacy setting
desired by the caller. This privacy can indicate one of the following options:
● off = no privacy requested. The device shows name and number.
● full = full privacy requested. The device hides both name and number.
● name = name privacy requested. The device shows the number but hides the name.
● uri = uri privacy requested. The device shows the name but hides the number.
Regardless, if PAID exists or not, the device always takes the privacy setting from the RPID if it’s present in
the INVITE request. Note that if the resulting caller name is “Anonymous” (case-insensitive), device treats
it as if the caller is requesting full privacy.
For outbound calls, the caller’s preferred privacy setting can be stated by the device in an RPID header of
the outbound INVITE request. To enable this behavior, the ITSP Profile X –
SIP::X_InsertRemotePartyID parameter must be set to True, which is the default value of this
parameter. The device supports only two outbound caller privacy settings: privacy=off or privacy=full. The
RPID header generated by the device carries the same name and number as the FROM header. If outbound
caller-ID is blocked, the device sets privacy=full in RPID, and also sets the display name in the FROM and
RPID headers to “Anonymous” for backward compatibility. The device won’t insert PAID in outbound INVITE
requests.
You can further instruct your phone to use sip:anonymous@localhost in the FROM header by enabling
the option X_UseAnonymousFROM (that is, in this case your phone uses From: “Anonymous”
<sip:anonymous@localhost>).
Your phone also includes a Privacy: id header if X_InsertPrivacyHdr is also enabled.
NAT Traversal Considerations
If your phone sits behind a NAT router, it can discover the mapped external address corresponding to its
local SIP contact address as seen by the serverin one of the following ways:
● From the “received=” and “rport=” parameters of the VIA header of the REGISTER response sent by
the server. These two parameters tell your system its mapped IP address and port number. Your
system uses this method if you’ve enabled periodic registration on your system.
● From the response to a STUN binding request your system sent to a STUN server. This method is
used by enabling X_KeepAliveEnable and setting X_KeepAliveMsgType to stun. The
keep-alive messages are sent to the same server where a REGISTER request would be sent.
● From the value of theX_PublicIPAddress parameter. Your system always uses the mapped
external contact address in all outbound SIP requests instead of its local contact address if one is
discovered by either method when the ITSP Profile X – SIP::X_DiscoverPublicAddress option
is also enabled. The substitution of private addresses with public addresses applies to the Contact
header of any SIP requests and the c= line in SDP. If the option X_UsePublicIPAddressInVia is also
enabled, the Via address is also substituted. However, this usually isn’t necessary.
Your phone can also include an empty rport parameter in the Via header of outbound SIP requests if the
option ITSP Profile X – SIP::X_UseRport option is enabled. This parameter is sometimes needed to
prompt the server to insert an rport parameter value in the response. It should also prompt the server to
send the response to the port where the request originated from (that is, according to the source port of the
IP header of the packet). However, as such behavior on the server is considered standard by many, the
empty rport parameter has become superfluous in practice.

Network Settings
39
STUN and ICE
Your system supports standard STUN based on RFC3489 and RFC5389 for passing inbound RTP packets
to systems sitting behind NATs. The parameters that control the STUN feature are found in the ITSP Profile
X – General:: section:
● STUNEnable – Enables this feature. Default is False.
● STUNServer – The IP address or domain name of the external STUN server to use. STUN feature
is disabled if this value is blank, which is the default.
● X_STUNServerPort – The STUN Server’s listening UDP port. Default value is 3478 (standard
STUN port).
The STUN feature used in this context is only for RTP packets, not SIP signaling packets, which typically
don’t require STUN. Your device sends a STUN binding request right before making or answering a call on
SP1/2. If the request is successful, your device decodes the mapped external address and port from the
binding response and uses them in the m= and c= lines of its SDP offer or answer sent to the peer device.
If the request fails, such as STUN server not found or not responding, the call goes on without using external
address in the SDP.
Standard RTP requires the use of an even-numbered port in the m= line. If the external port isn’t an even
number, your device changes the local RTP port and redoes STUN, and continues to do this as many as
four times or until an even external port number is found. If the fourth trial still results in an odd external port
number, the call goes on without using an external address in the SDP.
Your system supports standard ICE based on RFC5245. ICE is done on a per-call basis for automatically
discovering which peer address is the best route for sending RTP packets. To enable ICE on your system,
set the ITSP Profile X – General::X_ICEEnable parameter to True. The default is False.
ICE is effective if STUN is also enabled. However, STUN not a requirement for using ICE on your device. If
STUN is enabled and an external RTP address different from its local address is discovered, your device
offers two ICE candidates in its SDP:
● The local (host) address (highest priority)
● The external (srflx or server reflexive) address
Otherwise, only the localhost candidate is shown in the device’s SDP. Note that your device uses the srflx
address in the m= and c= lines of the SDP if STUN is enabled and successful.
If ICE is enabled and the peer’s SDP has more than one candidate, your device sends STUN requests to
each peer candidate from its local RTP port. As soon as it receives a response from the highest priority
candidate, your device concludes ICE and uses this candidate to communicate with the peer. Otherwise,
your device allows as long as 5 seconds to wait for the response from all the candidates, and selects the
highest priority candidate that has a response. Once ICE completes successfully, your device further applies
symmetric RTP concept to determine the peer’s RTP address (that is, sends them to the address from which
the peer’s RTP packets are coming).
RTP Statistics – the X-RTP-Stat Header
When ending an established call, your system can include a summary of the RTP statistics collected during
the call in the SIP BYE request or the 200 response to the SIP BYE request sent by the peer system. The
summary is carried in an X-RTP-Stat header in the form of a comma-separated list of fields. The reported
fields are:
● PS = Number of Packets Sent

Network Settings
40
● PR = Number of Packets Received
● OS = Number of bytes sent
● OR = Number of bytes received
● PL = Number of packets lost
● JI = Jitter in milliseconds
● LA = Decode latency or jitter buffer size in milliseconds
● DU = Call duration in seconds
● EN = Last Encoder Used
● DE = Last Decoder Used
For example:
X-RTP-Stat:PS=1234,OS=34560,PR=1236,OR=24720,JI=1,DU=1230,PL=0,EN=G711U, DE=G711U
To enable the X-RTP-Stat feature, set the ITSP Profile X – SIP::X_InsertRTPStats parameter to True.

41
Provisioning Scripts and Macros
You can use scripts and macros when provisioning your OBi devices.
Provisioning Scripts
A provisioning script can be used in a ConfigURL and FirmwareURL parameter. A provisioning script is a
sequence of statements separated by a semicolon (;). The phone executes the statements sequentially.
Syntax:
*<SPNL> [@label 1*<SP>] [IF 1*<SP> ( 1*<SP> expr 1*<SP> ) 1*<SP>] oper [1*<SP>
args] ;
The following table provides the description of the provisioning script parameters.
Provisioning Script Parameters
Parameter Name Description
[…] An optional element in the syntax.
<SP> A white space, which can be a space (0x20) or a tab (0x09).
*<SP> Zero or more <SP>.
1*<SP> One or more <SP>.
<SPNL> A <SP> or a newline (0x0A or 0x0D) character.
*<SPNL> Zero or more <SPNL>.
@label @ (0x40) followed by a string made up of ASCII characters in the set [a-zA-Z0-9]. A label
is used with a GOTO operation: GOTO label.
IF The string IF (0x49 0x46), which must be followed by (expr). This tells the phone to
execute the following operation in the statement only if the condition specified in expr is
matched.

Provisioning Scripts and Macros
42
Notes:
● All statement syntaxes are case-sensitive.
● The maximum size of a script is 2048 bytes. If the size is too big, the script is truncated, execut
ion
may be terminated prematurely
, and behavior will be unpredictable. Please make sure your script
is
within this s
ize limit.
● You must also not have any newline character anywhere in a statement other than at the begi
nning
of
each statement.
You can use $TPRM0, $TPRM1, $TPRM2, and $TPRM3 as variables to store temporary values in a script.
However, be cautious that $TPRM0 may be used by the system to store the result of an operation and may
accidentally overwrite the value you explicitly set for it. By default, the SYNC and the FWU operations store
the result (1 for success and 0 for failure) in $TPRM0.
Provisioning Script Operations
Provisioning Script Operations
Use the following operations when writing provisioning scripts.
expr An expression enclosed in parentheses. The format of expr must be
$MacroName <SP> ComparisonOperator <SP> Value.
where:
MacroName is the name of a defined macro, such as TPRM0 or MAC.
Value can be a combination of ASCII string and macros, or a quoted string.
Examples:
• Abcde
• $DM$MAC
• abcde${MAC}.xml “abc def higjk”
It may not contain any <SP> characters except when enclosed by double quotes. The
enclosing double quotes are excluded when doing the comparison.
ComparisonOperator is one of the following relational operators:
• == (Equal)
• != (Not equal)
• >= (Greater than or equal to)
• > (Greater than)
• <= (Less than or equal to)
• < (Less than)
The definition of the relational operation follows that of the standard C library function
strcmp(char *str1, char *str2).
Oper One of the following operations: SYNC, FWU, WAIT, EXIT, GOTO, SET, CLR.
The Provisioning Script Operations
section describes these operations.
Provisioning Script Parameters
Parameter Name Description

Provisioning Scripts and Macros
43
SYNC
This operation synchronizes the phone’s profile with a profile specified by the URL. The phone downloads
the specified profile according to the URL, and then decrypts the profile. This operation can be used only in
a ConfigURL parameter, and must never be used in a FirmwareURL parameter.
Syntax:
[SYNC 1*<SP>] [-T=var 1*<SP>] [-A=crypto 1*<SP>] [-K=key 1*<SP>] [-IV=iv <SP>] URL
The following table provides the description of the provisioning script synch operation parameter.
Note that in the context of a ConfigURL parameter, the opcode SYNC is implied if omitted.
Result:
● 0 (for Failure)
● 1 (for Success)
The operation returns 0 to indicate a failure if one of the following occurs:
● An invalid URL is
specified.
● Hostnam
e in the URL cannot be resolved
.
● T
imeout while waiting for a response from the server. In case of TFTP, the phone retransm
its a
r
equest every second until a response is received. If no response is received after 30
retransmissions, it is considered a timeout. In case of HTTP and HTTPS, the server must accept the
con
nection request from the phone within 60 seconds and the profile download must be completed
within 600 seconds. Otherwise, it is considered a timeout.
● An error code is returned by the server. In case of TFTP, all non-zero error codes are considered
errors. In case of HTTP and HTTPS, all HTTP failure response codes are considered errors except
302 and 307 for redirection. The phone honors the redirection response (302 or 307) as many as five
times. Beyond that it also is considered an error.
● In case of HTTPS, the server’s SSL certificate is invalid (expired or failed verification).
● Profile has invalid format, such as malformed XML or <ParameterList> element not found.
Provisioning Script Parameters
Parameter Description
var
A TPRMx to store the result, where x = 1, 2, or 3. By default, the result is stored in TPRM0.
crypto
aes
OR
rc4
(the
crypto
to decrypt the profile). Specify
aes
for AES128 or
rc4
for RC4-128.
key
The decryption key specified as a 32-character (case insensitive) hex string, such as:
000102030405060708090a0b0c0d0e0f
In case of AES128,
key
should be 128 bits (or 16 bytes or 32 hex digits) long. It is permissible to
specify a shorter key. In this case, the phone pads the key with zeros to form a 128-bit key. For
RC4, the given key MUST be exactly 128 bits long.
iv
The IV for AES128 CBC, specified as a 32-character (case insensitive) hex string, such as
00102030405060708090a0b0c0d0e0f0
iv
is not needed for RC4. It is optional for AES. If not specified, the phone uses an all-zero string
as the IV.
URL
The URL to download the profile. HTTP, HTTPS, and TFTP schemes are supported.

Provisioning Scripts and Macros
44
Otherwise, the operation returns 1 to indicate a success. This includes the case where the profile doesn’t
update any parameters because the profile is empty or the parameters all have the same values as what
are currently stored on the phone.
Examples:
SYNC –T=TPRM1 –A=aes –K=$SPRM0 –IV=$SPRM1 http://server.mycompany.com/profile.xml
SYNC -A=rc4 -K=$SPRM1 http://192.168.15.102/2003C5-e.cfg
RPT (Report Configuration and Status)
This operation lets the phone report configuration and status to a cloud server.
The Sub Command (RPT) in ITSP ConfigURL script is used to exercise this feature.
Syntax:
[RPT 1*<SP>] [-stid=var 1*<SP>] [-A=aes 1*<SP>] [-K=key 1*<SP>] [-IV=iv <SP>]
[-z=comp] URL
The following table provides the description of the provisioning script RPT operation parameter.
In conjunction with a SYNC command, the provisioning server would be able to update profile for device to
download according to the current configuration reported by the device. The following ConfigURL example
below tells the device to report the current configuration first, then wait for 30 seconds before downloading
the profile.
RPT -stid=config -z=1 http://192.168.1.28/dev-report.php?obi=$OBN;
WAIT 30;
Script Parameters
Parameter Description
var
Type of configuration to report (config or status), where
config = Entire configuration including status (same as the backup file retrieved from webpage
without status and default values)
status = The run status only (same as the “System Status” page retrieved from device webpage)
crypto
aes
only (128-bit CBC)
key
The decryption key specified as a 32-character (case insensitive) hex string, such as:
000102030405060708090a0b0c0d0e0f
For AES128,
key
must be 128 bits (or 16 bytes or 32 hex digits) long. It is permissible to specify a
shorter key. In this case, the phone pads the key with zeros to form a 128-bit key.
iv
The IV for AES128 CBC, specified as a 32-character (case insensitive) hex string, such as
00102030405060708090a0b0c0d0e0f0
iv
is not needed for RC4. It is optional for AES. If not specified, the phone uses an all-zero string
as the IV.
URL
The URL to upload the profile. HTTP, HTTPS, and TFTP schemes are supported.
comp
Compression method (1 or 2). When omitted, no compression is performed on data, Otherwise,
use 1 for gzip file or 2 for gz compressed string.
Note: When the compression and encryption are both selected, the configuration is compressed
first before the encryption is applied. The server needs to process the data accordingly.

Provisioning Scripts and Macros
45
SYNC http://192.168.1.28/dev-profile.php?obi=$OBN
FWU (Firmware Update)
This operation lets the phone update the firmware to the one specified in the given URL. This operation can
only be used in a FirmwareURL parameter and must not be used in a ConfigURL parameter.
Syntax:
[FWU 1*<SP>] [–T=var 1*<SP>] URL
Where:
●
var
= A TPRMx to store the result, where x = 1, 2, or 3. By default, the result is stored in TPRM0
●
URL
= URL to download the firmware. HTTP and TFTP schemes are supported
Note that in the context of the FirmwareURL parameter, the opcode FWU is implied if omitted. Example:
IF ( $FWV <= 1.0.3.1626 ) FWU
http://server.mycompany.com/VVX250-1-0-3-2010-12-5.fw
In this example, the phone is updated to the firmware at the given URL only if the current firmware version
is older than 1.0.3.1626
Result:
● 0 (for Failure)
● 1 (for Success)
The operation returns 0 to indicate failure if one of the following occurs:
● An invalid URL is specified.
● Hostname in the URL cannot be resolved.
● Timeout while waiting for a response from the server. In case of TFTP, the phone retransm
its its
r
equest every second until a response is received. If no response is received after 30 retransmissions,
it is considered a timeout. In case of HTTP and HTTPS, the server must accept the connectio
n
r
equest from the phone within 60 seconds and the profile download must be completed within 600
seconds. Otherwise, it is considered a timeout.
● An error code is returned by the server. In case of TFTP, all non-zero error codes are considered an
error. In case of HTTP and HTTPS, all HTTP failure response codes are considered erro
rs except
3
02 and 307 for redirection. The phone honors the redirection response (302 or 307) as many as five
times. After that, it also is considered an error.
● In case of HTTPS, the server’s SSL certificate is invalid (expired or failed verification).
● Firmware file has invalid format.
● Firmware file doesn’t pass checksum validation. The file may be corrupted.
WAIT
Suspend the execution of the script for at least the specified duration seconds. During this time, the script
engine is considered IDLE, which means that a graceful reboot of the system can take place while the script
execution is suspended. This is the point where the script stops and lets other scripts start or resume.
Syntax:
WAIT 1*<SP> duration

Provisioning Scripts and Macros
46
Where:
duration
= the number of seconds to wait before resuming execution.
Example:
WAIT 60
Wait for 60 seconds before executing the next statement in the script.
EXIT
Stop the execution of the current script.
Syntax:
EXIT
GOTO
Change the sequence of script execution by jumping to the statement marked with the given @label.
Syntax:
GOTO 1*<SP> label
Example:
@retry IF(xxx) –T=var http://myserver.mycompany.com/obi${MAC}.xml;
IF ( $TPRM0 == 1 ) EXIT;
WAIT 60;
GOTO retry
In the example, the phone synchronizes with the profile at the given URL. Note that we also use the default
result variable TPRM0. If the profile downloads successfully when this script executes, it exits and stops
executing the task. Otherwise, it waits for 60 seconds and tries again.
SET
Set a variable to the given value
Syntax:
SET 1*<SP> TPRMx 1*<SP> = 1*<SP> value
Where:
x
= 0, 1, 2, or 3
value
= a combination of ASCII strings and macros; it must not contain any <SP> characters.
Example:
SET TPRM1 = ABC
SET TPRM3 = abcde${TPRM1}
CLR
Clear a variable.
Syntax:

Provisioning Scripts and Macros
47
CLR 1*<SP> TPRMx
Where:
x
= 0, 1, 2, or 3
Operation Error Codes
You can use the $ERR macro in a provisioning script to get the 3-digit error code for the last SYNC or FWU
operation. The following error codes are defined:
● Any HTTP failure response codes returned by the server if using HTTP or HTTPS, such as 403, 40
4,
50
3
● 801: Transmission time out
● 802: Connection time out
● 803: SSL connection time out
● 805: Too slow (can not get complete file with 10min)
● 806: Server rejects connection
● 810: Server close connection while transmission
● 815: Cannot follow http redirect (bad URL)
● 816: Being redirected more than 4 times
● 820: SSL server name doest not match
● 830: Buffer overflow (internal)
● 831: Out of memory (internal)
● 850: Invalid URL
● 851: Cannot resolve the server name as specified in the URL
● 861: Firmware checksum error
● 862: Firmware downgrade to the specified version is prohibited in the current running version
● 863: Profile is malformatted
● When using TFTP, the following codes may be reported:
500: TFTP code 0 (Unknown error)
404: TFTP code 1 (File not found)
401: TFTP code 2 (Access violation)
405: TFTP code 4 (Bad operation)
400: TFTP code 5 (Unknown TID)
200: The last operation is successful
Provisioning Script Examples
Refer to the following provisioning script examples for configuring your OBi devices.

Provisioning Scripts and Macros
48
Example 1: (FirmwareURL) Upgrade to Specific Firmware
tftp://server.myinc.com/VVX250-1-0-2-1512.fw;
Note that opcode FWU is implied in this simple case.
Example 2: (ConfigURL) Sync to a Specific Profile
http://server.myinc.com/$DM-generic.cfg;
Note that opcode SYNC is implied in this simple case.
Example 3: (FirmwareURL) Upgrade to Specific Firmware -
Current Version
The phone updates to firmware version 1.0.2.1512 if its current version is older than that. Otherwise it
updates to firmware version 1.0.3.1719 if its current version is older than that. In case the upgrade fails, the
phone retries in 60 seconds. Note that the phone reboots if it updates to version 1.0.2.1512. On bootup, it
runs the same script again and updates to 1.0.3.1719.
@start SET TPRM2 = 2;
IF ( $FWV < 1.0.2.1512) FWU -T=TPRM2 tftp://server.myinc.com/VVX250-1-0-2-1512.fw;
IF ( $TPRM2 == 1 ) EXIT;
IF ( $TPRM2 == 0 ) GOTO error;
IF ( $FWV < 1.0.3.1719 ) FWU -T=TPRM2
tftp://server.myinc.com/VVX250-1-0-3-1719.fw; IF ( $TPRM2 != 0) EXIT;
@error WAIT 60;
GOTO start;
Example 4: (ConfigURL) Download with Two Profiles
Sequentially
The phone downloads the two given profiles in succession. The changes apply only when the entire script
is completed.
SYNC http://server.myinc.com/$DM-generic.cfg; SYNC
http://server.myinc.com/$DSN.cfg
Example 5: (ConfigURL) Retry Sync with Exponential
Back-Off
The phone attempts to download the given profile as many as four times until successful. It waits twice as
long as before on each retry, starting with 30 seconds. When it fails after four tries, it waits for an hour before
retrying from the beginning again.
SET TPRM1 = 0;
@start SYNC http://server.myinc.com/$DM-generic.cfg;
IF ( $TPRM0 == 1 ) EXIT;
IF ( $TPRM1 == 3 ) SET TPRM1 = 4;

Provisioning Scripts and Macros
49
IF ( $TPRM1 == 2 ) SET TPRM1 = 3;
IF ( $TPRM1 == 1 ) SET TPRM1 = 2;
IF ( $TPRM1 == 0 ) SET TPRM1 = 1;
IF ( $TPRM1 == 1 ) WAIT 30;
IF ( $TPRM1 == 2 ) WAIT 60;
IF ( $TPRM1 == 3 ) WAIT 120;
IF ( $TPRM1 == 4 ) SET TPRM1 = 0;
IF ( $TPRM1 == 4 ) WAIT 3600;
GOTO start;
Script Execution Model
Each provisioning script stored in the phone (ConfigURL and FirmwareURL) has its own execution thread
with an internal execution state. The execution state can be either:
● Idle: The script isn’t running at the moment and isn’t about to start.
● Ready:
The script can start or resume as soon as no other threads are running.
● Runn
ing: The script execution is active.
● Suspended: The script execution is suspended (inside a WAIT operation).
When a script is about to start, its thread goes from the Idle state to the Ready state. Once the system has
determined that the Ready thread can run, it transitions to the Running state. Then it goes from Running to
Suspended state when it hits a WAIT operation, or back to Idle when it hits an EXIT operation or the end of
script. It can go from Suspended to Ready state when the WAIT timer expires.
A script can be configured to run just once at boot up, or in addition, to run periodically afterwards at regular
intervals (such as once every hour). When it’s time for the thread to run, the execution state goes from Idle
to Ready. When the system boots up, the system executes a WAIT operation on behalf of each script with
a nonzero random delay. Therefore all scripts are in the Suspended state when the system starts. The
random delay is in the range of 0 to 30 seconds for the FirmwareURL script and in the range of 30 to 90
seconds for the ConfigURL script. In other words, the FirmwareURL script is guaranteed to run first.
By design no more than one script execution thread can assume the Running state at any time. When the
current Running thread goes to Idle or Suspended state, the system picks one of Ready threads to run. If
there are more than one Ready threads, the FirmwareURL script has priority over the ConfigURL script.
The phone’s provisioning engine is considered busy any time when there is at least one script execution
thread is Running. Otherwise, it’s considered idle. If the provisioning engine is busy, a request to gracefully
reboot the system (for any reason) is postponed until the engine becomes idle again.
Note that there can be two ConfigURL scripts defined in the phone, one for ITSP provisioning and one for
OBiTALK provisioning. The ITSP provisioning ConfigURL script has higher priority over the OBiTALK
provisioning ConfigURL script.
Macros
The OBi Edition enables you to use macros when provisioning your phones, which speeds and simplifies
the process.

Provisioning Scripts and Macros
50
Parameter Macro Expansion
You may specify parts of or the entire value of a parameter with parameter macros. A parameter macro has
the general format $NAME or ${NAME}, where NAME is the name of a defined macro. Macro names are
case-sensitive. The curly braces
{}
are optional except when the name is followed by a character in the set
[a-zA-Z0-9]. For example, the macro $MAC represents the MAC address of the current device, and it can
be used as part of a parameter value, such as:
ConfigURL = http://ps.abc.com/obi${MAC}.xml
The macro is expanded by the device with the actual value it represents when the parameter value is loaded.
If the macro name is undefined, the macro name is used as-is, including the $ and any enclosing braces.
Macros help to keep the device profile more generic so that the same profile may be applied to all units.
Note that some macros may be used in specific parameters only, while others may be used in all
parameters.
The following table lists the macros currently defined with the given properties, where:
● Value – The value in which the macro is expanded.
● ExpandIn – The parameter in which the macro can be used – ANY means it can be used in an
y
p
arameter.
● Script – Whether the value of the macro can be changed when used in a Provisioning
Script
(C
onfigURL).
● Web – Whether the value of the macro is shown on the device web page.
● Provisioning – Whether the value of the macro can be changed by provisioning.
Currently Defined Macros
Macro Name Value ExpandIn Script Web Provisioning
MAC MAC address in uppercase, such as
9CADEF000000
ANY N Y N
MACC MAC address in uppercase with colons,
such as 9C:AD:EF:00:00:00
ANY N N N
mac MAC address in lowercase, such as
9cadef000000
ANY N N N
macc MAC address in lowercase with colons,
such as 9c:ad:ef:00:00:00
ANY N N N
FWV F/W version, such as 6.3.0.15058 ANY N Y N
HWV H/W version, such as 1.0 ANY N Y N
IPA Device IP Address, such as
192.168.15.100
ANY N Y N
DM Device Model Name, such as VVX450 ANY N Y N
DMN Device Model Number, such as 450 ANY N Y N
OBN Device OBi Number, such as
723822495
ANY N Y N

Provisioning Scripts and Macros
51
User-Defined Macros
In addition to the predefined macros, the configuration can specify as many as 32 user-defined macros.
These macros are named $UDM0, $UDM1, $UDM2, …, $UDM31. Only $UDM0 to $UDM3 are accessible from
DSN Device S/N, such as 64167F3A539F ANY N Y N
DHCPOPT66 Option 66 offered by the DHCP server ANY N N N
SPRM0 to
SPRM7
X_DeviceManagement.
ITSPProvisioning.SPRM0
to
X_DeviceManagement.
ITSPProvisioning.SPRM7
X_DeviceManagem
ent.ITSPProvisioni
ng.ConfigURL
and
X_DeviceManagem
ent.FirmwareUpdat
e.FirmwareURL
YNY
GPRM0 to
GPRM7
X_DeviceManagement.
ITSPProvisioning.GPRM0
to
X_DeviceManagement.
ITSPProvisioning.GPRM7
X_DeviceManagem
ent.ITSPProvisioni
ng.ConfigURL
and
X_DeviceManagem
ent.FirmwareUpdat
e.FirmwareURL
YYY
TPRM0 to
TPRM3
X_DeviceManagement.ITSPProvision
ing.TPRM0
to
X_DeviceManagement.ITSPProvision
ing.TPRM3
X_DeviceManagem
ent.ITSPProvisioni
ng.ConfigURL
and
X_DeviceManagem
ent.FirmwareUpdat
e.FirmwareURL
YYY
UDM0 to
UDM3
X_DeviceManagement.X_UserDefine
Macro.0.Value
to
X_DeviceManagement.X_UserDefine
Macro.3.Value
X_DeviceManagem
ent.X_UserDefineM
acro.0.ExpandIn
to
X_DeviceManagem
ent.X_UserDefineM
acro.3.ExpandIn
YYY
UDM4 to
UDM31
X_DeviceManagement.
X_UserDefineMacro.4.Value
to
X_DeviceManagement.
X_UserDefineMacro.31.Value
X_DeviceManagem
ent.X_UserDefineM
acro.4.ExpandIn
to
X_DeviceManagem
ent.X_UserDefineM
acro.4.ExpandIn
YNY
Currently Defined Macros
Macro Name Value ExpandIn Script Web Provisioning

Provisioning Scripts and Macros
52
the device web page. The rest are hidden, and can be changed only by provisioning. To define a user macro,
specify its properties in the corresponding object parameters as shown in the following table:
As an example, for the phone to request configuration from a provisioning server using HTTP, and for this
HTTP request to include a request parameter that is a 4-digit code stored in Speed Dial #99 by a new
subscriber, you can set up $UDM0 for this according to the following table:
Note: The new subscriber may enter a random code, say 8714, ZTP into speed dial 99 by dialing the
following star code sequence from a connected phone: *74 99 8714#. The subscriber may find out
information about this process on the ITSP’s web site that also generates the 4-digit random code to be
stored in Speed Dial 99. The example parameter shown here may be preinstalled in the phone as part of its
ZTP profile. Subsequent provisioning of the device may clear the Speed Dial to prepare for normal usage
by the subscriber.
User-Defined Macros
UDMx Parameters,
x = 0, 1, 2, …, 3 Description
X_DeviceManagement.
X_UserDefineMacro.x.Value
The value can be any plain text or a valid canonical parameter name
preceded by a $ sign. For example:
$X_DeviceManagement.WebServer.Port
Note: Here you MUST NOT enclose the parameter name following the $ sign
with braces or parentheses.
X_DeviceManagement.
X_UserDefineMacro.x.ExpandIn
This is a comma-separated list of canonical parameter names, where the
macro expansion can be used. As many as three parameter names may be
specified. Specify ANY to allow the macro to expand in any parameter.
Example:
X_DeviceManagement.HTTPClient.UserAgent
Note: There is no $ sign in front of the parameter name. The macros may not
be used in any parameter value if this value is set to blank (the default).
$UDM0 Settings
Parameter Name Value
X_DeviceManagement.X_UserDefineMacro.0.Value $SpeedDial.99
X_DeviceManagement.X_UserDefineMacro.0.Expan
dIn
X_DeviceManagement.ITSPProvisioning.ConfigURL
X_DeviceManagement.ITSPProvisioning.ConfigURL http://prov.myitsp.com/obi${mac}-signup.x
ml?code=${UDM0}

53
Call Routing
Call routing is the process your system uses to set up a call bridge or an endpoint call based on information
like the trunk on which the call originates, the caller’s number, and the called number.
From your system’s perspective, calls originated from the trunk side are considered inbound calls, while
calls originated from an endpoint are outbound calls.
Call routing rules are parameters that instruct your system how to route calls. A call can transform into a call
bridge or an endpoint call after being routed by your system according to the given routing rules. The call
routing rule syntaxes for inbound calls and outbound calls are slightly different.
Call routing rule configuration relies heavily on digit maps. If you aren’t familiar with how digit maps work,
see Digit Map Configuration
.
Basic Incoming Call Handling
For each incoming call from a specific trunk, your phone handles the call in the following order:
● Ignore/reject the call if the trunk is disabled.
● Forward the call if native per-line.
● Call Forward Unconditional feature is enabled on the service.
● Apply Busy Treatment to the call if native per-line Do Not Disturb feature is enabled on the service.
● Apply Busy Treatment to the call if the number of existing calls on the trunk exceeds the limit set for
the service.
● Apply the rules in the InboundCallRoute parameter of the service to determine where to send the
call. A common destination for an incoming call is ph (to ring your phone).
Note the following:
● Busy Treatment refers to whether to reject/ignore the call or apply native per-line Call Forward On
Busy if the feature is enabled on the service.
● When it comes to reject/ignore a call, the decision whether to reject or ignore is based on the service.
● You can configure InboundCallRoute to enable your phone for complex call handling. For
example:
Ring the phone, the AA, and one or more cell phone numbers via SPn simultaneously. Whoever
answers first takes the call.
If the caller number ends in 4281234 or 3357, ring the AA and a cell phone number
simultaneously.

Call Routing
54
Inbound Call Route Configuration
Every trunk has a corresponding InboundCallRoute parameter in your system configuration. It’s a
comma-separated list of rules where each rule is also surrounded by a pair of curly braces {}. No extra
white space is allowed. These rules tell your device how to handle an inbound call, such as sending it to the
handset and ringing any attached phones.
By default, the Voice Services – SPn Service – X_InboundCallRoute parameter specifies the handset on
which an incoming call rings.
The general format is:
InboundCallRoute:= rule OR {rule},{rule},….
Note that the curly braces can be omitted if only one rule is in the route. The OR operator isn’t part of the
parameter syntax. It’s used here to separate alternative values only.
A rule has the following format:
rule := peering-list : terminal-list
The following table shows the rule formats.
General notes:
Rule Formats
Rule Format Notes
peering-list : peering,peering,… Comma-separated list of 0 or more peering
objects.
terminal-list : terminal,terminal,…. Comma-separated list of 0 or more
terminal objects.
peering : caller-list > callee-list
caller-list : caller|caller|caller|… Vertical bar-separated list of 0 or more
caller objects.
callee-list : callee|callee|callee| … Vertical bar-separated list of 0 or more
callee objects.
caller : number OR embedded-digit-map OR ?
OR @
? = anonymous, @ = any number but
anonymous.
callee : number OR embedded-digit-map OR @
terminal : SPx(arg) OR PPx(arg) arg object is optional.
arg : cid > target
x : 1 OR 2 OR 3… Where applicable. Can be omitted if x = 1.
cid : spoofed-caller-number OR $1
target : number-to-call OR $2
embedded-digit-
map :
(Mlabel) OR digit-map

Call Routing
55
● Terminal-list can be empty, which means to block this call. The preceding ‘:’ can’t be omitted.
As many as four terminals can be specified in the list. The listed terminals are called/rung by th
e
de
vice simultaneously. This operation is known as forking the call. A terminal can be a trunk or
an
e
ndpoint.
● Abbreviated terminal names are case-insen
sitive.
● Number a
nd number-to-call are literal strings, such as 14089991234
.
● Digit-m
ap is just any proper digit map, such as (1xxx|xx.). Make sure to include the enclosing
parenthese
s.
● Spoofed
-caller-number is a literal string, such as 14081112233, to be used as the ca
ller
nu
mber for making a new call on the specified trun
k.
● (Mlabel
) is a named digit map, where label is the abbreviated name of any terminal that ha
s a
d
igit map defined: SP1, SP2, SP3, SP4, SP5, SP6, SP7 and SP8
.
● $1 is an
internal variable containing the value of the caller number of this inbound call, after an
y digit
ma
p transformation in the matched caller object of the matched peering object in the peering-
list.
● $2
is an internal variable containing the called number of this inbound call, after any digit m
ap
tr
ansformation in the matched callee object of the matched peering object in the peering-
list.
Notes
on peering-list and peering objects:
● Peering-list is optional in InboundCallRoute. If the peering-list is empty, the succeeding ‘:’ can
be omitted also. An empty peering-list implies a single peering object whose caller object list matches
any caller number. That is, the following InboundCallRoutes are all equivale
nt:
dt1
{dt}
{:dt}
{?|@>@:
dt}
● Callee-list in a peering object can be empty. It implies the callee object @, meaning any calle
d
n
umber. The preceding ‘>’ can be omitted if callee-list is empty.
● Caller-list in a peering object can be empty. It implies the caller-list @|?, meaning any calle
r
nu
mber including anonymous. The succeeding ‘>
’ can’t be omitted if caller-lis
t is empty but not
the call
ee-list
.
Notes on
the arg, cid, and target objects:
● The cid object inside an arg object is optional. If omitted, it implies no caller-ID spoofing when
making the call on the specified trunk. The succeeding ‘>’ can be omitted is cid is
omitted.
● Th
e target object inside an arg object is optional. If omitted, it implies the target $2, which means
to
call the o
riginal called number after applying any necessary digit map transformation implied by th
e
ru
le. The preceding ‘>’ can’t be omitted if target is omitted but cid isn’t.
● arg object is optional. If omitted, it implies the arg with the target $2 and no cid. If arg is omitted,
the succeeding parentheses () can be omitted also.
An inbound call matches a rule if its caller-number/callee-number matches one of the peering objects of the
rule. Peering objects are tested in the order left and right, and the first matched peering object wins. Rules
are also checked in the order left to right, and the first matched rule wins. Therefore it is important that you
place the more specific rules first in the InboundCallRoute if multiple rules can potentially match the same
inbound call.

Call Routing
56
InboundCallRoute Examples
dt OR {dt} OR {:dt} OR {@|?>@:dt} (all equivalent)
It says: Ring the handset for all incoming calls. This is the default InboundCallRoute for all trunks.
{(14081223330|15103313456):aa},{(1800xx.|1888xx.):},{dt}
It says: Ring both handset and AA for calls coming from 1 408 122 3330 or 1 510 331 3456, block all
800, 888, and anonymous calls, and ring the handset for all other calls.
{(x.4081113333|x.4152224444):aa},{dt}
It says: Ring the AA for calls coming from any number that ends with 408 111 3333 or 415 222 4444,
and ring the handset for all other calls. Be sure to include the enclosing parentheses in this example, since
“x.” is a digit map specific syntax.
{200123456:aa},{sp1(14083335678)}
It says: Ring the AA for calls coming from 200123456. For all any other call, bridge it by calling 1
408 333 5678 using SP1 Service.
Basic Outgoing Call Handling
When the trunk receives a number to call, it makes the call if the trunk is enabled, running, and under full
capacity. Otherwise, the trunk fails to send the outgoing call.
Although there’s a DigitMap parameter available per service, the trunk doesn’t use it to validate the
number to call. The validation completes at a higher level before the system routes the call attempt to the
trunk for execution. The phone uses the per-line DigitMap as a reference in other DigitMap parameters
(usually in Phone Settings::DigitMap) and in trunk selection from within a trunk group.
Outbound Call Route Configuration
Every endpoint has an OutboundCallRoute parameter in its system configuration. It tells your system
where to send the call when the endpoint attempts to make a call. Endpoints can call each other or an
outside number using one of the trunks. The OutboundCallRoute syntaxes are almost identical to those
of the InboundCallRoute. The differences are mainly in the implied value when an optional field is
omitted, no caller objects, and one and only one terminal object per terminal-list in an
OutboundCallRoute. Forking isn’t supported when routing outbound calls.
The general format is:
OutboundCallRoute:= rule OR {rule},{rule},….
You can omit the curly braces if the route contains only one rule. The OR operator isn’t part of the parameter
syntax. Here, it separates alternative values.
A rule has the following format:
rule := callee-list : terminal
where
● callee-list:= callee|callee|callee| …(vertical bar separated list of 0 or more calle
e
ob
jects)
● callee:= number OR embedded-digit-map OR @ (@ = any number)

Call Routing
57
● terminal:= DTx OR SPx(arg) OR PPx(arg) (arg object is optional)
● arg:= cid > target
● x:= 1 OR 2 OR 3…(where applicable. Can be omitted x = 1.)
● cid = spoofed-caller-number
● target = number-to-call OR $2
● embedded-digit-map = (Mlabel) OR digit-map
General notes:
● A terminal can be a trunk or another endpoint.
● Abbreviated terminal names are case-insensitive.
● number and number-to-call are literal strings, such as 14089991234.
● digit-map is just any proper digit map, such as (1xxx|xx.). Make sure to include the enclosing
parentheses.
● spoofed-caller-number is a literal string, such as 14081112233, used as the caller number for
making a new call on the specified trunk.
● (Mlabel) is a named digit map where label is the abbreviated name of any terminal that has a digit
map defined: SP1, SP2, LI, PP, or DT.
● $2 is an internal variable containing the called number of this outbound call, after any digit map
transformation in the matched callee object.
● callee-list can be empty, which implies the single callee object @, which means any called
number. The succeeding ‘
:’ can be omitted also when callee-list is empty.
Notes on the arg, cid, and target objects:
● The cid object inside an arg object is optional. If omitted, it implies no caller-ID spoofing when
making the call on the specified trunk. The succeeding ‘>’ can be omitted if cid is omitted.
● The target object inside an arg object is optional. If omitted, it implies the target $2, which means
to call the original called number after applying any necessary digit map transformation implied by the
rule. The preceding ‘>’ can’t be omitted if target is omitted but not cid.
● The arg object is optional. If omitted, it implies arg with the target $2 and no cid.
An outbound call matches a rule if its called number matches one of the callee objects of the rule. Callee
objects are tested in the order left to right, and the first matched callee wins. Rules are also checked in the
order left to right, and the first matched rule wins. Therefore, you need to place the more specific rules first
in OutboundCallRoute if multiple rules can potentially match the same outbound call.
Note that every endpoint also has a digit map defined. The user-dialed number is completely processed with
the endpoint’s digit map first before passing it to OutboundCallRoute for a routing decision. Therefore
the number used for matching call routing rules has already incurred the transformations, if any, implied by
the digit map. Remember this fact when crafting your own OutboundCallRoute.
OutboundCallRoute Examples
sp1 OR {SP1} OR {:SP1} OR {@:Sp1} (all equivalent)
This rule says: Make all calls using the SP1 Service, without any caller-id spoofing or digit transformation.
{(Mpli):pli},{(<**1:>(Msp1)):sp1},{(<**2:>(Msp2)):sp2},{(<**8:>(Mli)):li}
,{(<**9:>(Mpp)):pp}

Call Routing
58
This is the default OutboundCallRoute for the handset. It says:
● Dial *** to invoke the local system configuration IV
R.
● (Mpli) a
nd pli are substituted with the Primary Line’s abbreviated name
.
● Use SP1 Ser
vice to call all numbers that start with **1 and subsequent digits matching SP1
Service’s
DigitMa
p. Remove the **1 prefix from the resulting number before making the ca
ll.
● Use SP2 Ser
vice to call all numbers that start with **2 and subsequent digits matching SP2
Service’s
DigitMa
p. Remove the **2 prefix from the resulting number before making the ca
ll.
● Use the OBiT
ALK Service to call all numbers that start with **9 and subsequent digits matching
OBiTALK Service’s DigitMap. Remove the **9 prefix from the resulting number before making the
call.
Digit Map Configuration
A digit map serves to transform and restrict the number that can be dialed or called, and determine if you
dialed sufficient digits to form a complete number. Each map is composed of one or more rules surrounded
by parentheses that MUST NOT be omitted. Here is the general format of a digit map:
(rule|rule|….|rule)
A digit map rule is a rule for matching a given sequence of digits. It can contain extra white spaces for
readability. All spaces are removed by your system during parsing. A rule can contain one or more of the
following elements:
● literals – Any combination of 0-9,*,#,+,-,A-Z,a-z, except m, M, s, S, x, and X, which have
special meaning in the digit map syntax. It matches digit sequences with exactly the same liter
als.
● ‘litera
ls’ – Everything inside a pair of single quotes is treated as a literal except for the sing
le
q
uote (‘) character.
● x – a wild card digit that matches any digit from 0-9. x is case-sensi
tive.
● x. – ma
tches 0 or more x
.
● [123-7] or
[135] – A set of 1 or more digits surrounded by pair of [ ]. It matches any digit
in the
set. The – syn
tax represents an inclusive digit range, such as 0–9, 3–7. So [123–7] is equivale
nt
to [1–7] or
[1234567]
.
● S, S0, S1, S2, …S9
– Digit timer of 0, 1, 2, …,9 seconds. S is equivalent to S1. S0 is the same
as
“
blank”. You can concatenate multiple S elements together if you need more than 9 seconds timeou
t,
such as S9S5 fo
r a 14-second timeou
t.
S
is case-sensitive. It should only be used either as the first element of a rule for hot/warm line
implementation, or as the last element of a rule as a means of overriding the default interdigit timer.
● <elements:literals> – Substitute the digit sequence matching elements with the given liter
als.
Sing
le quote syntax isn’t needed or allowed for the literals in this context. Special characters can be
used here as they don’t apply in this context either. Elements can be empty, in which case the ‘:’ can
be omitted. This case is useful for inserting some extra digits in certain part of the dialed digits. The
literals part can be empty also but the ‘:’ MUST NOT be omitted. This case is useful for removing
part of dialed digits. Elements and literals MUST NOT be both empty.
● (map) – An embedded digit map for matching subsequent di
gits.
● (Mlabel
) – A named embedded digit map for matching subsequent digits, where label is one of
abbreviated terminal names. Possible choices are:
(Msp1) for SP1 Service::DigitMap

Call Routing
59
(Msp2) for SP2 Service::DigitMap
(Msp3) for SP3 Service::DigitMap
(Msp4) for SP4 Service::DigitMap
(Msp5) for SP5 Service::DigitMap
(Msp6) for SP6 Service::DigitMap
(Msp7) for SP7 Service::DigitMap
(Msp8) for SP8 Service::DigitMap
(Mpp) for OBiTALK Service::DigitMap
Starting with release 1.2, the following elements are added:
● X – A wildcard digit that matches 0–9 or *. This is equivalent to [x*] or [0-9*x]
● @ – A wildcard character that matches any alphanumeric character except #
● x? – matches 0 or 1 x
● @? – matches 0 or 1 @
● [^…] – matches any single alphanumeric character that isn’t in the set
● Allow alphanumeric and wildcard characters inside a set [ ], such as [x], [X#], [@#], [a-zA-Zx]
The last two elements imply that your system’s digit maps are recursive. Recursive digit maps allow digit
maps to be reused and make their specification more compact and readable. It’s important that you don’t
specify digit maps that lead to infinite recursion. For example, a digit map must not include a named
embedded digit map that references itself.
To bar users from calling numbers that match a rule, add a ‘!’ in front of that rule in the digit map. The rule
is then referred to as a barring rule.
Examples:
●
1408xxxxxxx
– Matches any 11-digit number that starts with 1408.
●
011xx.
– Matches any number that starts with 011 followed by one or more digits.
●
<1408>xxxxxxx
– Matches any 7-digit number. Your system prepends 1408 to the number when
making the call.
●
<:1408>xxxxxxx
– Equivalent to the last example.
●
<+>1xxxxxxxxxx
– Prepends ‘+’ to any 11-digit number that starts with 1.
●
<**1:>1408xxxxxxx
– Matches any number that starts with **11408 followed by 7 digits. Your
system removes the **1 prefix when making the call.
●
*74(x|xx)
– Matches any number that starts with *74, followed by 1 or 2 digits.
●
**1(Msp1)
– Matches any number that starts with **1 and with the rest of digits matching the
DigitMap in the SP1 Service.
●
<:1234>
– Matches an empty phone number and replaces with 1234. This is the syntax for a hotline
to 1234.
●
<S0:1234>
– Equivalent to the last example.
●
<:#>
– Hotline to the number #.
●
<S0:#>
– Equivalent to the last example.
●
<S4:1234>
– Call 1234 if no digits entered for 4 seconds. This is the syntax of a warm line.

Call Routing
60
●
xx.853 7683
– Matches any number with at least 8 digits and ends with 8537683, such as
15108537683, 98537683.
●
(x.408 223 1122)
– Matches any number with at least 10 digits and ends with 408 223 1122,
such as 4082231122 or 1408 223 1122.
●
xx.<#>
– Adds a # to the end of any number with 1 or more digits.
●
!1900xxx xxxx
– Barring all 11-digit numbers that start with 1900.
●
[^*]@@.
– Arbitrarily long alphanumeric sequence (except #) that doesn’t start with *
●
xx?
– Any 1- or 2-digit number.
●
(1xxxxxxxxxxS0|xx.)
– Arbitrarily long digit sequence not starting with 1. Otherwise it’s limited to
11 digits.
Match Against Multiple Rules in a Digit Map
One important function of a digit map is to determine if you dialed sufficient digits during dialing. A digit map
normally contains more than one rule. The Digit Map Processor (DMP) must return the best matched rule
at some point, or declare that the input digit sequence is invalid. The DMP keeps refining its decision as
each digit is entered until it reaches a final decision, or is forced to make a timely decision when the interdigit
timer expires.
The DMP restarts the interdigit timer on every newly entered digit. The duration of this timer can be either
long or short. The long and the short timer values are set by default to 10 seconds and 2 seconds,
respectively, and are configurable per handset via the DigitMapLongTimer and DigitMapShortTimer
parameters. Whether to use the long or short interdigit timer depends on the current rule matching states.
The DMP maintains a matching state for each rule in the digit map as it processes each input digit. The
following states are defined:
● Exactly Matched (EM) – The rule exactly matches the accumulated input sequence. However, any
further input digit turns this rule into the MM state. Example: 1234 exactly matches the rules xxxx,
1234, 1xxx, <123:5678>x.
● Indefinitely Matched (IM) – The rule matches the accumulated input sequence indefinitely, with a
variable length such that the rule can potentially stay as IM as more matching digits are entered.
Example: 011853 indefinitely matches the rules xx., 011xx., <011:>xx.
● Partially Matched (PM) – The rule partially matches the accumulated input sequence. Initially all rules
are in this state before any digit is entered. Rules in this state have the potential of becoming EM or
IM as more digits are entered. Example: 1234 partially matches the rules xxxxxxx, 1xxxx,
1234567, <123:>xxxx.
● Mismatch (MM) – The rule doesn’t match the accumulated input sequence. This state won’t change
as more digits are entered. Example: 1234 mismatches the rules 123, 1xx, 12345.
Rules in the EM or IM state are candidates to be selected by the DMP. After processing a new digit, the DMP
returns a final decision if any of the following conditions holds:
● All rules are the MM state. The DMP returns an error.
● One or more rules are in the EM state with no rules in the IM state. DMP returns the best matched
EM rule. If the best matched rule is a barring rule, DMP returns an error instead.
Otherwise, DMP starts the short interdigit timer if there is at least one rule in the EM state, or else the long
one. When the interdigit timer expires, DMP returns the best matched rule at that moment if one is found,
or else a timeout error. If the best matched rule in this case is a barring rule, DMP returns an error instead.

Call Routing
61
Note that the timer to wait for the first input digit isn’t governed by the interdigit timer, but the duration of dial
tone being played, and could be a lot lengthier than the long interdigit timer.
The best matched rule is the one that has the most specific literals matching the input digit sequence. For
example, the input sequence 1234 matches the rule 123x better than 1xxx. Note that an EM rule is always
selected over an IM rule.
Finally, the default interdigit timer can be overridden by appending the Sn element at the end of the rule (n
= 0–9).
Consider this simple digit map:
(<1408>xxx xxxx)
As soon as you enter 7 digits, the DMP returns a complete number by prepending the accumulated digits
with 1408.
Consider another simple map:
(xx.)
After you dial one or more digits, the DMP returns the accumulated digits as a complete number when the
long interdigit timer expires.
Combine the last two maps:
(xx. | <1408>xxx xxxx)
After you dial one or more digits (but fewer than seven digits), the DMP returns the accumulated digits as a
complete number when the (long) interdigit timer expires. As soon as seven digits are entered, the DMP
returns 1408 followed by the accumulated seven digits when the (short) interdigit expires. On the eighth
digit and beyond, however, the DMP considers the first rule only and returns the accumulated digits as-is
when the (long) interdigit timer expires.
Now add an S4 timer to the second rule:
(xx. | <1408>xxx xxxxS4)
In this case, the DMP behaves exactly the same as the last, except that the short interdigit timer the DMP
uses upon receiving the seventh digit is overridden by a 4-second timer. Thus you’ve as long as 4 seconds
instead of 2 to dial the eighth digit.
Example of Forcing an Interdigit Timeout with a Pound(#) Key
When dialing, you can force an interdigit timeout with a # key instead of waiting for the DMP to time out its
own long or short timer. This is allowed as long as the # key doesn’t match the current element of any PM
rules. Otherwise the DMP consumes the # key instead of triggering a timeout.
Consider the digit map (33xx.)
If you enter 333#, the DMP immediately returns the number 333.
Now consider the digit map (33xx.|333#1234x.)
If you enter 333#, the DMP won’t return, but continues to wait for further input or for its interdigit timer to
expire. Note that the first rule “33xx.” is now in the MM state since the digit # doesn’t match “x”. You can
continue to enter 1234#, or 1234 and wait for a long interdigit timeout for the DMP to successfully return
333#1234.

Call Routing
62
Invoking a Second Dial Tone in a Digit Map
You can tell your system to start a tone after a certain pattern of digits have been dialed by specifying the
element {t=<tone>} within a digit map, where <tone> is a 1- to 3-letter name of the tone to play. The tone
stops when you enter the next digit. For example:
(**1{t=di2}(Msp)|**8{t=od}(Mli))
tells your system to play Second Dial Tone when you dial **1, or play Outside Dial Tone when you dial **8.
The acceptable (case-insensitive) values of <tone> are:
● bu = Busy Tone
● cf = Call Forwarded Dial Tone
● cm = Confirmation Tone
● co = Conference Tone
● cw1 – cw10 = Call Waiting Tone 1-10
● di = Dial Tone
● di2 = Second Dial Tone
● fb = Fast Busy Tone
● ho = Holding Tone
● od = Outside Dial Tone
● pr = Prompt Tone
● rb = Ringback Tone
● ro = Reorder Tone (same as fast busy)
● si1 – si4 = SIT TONE 1 – 4
● st = Stutter Tone
● 0 – 9, *, #, a – d = DTMF 0 – 9, *, #, A – D
Changing an Interdigit Long Timer Dynamically After a Partial
Match
Your system starts off with the interdigit long timer set to the configured DigitMapLongTimer value when
processing a new digit sequence by a digit map. You can change the long timer as some patterns are
partially matched by embedding the syntax {L=<time>} within a rule in the digit map, where <time> is the
desired number of seconds for the long timer. For example:
(011 853 xxxx xxxx{L=5}x. |xx.)
Here the long timer is shortened to 5 seconds after you enter 011 853 + 8 digits. Hence, your system
declares that a complete number is collected in 5 seconds when it doesn’t receive any more digits. Without
the {L=5} syntax, you have to wait for 10 seconds (by default) for the same to happen.

Call Routing
63
User-Defined Digit Maps
The User Settings – User Defined Digit Maps section of the system web interface provides for 10
user-definable digit maps. These digit maps are referred to as User-Defined Digit Map 1 to 10. Each
user-defined digit map is specified with two parameters:
● Label: An arbitrary string for referencing this digit map in other digit map specification. The value
should be 2 to 16 characters long. For example, “friends”. In this case, (Mfriends) can be
referenced in other digit maps.
● DigitMap: A digit map to restrict the numbers that can be dialed or called with this service. Maximum
length is 511 characters.
Both parameters are empty by default, except for User Defined Digit Map 1.
Example of a User Defined Digit Map For IPv4 Dialing
The default values of the parameters for User-Defined Digit Map 1 are set to the following values to support
IPv4 dialing:
● Label: ipd
● DigitMap:
(xx.<*:@>xx?x?<*:.>xx?x?<*:.>xx?x?<*:.>xx?x?|xx.<*:@>xx?x?<*:.>xx?x?<*:.>
xx?x?<*:.>xx?x?<*::>xx?x?x?x?)
The map (Mipd) is referenced in the default setting of the DigitMap parameters in ITSP Profiles A through
H. It supports the following two forms of IPv4 dialing:
● <user-id>*<a>*<b>*<c>*<d>
● <user-id>*<a>*<b>*<c>*<d>*<port>
where <user-id> is an arbitrary length numeric user-id, such as 100345, <port> is a port number in the
range 0–65535, and each of <a>,<b>,<c>,<d> is a 1- to 3-digit pattern in the range 1–255 that identifies
one byte of an IP address. The dialed number is translated into <user-id>@<a>.<b>.<c>.<d> and
<user-id>@<a>.<b>.<c>.<d>:<port>. Here are some examples:
● 123456*192*168*15*180*5061 maps to [email protected]:5061
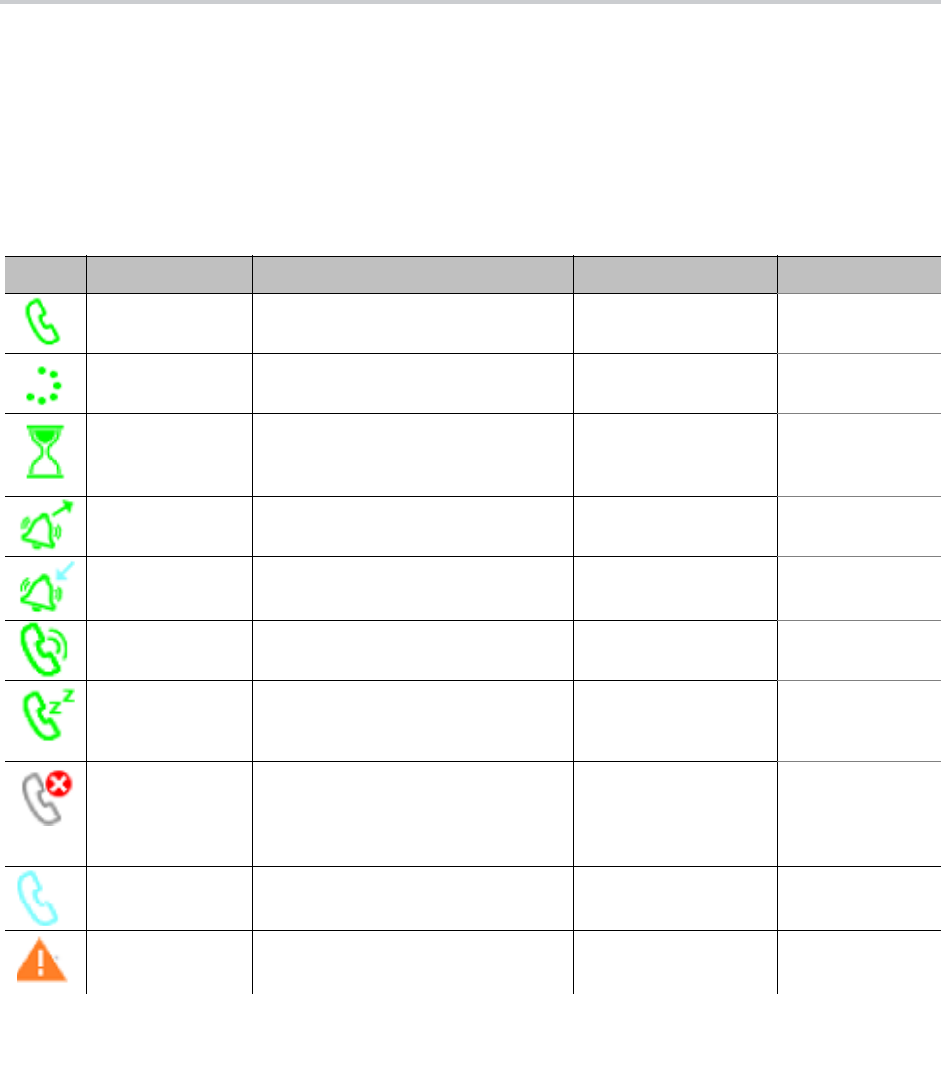
64
Call Settings
Use the following information to better understand certain aspects of the call settings for your OBi device.
Call States
As a call progresses from beginning to end, it goes through a number of defined stages commonly known
as call states or states. The following table includes the call states for calls on your phone.
List of Call States
Icon Call State Description Available Operations LED Pattern
Dial Tone Dial tone plays to prompt user to
enter the target number to call.
End Steady green
Dialing User is entering a target number to
call.
End Steady green
Trying Trying to call the dialed number but
the called party hasn’t started ringing
yet.
End Steady green
Peer Ringing The called party is ringing. End Fast blinking
green
Ringing An incoming call is ringing the phone. Reject, Answer Fast blinking red
Connected Connected on a call and both sides
are talking.
End, Hold, Transfer,
Blind Transfer
Steady green
Holding User has placed the call on hold. End, Resume, Add to
Conf., Transfer, Blind
Transfer
Slow blinking red
Ended Call failed due to various reasons,
such as invalid number, service not
available, called party busy, and so
forth.
End
(Remove the Call)
Slow blinking
green
Idle No Call. — Off
Registration Error Error registering with the server. — Off
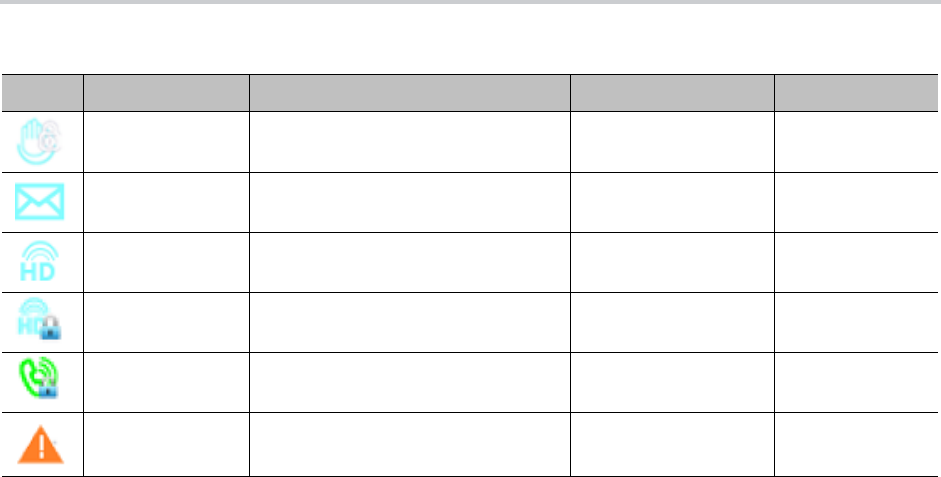
Call Settings
65
Caller ID
When only the caller number is available, the phone attempts to match the number against the phone book
or buddy list to find a corresponding entry. If the phone finds a matching entry, it displays the name and
picture from that entry on the screen.
If the call comes from a SIP service, the service provider provides the caller-id picture in the INVITE request
by including a Call-Info header with a (http or https) URL to the picture file and the attribute
“purpose=icon”
.
For example:
Call-Info: <http://abc.com/user/somepic.png>;purpose=icon;org="ABC Publishing”
The header may also include an
org
attribute. This value propagates the Organization field in the Caller-ID
display.
Calling Line ID Display
When making an outgoing call, your phone accepts SIP UPDATE method from the softswitch that may
contain the called party’s name and number. Your phone then updates the phone screen with the called
party information from the SIP UPDATE request. There are no configuration parameters for this feature.
Your phone can also identify the called party ID from the 18x and 2xx responses to the outbound INVITE
message.
Call Forward Numbers
Calls may be forwarded to numbers on the same service or on another service. Therefore each call forward
number stored in your phone’s configuration MUST include call routing information to let the device know
which voice service should be used to forward the call to. The general format of a call forward number is:
TK(number)
Remote Hold Remote side placed the call on hold. End, Hold, Transfer,
Blind Transfer
Steady green
Messages
Waiting
Idle state with unread messages in
the mailbox.
—Off
Connected-HD Call connected with HD Audio. End, Hold, Transfer,
Blind Transfer
Steady green
Connected-HDS Call connected with Secure HD
Audio.
End, Hold, Transfer,
Blind Transfer
Steady green
Connected-S Call connected with Secure Audio. End, Hold, Transfer,
Blind Transfer
Steady green
Service Down Service down. — Off
List of Call States (continued)
Icon Call State Description Available Operations LED Pattern

Call Settings
66
where TK is the abbreviated name of a voice service. Valid values of TK are SPn for the SPn Voice Service
where n = 1 – 6, or PP for the OBiTALK Service.
The number to forward to must be in the final form that is acceptable by the service provider. Your phone
won’t apply any Digit Map or Call Routing Rules on it.
Examples: SP1(14089991234), PP1(ob200333456)
Multicast Paging Groups
Each phone supports two multicast groups that are configurable by the administrator. The administrator may
also assign a feature key for users to join or leave each group. The default settings on your phone work in
most LAN environments, so usually all that is required is for the feature to be enabled and a feature key
mapped to each phone for the service. Push to talk can also be enabled for Page Groups. This can be
configured under Phone Settings – Page Group 1/2/3/4/5/6/7/8/9/10. Consult your phone administrator if
to see if the group paging feature is enabled at your location.
Multicast Paging Groups
Parameter Group Parameter Description
Page Group N
N = 1 through 10
GroupName A user-friendly name to label the group on the
phone UI.
Page Group N
N = 1 through 10
MulticastAddress Must be a valid IPv4 Multicast Address. Default is
224.1.1.100 for both paging groups.
Page Group N
N = 1 through 10
MulticastPort Default is 65322 for page group 1 and 65324 for
page group 2. Note that each group must use a
different port number.
Page Group N
N = 1 through 10
PushToTalk A Boolean option to control whether the page group
key (softkey or feature key) should act as a PTT
key. You can talk only while pressing and holding
the key down. Default is false.
Page Group N
N = 1 through 10
TTL TTL value of outgoing (multicast) RTP packets.
Default is 2.
Page Group N
N = 1 through 10
AudioCodec Audio codec to use for outgoing page. Default is
G711U.
Page Group N
N = 1 through 10
TxPacketSize Outgoing RTP packetization in milliseconds.
Default is 20.
Page Group N
N = 1 through 10
RTCPTxInterval Interval in milliseconds between sending outgoing
RTCP packets when paging. No RTCP packets
sent if value is 0, which is the default. Note that an
RTCP Bye packet is always sent when ending an
outgoing page regardless of this setting.
Page Group N
N = 1 through 10
SilenceSuppression A Boolean option to control if Silence Suppression
should be used for outgoing page. Default is
false.

Call Settings
67
Media Loopback Service
Your device supports the media loopback draft as described in draft-mmusic-media-loopback-13.txt.
The device supports the following media loopback features:
● Loopback modes: loopback-source and loopback-mirror
● Loopback types: rtp-media-loopback and rtp-packet-loopback
● Loopback packet formats: encaprtp, loopbkprimer
Page Group N
N = 1 through 10
ParticipantName A string value to identify the current user who is
paging to the group in outgoing RTCP packets.
Page Group N
N = 1 through 10
PlayToneOnIncomingPage A Boolean option to control whether to play a short
Paging Tone before playing a new incoming page.
Default is true.
Page Group N
N = 1 through 10
PreferredAudioDevice Select the preferred audio device to play incoming
page. Enter either System, Headset, or Speaker.
Default is System to let the phone picks according
to other user preferences
Page Group N
N = 1 through 10
PageTimeout Limit of outbound page duration in number of
seconds to avoid accidentally jamming the page
group channel. The duration would be unlimited if
the value is 0, which is also the default.
Page Group N
N = 1 through 10
EnableJoinLeaveGroupUserControl A Boolean option to control whether to allow you to
Join or Leave a page group by pressing (and
releasing it quickly) the pg1 through pg10 softkey.
Default is true. When it is set to false, press the key
once to talk and press it again to go back to listen.
Although in that case you can’t choose the leave
the page group, you can still use the
AutoAnswerIntercom option from the User
Preferences menu not to play any of the incoming
pages.
Speaker Volume Initial speaker volume each time the phone starts
playing the audio from that page group. If the value
is 0, then the current speaker (ringer) volume is
used. Default is 0.
Stats A comma-separated list of 3 running statistics of the
number of packets received on this group:
rx-pkts-last-hour,rx-pkts-lastminute,
rx-pkt-last-second
where the values are update once every 10
seconds.
Multicast Paging Groups (continued)
Parameter Group Parameter Description

Call Settings
68
When your system acts as a loopback mirror, it always sends primer packets so that incoming packets can
get through NAT/Firewall. The following parameters control the media loopback feature:
● AcceptMediaLoopback – Enable system to accept an incoming call that requests media loopback.
Default is True.
● MediaLoopbackAnswerDelay – The delay in ms before your system answers a media loopback
call. Default is 0.
● MediaLoopbackMaxDuration – The maximum duration to allow for an incoming media loopback
call. Default is 0, which means the duration is unlimited.
The device rejects an incoming media loopback call if:
● Handset port is off-hook.
● Handset port is ringing.
The device terminates an inbound media loopback call already in progress when:
● Handset port is off-hook.
● Handset port is ringing.
To make an outgoing loopback call, dial one of the following star codes before dialing the target number:
● *03 – Make a Media loopback call.
● *04 – Make an RTP packet loopback call.
Note that outbound Media Loopback Call isn’t subject to call duration limit. It lasts until you hang up or until
the called device ends the call.
Shared Line and Shared Call Appearances (SCA)
(SIP/SP only) A shared line is a service account or extension that is installed on a group of phones, such
that if a sharing phone is using that extension, other sharing phones are notified. There can be multiple
simultaneous calls on a shared line. The maximum allowed simultaneous calls on a shared line should be
a fix number.
Each call on a shared line is called a Shared Call Appearance (SCA). If your phone has a shared line
configured as one of the services, it should have as many call keys defined on the phones that are bound
to that service. SCAs of a shared line are ordered with an index 1–n as SCA1, SCA2, SCA3, SCAn, where
n is the maximum number of calls permitted for that line. On your phone, the SCAs are assigned sequentially
in ascending order according to the VLK index of the corresponding call key bound to the shared line. For
example, suppose a shared line with four SCAs is configured on a phone with VLK1, VLK3, VLK7, and VLK8
assigned as the four call keys bound to that line, then the calls hosted on VLK1, VLK3, VLK7, and VLK8 are
SCA1, SCA2, SCA3, and SCA4, respectively.
SCA States
There are two common implementations of SCA, namely, the Call-Info Method and the SLA/BLA (dialog)
method. Use the ITSP Profile–SIP–Feature Configuration::X_ShareLineMethod parameter to select
which method to use. It can be one of the following choices:
● call-info: This is the method used by BroadSoft. The phone subscribes to the call-info event
package with the proxy server to receive notification of share call appearance state updates. This
method also uses the line-seize event package for seizing a SCA before making a call
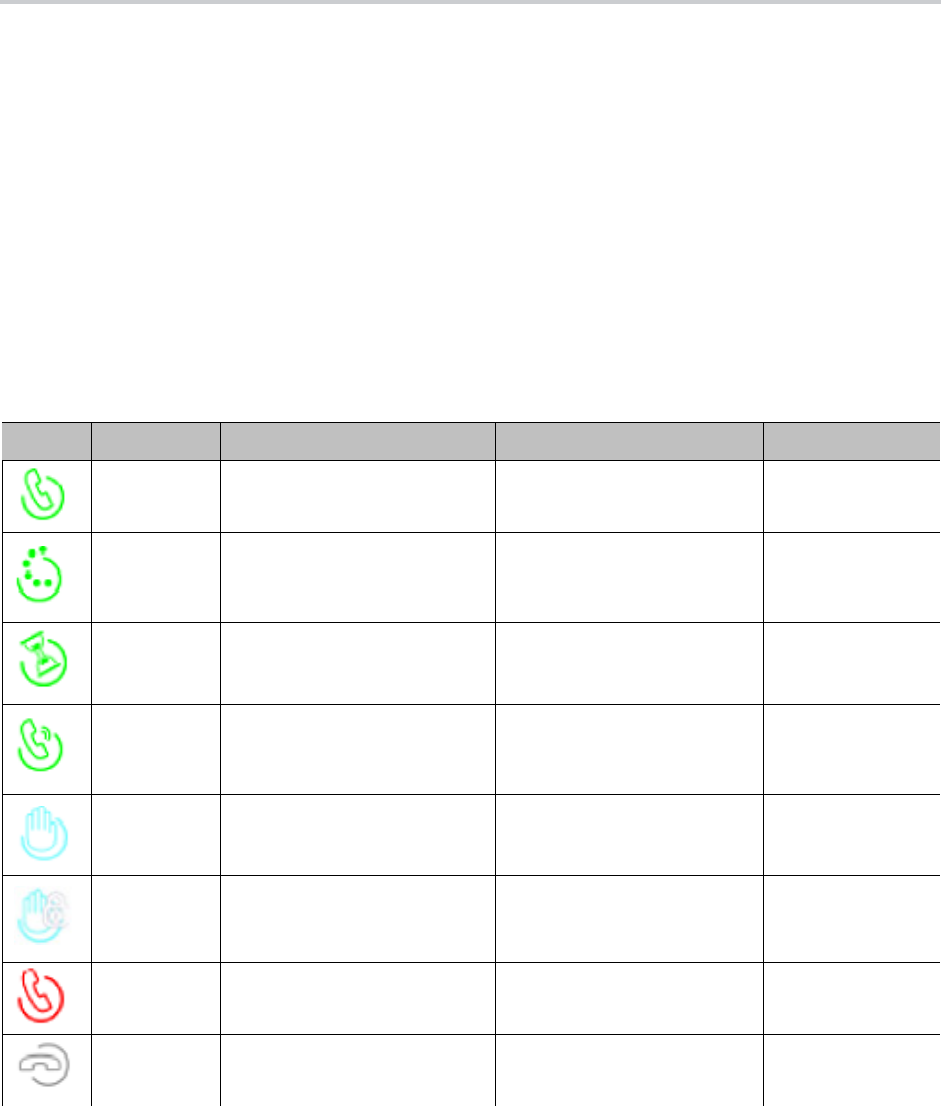
Call Settings
69
● dialog;sla: This is based on the Bridged Line Appearance draft (draft-anil-sipping-bla-02). The
phone accepts subscription to the dialog;sla event package from the state-agent, and also subscribes
back the same with the state-agent. The phone and state agent then exchange notifications of share
call appearance state updates.
● dialog;ma: This is similar to the dialog;sla method, and is based on a more current version of
the same draft (draft-anil-sipping-bla-04). The name of the event package name is changed to
dialog;ma
.
You must have the same number Call Appearance feature keys defined to bind to the SP service. A Call
Appearance key bound to a shared line behaves similarly to one that is bound to a private line, except that
when the (private) call state is idle (that is, the call appearance is not being used by this phone), the SCA
state is shown. The SCA state (or shared call state) indicates the call state on the sharing phone that is using
that call appearance, and is communicated to this phone by softswitch via (SIP) notification.
The following table describes the SCA states that are supported by the phone:
List of SCA States
Icon SCA State Description Available Operation LED Pattern
Seized A sharing phone has seized the
SCA to make an outgoing call.
— Blinking red (30
ms on, 30 ms off)
Trying A sharing phone is trying an
outgoing call.
— Steady red
Proceeding A sharing phone is making an
outgoing call and the called
party is ringing.
— Steady red
Connected A sharing phone is on a
connected call with that SCA.
Barge In to:
• Monitor the call only
• Fully participate in the call
Steady red
Held A sharing phone is on a call
with that SCA and has placed
the call on hold.
Resume and take over the
call.
Slow blinking red
Private Held A sharing phone is on a call
with that SCA and has placed
the call on private hold.
— Slow blinking red
(100 ms on, 100
ms off)
Call Parked A call is parked against the
extension.
Pick up the parked call. Blinking red (50
ms on, 50 ms off)
Idle phones are using the SCA. Seize the SCA to make an
outgoing call.
Off
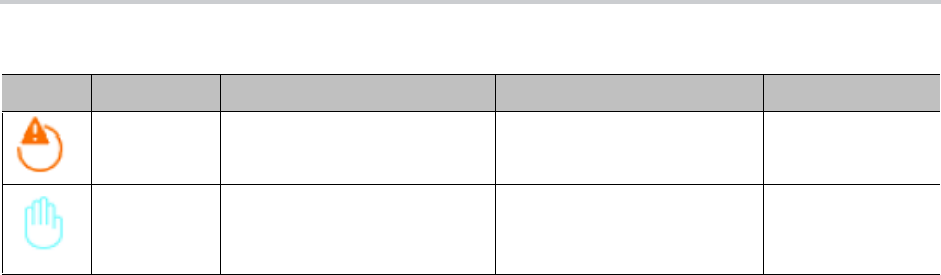
Call Settings
70
SCA implementations are based on subscribe/notify framework. With the call-info method, the subscription
expires value to the call-info and line-seize events are set in X_CallInfoSubscribesExpires and
X_LineSeizeSubscribeExpires (under ITSP Profile X – SIP), respectively. With the dialog;ma and
dialog;sla methods, the subscription expires value to the respective event is controlled by the
X_DialogSubscribesExpires parameter.
Line Seize
With any shared line design, each sharing phone should perform a proper line-seize before attempting to
make a call on a SCA. This lets the system work correctly when multiple phones are trying to make calls at
the same time.
With the call-info method, a phone seizes a SCA by subscribing to the line-seize event package for that
SCA, with a short expires value. If successful, the phone receives a 200 class response for the subscribe
method, and also a NOTIFY to indicate that the subscription is active and what the actual expires value of
the subscription allowed by the server.
With the dialog;sla or the dialog;ma method, a phone seizes a SCA by sending a NOTIFY to the state-agent
with the state of the requested SCA set to trying. If successful, the phone receives a 200 class response
for the NOTIFY request. Typically, the state-agent shortens the subscription interval with the phone that
owns the SCA to detect quickly if the phone has crashed or encountered network issues.
Busy Lamp Field (BLF)
(SIP/SP only.) BLF is a feature of the monitoring phone, as the monitored extension usually does not do
anything special to be monitored. The detection and notification of events occurring at the monitored
extensions are carried out by the softswitch.
When BLF is supported by a specific SP service on your phone, the BLF function can be assigned to a
feature key bound to that service to monitor an extension in the context of that SP service (another extension
on the same hosted voice service or PABX system). The following table lists the typical events that are
monitored with a BLF Key.
The following table lists the typical events that are monitored with a BLF Key. The table also shows the
operation that can be invoked when the respective event occurs, and the LED pattern indicating that
particular event.
Error Protocol error. — Steady amber
Remote Hold Remote side placed the call on
hold.
Barge In to:
• Monitor the call only
• Fully participate in the call
Steady red
List of SCA States (continued)
Icon SCA State Description Available Operation LED Pattern

Call Settings
71
SIP for Busy Lamp Field
For each BLF extension that does not belong to any group, your phone subscribes to the dialog event
package for each extension in the context of the SP service specified in the Service parameter of the
corresponding feature key. For extensions belonging to the same group, your phone only maintains one
subscription to the group-name and none for the individual extensions in the group. In the subscribe request,
your phone indicates (in an Accept header) support for the following content-types in NOTIFY message
bodies to be returned by the server:
● application/multipart/related
● application/rlmi+xml
● application/dialog-info+xml
For floating key assignment, your phone expects the NOTIFY message body to include a resource list
(Content-Type: application/rlmi+xml) that is compatible with RFC4662. Here is an example with two
extensions specified in the resource list:
<?xml version="1.0" encoding="UTF-8"?>
<list xmlns="urn:ietf:params:xml:ns:rlmi" uri="sip:[email protected]adworks.net"
version="0" fullState="true">
<resource uri="sip:ObihaiU[email protected]">
<name>Obihai User2 </name>
List of All BLF States
Icon
BLF
Event Description Available Operation LED Pattern
Ringing Monitored extension is
ringing.
Answer the call. This operation is called a
Directed Call Pickup.
Fast blinking
red
Busy Monitored extension is
on a call or making a
call.
Barge in to do one of the following:
• Fully participate in the call or conference.
• Listen to the conversation without talking.
• Listen to the conversation but talk only to
the monitored extension (also known as
coaching or whispering).
There can be other variations along these
lines.
Steady red
Holding Monitored extension is
holding one or more
calls.
Resume and take over the call. Slow blinking
red
Call
Parked
A call is parked against
the monitored
extension.
Pick up the call from the parking slot. Periodic short
blink in red
Idle Monitored extension is
idle.
Make or transfer a call to the extension. Steady green
Offline Monitored extension is
offline.
— Steady amber

Call Settings
72
<instance id="DNAbROacM9" state="active" cid="7jTC13@broadworks"/>
</resource>
<resource uri="sip:ObihaiU[email protected]">
<name>Test User</name>
<instance id="MT8FRckGPc" state="active" cid="cJ489p@broadworks"/>
</resource>
</list>
To notify the call states of a monitored extension, your phone expects the NOTIFY message body to include
a dialog-info XML (Content-Type: dialog-info+xml) that is compatible with RFC4235. Here is an example:
<?xml version="1.0" encoding="UTF-8"?>
<dialog-info xmlns="urn:ietf:params:xml:ns:dialog-info" version="1"
state="full" entity="sip:O[email protected]">
<dialog id="Y2FsbGhhbGYtNjI4MjM4NzU6MA==" direction="recipient">
<state>proceeding</state>
<local>
<identity display="ObihaiUser2 ObihaiUser2">
sip:[email protected]1.broadworks.net
</identity>
<identity display="ObihaiUser2 ObihaiUser2">
tel:+12404982562;ext=2562
</identity>
</local>
<remote>
<identity display="ObihaiUser1 ObihaiUser1">
sip:[email protected]works.net;user=phone
</identity>
</remote>
</dialog></dialog-info>
When the softswitch is capable of notifying call park status for the monitored extension, it is expected the
status is reported inside a dialog-info XML as well. Here is an example:
<?xml version="1.0" encoding="UTF-8"?>
<dialog-info xmlns="urn:ietf:params:xml:ns:dialog-info"
xmlns:sa="urn:ietf:params:xml:ns:sa-dialog-info"
xmlns:bw="http://schema.broadsoft.com/callpark"
version="3" state="partial"
entity="sip:north00@txasdev87.net">
<dialog id="Y2FsbGhhbGYtMzM6MA==">
<state>confirmed</state>
<bw:callpark>
<bw:parked>
<identity display="Alice south">
sip:9726987601@as.bw.com;user=phone
</identity>
</bw:parked>
</bw:callpark>
</dialog>
</dialog-info>

Call Settings
73
Call Park
Your phone supports call park status subscription by subscribing to the x-broadworks-callpark event
package, and expects notification that includes an x-broadworks-callpark-info XML document in the
message boxy (Content-Type:application/x-broadworks-callpark-info+xml). Here is an example:
<?xml version="1.0" encoding="UTF-8"?>
<x-broadworks-callpark-info xmlns="http://schema.broadsoft.com/callpark">
<callpark>
<parked>
<identity display="Alice south">
sip:[email protected];user=phone
</identity>
</parked>
</callpark>
</x-broadworks-callpark-info>
Call Diversion History
(SIP Only). The softswitch may keep a history of Diversion headers for each call forward transaction as it
tries to ring an extension. A Diversion header is added each time the called extension redirects (or diverts)
the call. When an INVITE message arrives at your phone after a series of redirections, it may include a
history of all the diversion headers (with the latest one appearing first). Your phone shows the call diversion
history in the call item of the Calls App, if available.
There is no configuration for this feature.
Hold and Talk Event Package
(SIP Only.) Your phone supports unsolicited notification of the hold and talk event package in the context of
an SP service. Note that these notifications are sent outside of any dialogs and are not dialog specific. When
the phone receives a hold event notification, it holds all the connected calls on the underlying service. When
the phone receives a talk event notification, it answers all the incoming calls and resumes all the holding
calls on the underlying service.
There is no configuration for these features.
Advice of Charges (AOC)
(SP/SIP Only.) Your phone accepts contents of the Content-Type: application/vnd.etsi.aoc+xml in the
message body of an INFO or BYE request, or 2xx response to a BYE request. It parses the charges
information and displays them on the screen in the corresponding call item of the Calls App. The final
charges information received with a BYE request or 2xx response to a BYE request is displayed in a
separate pop-up window at the end of the call.
There is no configuration for this feature.

74
System Settings
You can control system codec features, handset tones, and ringtones on your base station. You also can
control how handsets dial calls using speed dial numbers and user-defined digit maps.
Codec Profiles
Codecs define the digital process your system uses to encode and decode communications with other
systems. You can set codec profiles in three places:
● SPn Service
● OBiTALK Service Settings
● Page Groups
Your system provides two codec profiles (A and B), selectable per trunk (SPn and OBiTALK). For more
information on codec profile parameters, see the appropriate data model for your device.
Tones
Tone patterns provide audible call progress indicators to the user. Your system enables you to create
customized tone patterns.
Tone Examples
These examples show the interpretation of a few common tone patterns:
Dial Tone Example
DIAL, "350-18,440-18"
A mixture of two frequency components generates the dial tone.
350 Hz at –18 dBm and 440 Hz at –18 dBm
The expiration time is infinite, and tone active time is infinite.
Tone Profile A default settings use North American telephone standards. Tone Profile B default
settings use Australian telephone standards. You can download tone profiles for other countries
from the OBiTALK forum.

System Settings
75
Busy Tone Example
BUSY, "480-18,620-18;10;(.5+.5)"
A mixture of two frequency components generates the busy tone.
480 Hz at –18 dBm and 620 Hz at –18 dBm
The expiration time is 10 seconds. It has only one cadence segment, which has tone active 0.5 second and
tone inactive 0.5 seconds.
Prompt Tone Example
PROMPT, "480-16;10"
A single frequency component generates the prompt tone.
480 Hz at
–16 dBm. The expiration time is 10 seconds. It has only one cadence segment, which has tone
infinite active time.
SIT Tone Example
SIT_1, "985-16,1428-16,1777-16;20;(1/.380+0,2/.380+0,4/.380+0,0/0+4)"
A set of frequency components generates the special information tone (SIT).
● First frequency: 985 Hz at
–16 dBm
● Second frequency: 1428 Hz at
–16 dBm
● Third frequency: 1777 Hz at
–16 dBm
The expiration time is 20 seconds. It has only one cadence segment, which includes four on-off sections.
The segment has infinite repeating time:
● The first on-off section: generated by the first frequency component, and it has 0.38 tone second
active time and 0 inactive time.
● The second on-off section: generated by the second frequency component, and it has 0.38 tone
second active time and 0 inactive time.
● The third on-off section: generated by the third frequency component, and it has 0.38 tone second
active time and 0 inactive time.
● The fourth on-off section: only generates silence, since you specified no frequency component. It has
tone 0 second active time and 4 seconds inactive time.
Stutter Tone Example
STUTTER, "350-18,440-18;20;.2(.1+.1);()"
A mixture of two frequency components generates the stutter dial tone.
350 Hz at
–18 dBm and 440 Hz at –18 dBm. The expiration time for the entire tone is exactly 20 seconds. It
has two cadence segments.
● The first segment includes only one on-off section, on 0.1 second and off 0.1 second, and on-off
repeats for 2 seconds.
● The second segment includes one on-off section, and has infinite repeating time and infinite tone
active time, and plays until the entire tone duration has elapsed.

System Settings
76
For more information on Tone Profile A & B and call waiting parameters, see the appropriate data model for
your device.
Tone Patterns
Tone profiles use the following format:
[field-1];[field-2];[field-3];...;[field - 6]
Use a semicolon to separate the configuration fields. You can’t use spaces in the tone profile patterns.
Field–1 Composition
Field-1 describes frequency components used for tone synthesis. It supports as many as three different
frequencies.
The frequency expression is a string of numeric values with the notation + or –. The numeric values are the
frequency's decimal values in Hz and amplitude in dBm (maximum 3 dBm).
Different frequencies are separated by a comma.
Example: 350-18,440-18,550+2
● The first frequency is at 350 Hz with strength at –18
dBm.
● Th
e second frequency is at 440 Hz with strength at –1
8 dBm.
● Th
e third frequency is at 550 Hz with strength at
+2 dBm.
Field–2 Composition
Field-2 describes the overall tone playback duration in seconds.
The expression is a numeric value, and supports as many as three decimated digits. The numeric value can
be negative, zero, positive, or skipped:
● Negative value: Tone plays indefinitely.
● Zero value: Tone playback is skipped.
● Positive value: Normal playback duration.
● No value: Tone plays indefinitely.
Example: 30.234
Tone playback terminates after 30.234 seconds.
Field–3 to Field–6 Composition
Fields 3 through 6 share the same definition. Each field describes one single cadence segment. Together,
these four fields form a macro-segment, which repeats until tone playback expires.
Tone and Ring Profile A default settings are set for North American telephone standards. Tone and
Ring Profile B default settings are set for Australian telephone standards. You can download tone
profiles for other countries from the OBiTALK forum.

System Settings
77
The expression is a string of numeric values with the special notation '/', '(', ')', and ','.
t(f_0/on_0+off_0,f_1/on_1+off_1,f_2/on_2+off_2,f_3/on_3+off_3)
● t: The cadence segment duration in seconds.
Negative value: Tone plays indefinitely.
No value: Tone plays indefinitely.
Zero value: The duration of this particular segment is zero.
Positive value: Normal playback duration.
● f_0/1/2/3: The frequency component(s) used for the synthesis. Use one of following options (0
through 7):
0: No frequency specified (silence).
1: The first frequency.
2: The second frequency.
3: The first and second frequencies.
4: The third frequency.
5: The first and third frequencies.
6: The second and third frequencies.
7: The first and second frequencies if two or more than two frequency components, or the firs
t
frequency if only one frequency component is available.
If you don’t provide a value for f_0/1/2/3, the phone automatically uses the combination of the first
one or two available frequency components.
● on_0/1/2/3: The tone active time in seconds.
Negative value: Not allowed.
No value: Infinite tone active time.
Others: Normal tone active time (as many as three decimated digits).
● off_0/1/2/3: The tone inactive time in seconds.
Negative value: Not allowed.
No value: Infinite tone inactive time.
Others: Normal tone inactive time (as many as three decimated digits).
Example: 4(1/.3+2.34,3/2+1.5)
● Use the first frequency to generate a tone for 0.3 seconds.
● Follow this tone with 2.34 seconds of silence.
● Use a combination of the first and second frequencies to generate a tone for 2 seconds.
● Follow this tone with 1.5 seconds silence.
● The cadence repeats for 4 seconds.
Tone Examples
These examples show the interpretation of a few common tone patterns:

System Settings
78
Dial Tone
DIAL, "350-18,440-18"
Dial tone is generated as a mixture of two frequency components:
350 Hz at –18 dBm and 440 Hz at –18 dBm.
The expiration time is infinite, and tone active time is infinite.
Busy Tone
BUSY, "480-18,620-18;10;(.5+.5)"
Busy tone is generated as a mixture of two frequency components:
480 Hz at –18 dBm and 620 Hz at –18 dBm.
The expiration time is exactly 10 seconds. It has only one cadence segment, which has tone active 0.5
second and tone inactive 0.5 seconds.
Prompt Tone
PROMPT, "480-16;10"
Prompt tone is generated from a single frequency component:
480 Hz at
–16 dBm. The expiration time is exactly 10 seconds. It has only one cadence segment, which has
tone infinite active time.
SIT Tone
SIT_1, "985-16,1428-16,1777-16;20;(1/.380+0,2/.380+0,4/.380+0,0/0+4)"
Special information tone (SIT) is generated from a set of frequency components:
● First frequency: 985 Hz at
–16 dBm.
● Second frequency: 1428 Hz at
–16 dBm.
● Third frequency: 1777 Hz at
–16 dBm.
The expiration time is exactly 20 seconds. It has only one cadence segment, which includes four on-off
sections. The segment has infinite repeating time:
● The first on-off section: generated by the first frequency component, and it has 0.38 tone second
active time and 0 inactive time.
● The second on-off section: generated by the second frequency component, and it has 0.38 tone
second active time and 0 inactive time.
● The third on-off section: generated by the third frequency component, and it has 0.38 tone second
active time and 0 inactive time.
● The fourth on-off section: only generate silence since no frequency component is specified. It has
tone 0 second active time and 4 seconds inactive time.

System Settings
79
Stutter Tone
STUTTER, "350-18,440-18;20;.2(.1+.1);()"
Stutter dial tone is generated from a mixture of two frequency components:
350 Hz at
–18 dBm and 440 Hz at –18 dBm. The expiration time for the entire tone is exactly 20 seconds. It
has two cadence segments.
● The first segment includes only one on-off section, on 0.1 second and off 0.1 second, and on-off
repeats for 2 seconds.
● The second segment includes one on-off section, and has infinite repeating time and infinite tone
active time, and plays until the entire tone duration has elapsed.
For more information on Tone Profile A & B parameters, see the appropriate data model for your device.
For more information on call waiting parameters, see the appropriate data model for your device.
Ring Tones and Ring Patterns
The general format of an OBi ring profile is [field-1];[field-2];...;[field - 5]
Use a semicolon to separate as many as five configuration fields. You can’t use spaces in the ring profile
patterns.
Field–1 Composition
Field-1 describes the overall ringing duration in seconds.
The expression is a numeric value and supports as many as three decimated digits.
The numeric value can negative, zero, and positive:
● Negative value: Ringing lasts indefinitely.
● No value: Ringing lasts infinitely.
● Zero value: Ringing is skipped.
● Positive value: Normal ringing duration.
Example: 30.5
● This example illustrates a ringing tone that ends after 30.5 seconds.
Field–2 to Field–5 Composition
Fields 2 through 5 share the same definition, and each field describes one single cadence segment.
Together, the four fields form a macro-segment, which repeats until ringing expires.
The expression is a string of numeric values with the special notation '(' , ')', and ','.
t(on_0+off_0,on_1+off_1,on_2+off_2,on_3+off_3)
● t: The cadence segment duration in seconds.
Negative value: Ringing indefinitely.
No value: Ringing indefinitely.

System Settings
80
Zero value: Ringing is skipped.
Positive value: Normal ringing duration.
● on_0/1/2/3: The ring active time in seconds.
Negative value: Not allowed.
No value: Infinite ring active time.
Others: Normal ring active time (as many as three decimated digits).
● off_0/1/2/3: The ring inactive time in seconds.
Negative value: Not allowed.
No value: Infinite ring inactive time.
Others: Normal ring inactive time (as many as three decimated digits).
Example: 4(.3+2.34,2+1.5)
● This example illustrates a ringing tone comprised of two segments.
● Ringing is active for 0.3 seconds, followed by 2.34 seconds of silence, then ringing for 2 seconds, and
followed by 1.5 seconds of silence. This cadence operates repeatedly for 4 seconds.
Distinctive Ring Tones and Patterns
You can add Alert-Info to the SIP invite header to configure distinctive ringtones based on how you set
up incoming call parameters. In a SIP-based distinctive ring, the RingName is matched against the
Alert-Info of the form Alert-Info: <http://127.0.0.1/ring-name>, where ring-name is one of
the preloaded ringtones.
If there’s no
Alert-Info
, or if the specified
ring-name
doesn’t match any of the ring patterns, the handset
uses the ring tone configured in X_DefaultRing parameter under SPn Service.
Preloaded Ringtones
The handset can only play the following preloaded ringtones:
● Handset Default
● Type 2 - Low Trill
● Type 3 - Medium Trill
● Type 4 - High Trill
● Type 5 - Highest Trill
● Type 6 - Beeble
● Type 7 - Triplet
● Silent Ring
Star Codes
Star codes are short sequences of characters that users enter to perform certain operations. Each sequence
usually starts with the star (*) key followed by a two-digit code (such as *69).

System Settings
81
You can use star codes to set the value of one or more configuration parameters. Some OBi devices allow
you to issue a star code from the handset only. A short star code script parameter defines each star code
and its operation.
A star code script contains a number of predefined variables and actions. Each variable represents one or
a group of configuration parameters. An action can be checking or setting a variable’s value, collecting a
phone number, or calling a certain number.
The set of star codes that you can dial from the handset is a star code profile. Some OBi devices have two
star code profiles available in its configuration known as Star Code Profile A and Star Code Profile B. Each
profile has 30 star code script parameters known as Code1 to Code30. The default star codes in both Star
Code Profiles match the standard telephone provider star codes.
For a list of star code parameters, see the appropriate data model for your device.
Preprogrammed Star Codes
Your system has the following star codes preprogrammed.
Preprogrammed Star Codes
Code Description
*03 Request peer system to loop back media in the next outbound call
*04 Request peer system to loop back RTP packets in the next outbound call
*05 Tell system to periodically redial the last called number until the called party rings or answers
*06 Cancel the last repeat dial request
*07 Redial
*10 Day Mode
*11 Night Mode
*12 Auto Night Mode
*56 Enable Call Waiting
*57 Disable Call Waiting
*60 Call Forward on Busy (Enter Number + #)
*61 Disable Call Forward in Busy
*62 Call Forward on No Answer (Enter Number + #)
*63 Disable Call Forward No Answer
*66 Repeat Dial
*67 Block Caller ID (One Time)
*68 Unblock Caller ID (One Time)
*69 Call Return

System Settings
82
Star Code Script Variables (VAR)
A star code script variable or VAR can be trunk-specific or global (non-trunk-specific). The general format
of a global variable is $var. The general format of a trunk-specific variable is TK($var), where TK is the
abbreviated name of a trunk (
SP1
to SP6, or PP). If TK isn’t specified for a trunk-specific variable, it implies
all the applicable trunks in the system.
Here is a list of the supported $var:
● $CFA = call forward unconditional enable (trunk-specific; valid values: 0 for disable, 1 for enable)./
● $CFB = call forward busy enable (trunk-specific; valid values: 0 for disable, 1 for enable).
● $CFN = call forward no-answer enable (trunk-specific; valid values: 0 for disable, 1 for enable).
*72 Call Forward All (Enter Number + #)
*73 Disable Call Forward All
*74 Set Speed Dial
*75 Check Speed Dial
*76 Clear Speed Dial
*77 Block Anonymous Calls
*78 Do Not Disturb – Turn On
*79 Do Not Disturb – Disable
*81 Block Caller ID (Persistent Mode)
*82 Unblock Caller ID (Persistent Mode)
*86 Block Last Caller
*87 Unblock Anonymous Calls
*96 Barge In
*98 Blind Transfer
*4678 Use Opus Only on the next outbound call
*4711 Use G711 Only on the next outbound call
*4722 Use G722 Only on the next outbound call
*4729 Use G729 Only on the next outbound call
SPn is the SPn Service where n = 1 through 6 and PP is the OBiTALK Service. Each service is also
referred to as a trunk in this document.
Preprogrammed Star Codes (continued)
Code Description

System Settings
83
● $CFAN = call forward unconditional number (trunk-specific; valid value: a token representing a call
forward number).
● $CFBN = call forward busy number (trunk-specific; valid value: a token representing a call forward
number).
● $CFNN = call forward no-answer number (trunk-specific; valid value: a token representing a call
forward number).
● $MWS = message waiting state (trunk-specific; valid value: 0 for no new messages, 1 for one or more
new messages).
● $DND = do-not-disturb enable (trunk-specific; valid values: 0 for disable, 1 for enable).
● $BAC = block-anonymous caller enable (trunk-specific; valid values: 0 for disable, 1 for enable).
● $BCI = block outbound caller-ID enable (trunk-specific; valid values: 0 for disable, 1 for enable).
● $CWA = call-waiting enable (global; valid values: 0 for disable, 1 for enable).
● $BCI1 = block caller-ID once (global; valid value: 1 for enable).
● $UBCI1 = unblock caller-ID once (global; valid value: 1 for enable).
● $LBM1 = Loopback media (audio samples) once in the next call.
● $LBP1 = Loopback RTP packets once in the next call.
● $CDM1 = Codecs to enable in the next call (temporarily overriding any codec preferences in device
configuration). Each bit of its value represents one audio codec:
Bit0 (LSB) = G711u
Bit1 = G711a
Bit6 = G729
Other bits are reserved.
● $LDN = last dialed number (for redial) (global; read-only).
● $BAR1 = Enable Barge-In 1 on the next call (global; valid value: 1 for enable).
● $Bxrn = Blind Transfer Target Number (global; valid value: a token representing the target number).
● $LCR = last caller’s number (for call return) (global; read-only).
● $SPD[n]
= number for the speed dial n (n = 1 – 99) (global; valid value: literal or token representing
a phone number).
● $CODE = the digit(s) representing the variable part of a star code (see examples below; read-only).
Variable names are case-insensitive.
Star Code Script Actions (ACT)
The general format of an action: ACT(par, par, ….)
The following actions are supported:
● set(VAR,token) = Set the given VAR to the value represented by token.
● call(token) = Call the number represented by token. Phone Settings::
OutboundCallRoute
is
applied when making the call (but not the DigitMap).
● rpdi(token) = Repeat dial the number represented by token.

System Settings
84
● coll(VAR) = Collect a number from the user and store it as the value of the parameter(s)
represented by VAR. The number is collected with Phone Settings::DigitMap applied.
● say(token) = Display the value represented by token in an onscreen notification message. Values
are announced as a list of alphabets or numbers, where token can be a literal (such as 1234) or
another variable (such as $CFAN or SP1($CFBN)).
● wifiap = Enable Wi-Fi access point mode for quick Wi-Fi configuration from a web browser.
● blst = Add the number of the last caller to the X_BlockCallers list.
Action names are case insensitive.
Star Code Script Format
General Format: code, name, action1, action2, action3, …
● code = The star code, such as *72. It may contain a variable part enclosed in parentheses, such as
*74(x|xx). The variable part as entered by the user are stored in the variable $CODE.
● name = A descriptive name of the function of this star code, such as Call Forward Unconditional.
● action1, action2, … = A valid action with parameters.
Actions are carried out one-by-one in the order as specified in the script.
Restrictions:
● At most one coll action per code.
● Either 1 say or 1 call action at most per code, and it must be the last action in the script.
Star Code Script Examples
The following examples are taken from some of the default star code scripts in your phone.
● *69, Call Return, call($LCR)
Calls the number of the caller who last rang your phone.
● *07, Redial, call($LDN)
Redials the last dialed number.
● *72, Call Forward Unconditional, coll($cfan),set($cfa,1)
Your phone collects a number from you according to the digit map, then sets the
CallForwardUnconditionalNumber on all trunks to the collected value, and finally sets the
CallForwardUnconditionalEnable on all trunks to Yes.
To modify the script to enable CallForwardUnconditional on SP1 only, change it to
*72, Call Forward Unconditional SP1, coll(SP1($cfan)),set(SP1($cfa),1)
● *67, Block Caller ID Once, set($BCI1,1)
Enables masking caller ID information one time for the next call on any trunk.

85
Line Keys and Virtual Line Keys
There are twelve (12) physical Line Keys (LKs) on the VVX 450, six (6) on the VVX 350, four (4) on the
VVX 250, and two (2) on the VVX 150. On the VVX 450, the line keys are split half and half to the left and
right of the LCD display. On the VVX 350, VVX 250, and VVX 150, the line keys are on the left side of the
display.
By means of multiple “tabs” or pages on the VX 450, VVX 350, and VVX 250, one single physical line key
becomes multiple Virtual Line Keys (VLKs), one VLK per physical line key per tab. Tabs display across the
top left and right of the screen, with the active tab highlighted. The VVX 150 doesn’t support virtual line keys.
These models support four tabs, providing a total of 48 VLKs on the VVX 450, 24 on the VVX 350, and 16
on the VVX 250. The VVX 150 doesn’t support tabs.
On the VVX 450, the VLKs are further listed and numbered onscreen as Left Line Keys (LLK) for the line
keys on the left side of the display, and simply Line Keys (LK) for the line keys on the right side of the display.
On the VVX 250 and VVX 350, which have only one row of physical line keys on the left, the VLKs are all
labeled Left Line Keys (LLK).
The virtual line keys are numbered and grouped into tabs as follows:
Line Key Window Customization
A Line Key Window (also known as Screen Tile) is a 160Wx34H-pixel area next to each Line Key on the
screen. As shown in the picture above, this window is divided into three nonoverlapping regions: Text Line
1, Text Line 2, and Icon. The information shown in the window depends on the function assigned to the
corresponding line key (which is a feature key) and the current state of the assigned function.
Virtual Line Key Labels on VVX 250, VVX 350, and VVX 450
VLK Groups
within Tabs
Tab 1 Tab 2 Tab 3 Tab 4
VVX 250
4 LKs = 16 VLKS
LLK1 – LLK4 LLK5 – LLK8 LLK9 – LLK12 LLK13 – LLK16
VVX 350
6 LKs = 24 VLKS
LLK1 – LLK6 LLK7 – LLK12 LLK13 – LLK18 LLK19 – LLK24
VVX 450
12 LKs = 48 VLKs
(2 groups of 6
LKs)
LK1 – LK6
LLK1 – LLK6
LK7 – LK12
LLK7 – LLK12
LK13 – LK18
LLK13 – LLK6
LK19 – LK24
LLK19 – LLK24
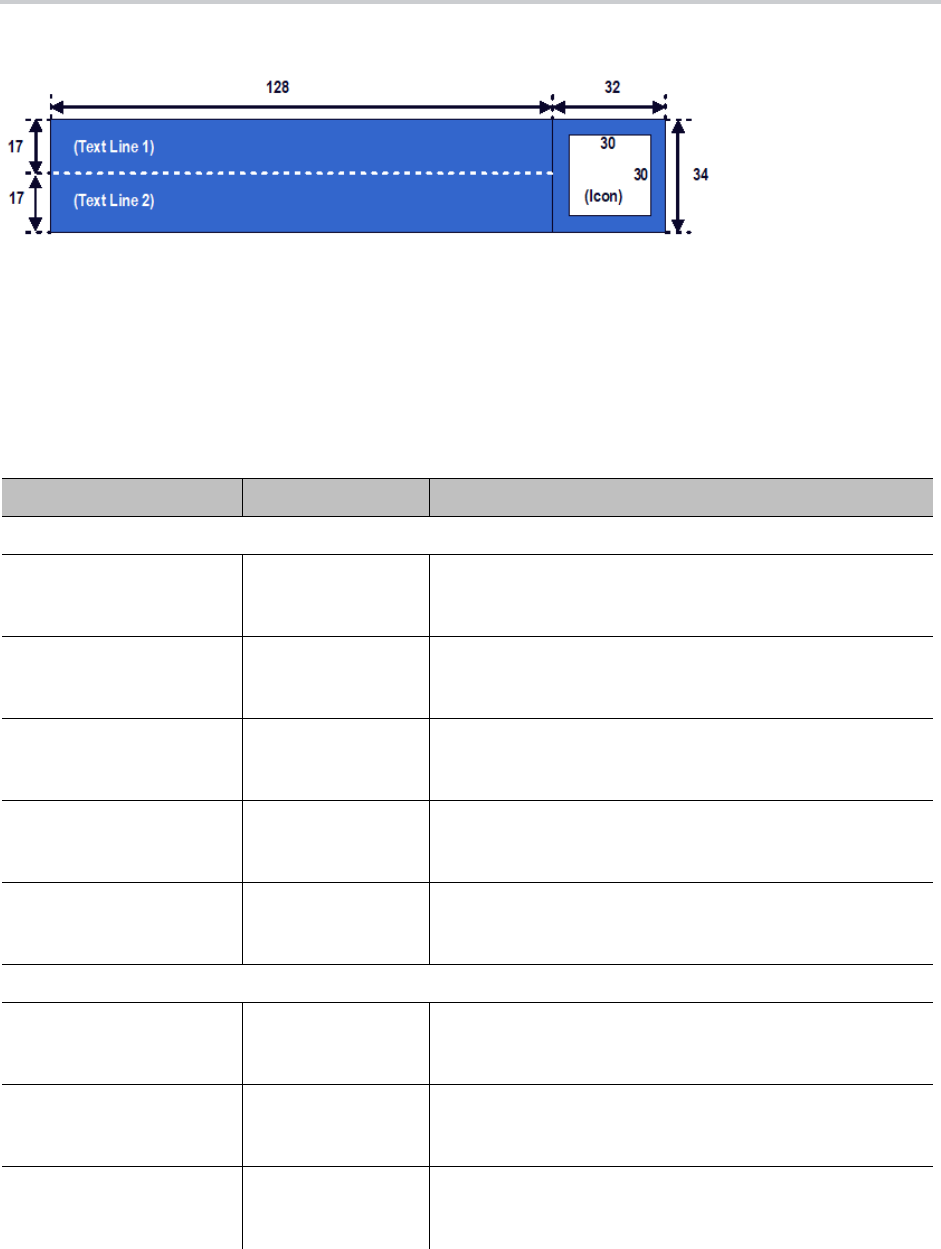
Line Keys and Virtual Line Keys
86
Line Key window dimensions
You can customize the information shown on Text Line 1 and 2 for the following feature key functions with
the parameters in the following table:
● Call Appearance
● Speed Dial
● Busy Lamp Field
● Action URL
Line Key Window Customization Parameters
Parameter Group Parameter Description
Call Appearance
IP Phone – Feature Key
Customization – Call
Appearance
Enable Enables using customized display for Call Appearance
feature keys.
IP Phone – Feature Key
Customization – Call
Appearance
TextLine1 Textual information to show on Text Line 1 area during idle.
IP Phone – Feature Key
Customization – Call
Appearance
TextLine2 Textual information to show on Text Line 2 area during idle.
IP Phone – Feature Key
Customization – Call
Appearance
TextLine1InCall Textual information to show on Text Line 1 area during a
call.
IP Phone – Feature Key
Customization – Call
Appearance
TextLine2InCall Textual information to show on Text Line 2 area during a
call.
Busy Lamp Field
IP Phone – Feature Key
Customization – Busy
Lamp Field
Enable Enables using customized display for Busy Lamp Field
feature keys.
IP Phone – Feature Key
Customization – Busy
Lamp Field
TextLine1 Textual information to show on Text Line 1 area.
IP Phone – Feature Key
Customization – Busy
Lamp Field
TextLine2 Textual information to show on Text Line 2 area.

Line Keys and Virtual Line Keys
87
You can use macros to specify the textual contents for Text Line 1 and Text Line 2 areas. You must precede
a macro with a
$
, such as
$number
or
$(number)
. The enclosing parenthesis is required when a character
that is a legal macro character follows the macro. A legal macro character is one of {
a–z A–Z . _ 0–9
}.
IP Phone – Feature Key
Customization – Call
Appearance
TextLine1InCall Textual information to show on Text Line 1 area when the
monitored extension has one or more calls.
IP Phone – Feature Key
Customization – Call
Appearance
TextLine2InCall Textual information to show on Text Line 2 area when the
monitored extension has one or more calls.
Speed Dial
IP Phone – Feature Key
Customization – Speed
Dial
Enable Enables using customized display for Speed Dial feature
keys.
IP Phone – Feature Key
Customization – Speed
Dial
TextLine1 Textual information to show on Text Line 1 area.
IP Phone – Feature Key
Customization – Speed
Dial
TextLine2 Textual information to show on Text Line 2 area.
Action URL
IP Phone – Feature Key
Customization – Action
URL
Enable Enables using customized display for Action URL feature
keys.
IP Phone – Feature Key
Customization – Action
URL
TextLine1 Textual information to show on Text Line 1 area.
IP Phone – Feature Key
Customization – Action
URL
TextLine2 Textual information to show on Text Line 2 area.
Group n (n = 1, 2, 3, 4)
IP Phone – Feature Key
Customization – Group n
ID The ID to reference this Group.
IP Phone – Feature Key
Customization – Group n
TextLine1 Textual information to show on Text Line 1 area.
IP Phone – Feature Key
Customization – Group n
TextLine2 Textual information to show on Text Line 2 area.
IP Phone – Feature Key
Customization – Group n
Icon Internal icon path or HTTP/HTTPS URL.
Line Key Window Customization Parameters (continued)
Parameter Group Parameter Description

Line Keys and Virtual Line Keys
88
The following macros are available.
Macros for Line Key Window Customizations
Macro Description Notes
$name The Name field as configured for the feature key.
$number The Number field as configured for the feature key.
$service The default name of the service specified in the
Service field for the feature key:
SP1
, …,
SP6
,
OBiTALK
.
Expands into the word
Auto
if
service field isn’t specified.
$service.displayL
abel
The X_DisplayLabel parameter per SPn service or
the DisplayLabel parameter per OBiTALK service.
{Blank} if service field isn’t
specified.
$service.number For SP1 – SP6, this is the User ID of the SIP
account, which is derived from the AuthUserName
or URI parameter of the SP service. For OBiTALK,
this is the OBi number of the phone.
{Blank} if service field isn’t
specified.
$service.displayN
umber
The X_DisplayNumber parameter per SPn
service or the DisplayNumber parameter per
OBiTALK service.
{Blank} if service field isn’t
specified.
$func Short internal name of the function assigned to the
key:
•
call
for Call Appearance
•
blf
for Busy Lamp Field
•
spd
for Speed Dial
•
acturl
for Action URL
{Blank} if function isn’t
specified.
$funcname Long internal name of the function assigned to the
key:
•
Call
for Call Appearance
•
Busy Lamp
for Busy Lamp Field
•
Speed Dial
for Speed Dial
•
XML APP
for Action URL
{Blank} if function isn’t
specified.
$call.service
and
$call.service.x
where x = number,
displayLabel, or
displayNumber
Same as $service and $service.x applying to
the service the call is on.
{Blank} if service isn’t defined
for the call yet.
$call.number Call peer’s Number
$call.name Call peer’s Name
$value For BLF, this is number of calls currently active on
the monitored entity.
The value is {blank} for other functions.

Line Keys and Virtual Line Keys
89
Example: Call Appearance Line Key Settings
In this example, the information that normally displays on line 1 and line 2 of all Call Appearance Line Keys
is reversed. In addition, during a call, "--" is added to the beginning of line 1. Below are the settings for this
example.
$blf.ext The extension of the entity monitored by the feature
key.
@id Line Key Hard Key ID. Expands into:
• 1,2 for VVX 150, VVX 250
• 1,2,3 for VVX 350, VVX 450
@p Line Key Page. Expands into:
• 1 for VVX 150, VVX 250
• 1,2,3,4 for VVX 350, VVX 450
@n Line Key ID. Expands into:
• 1,2 for VVX 150
• 1 – 16 for VVX 250
• 1 – 24 for VVX 350
• 1 – 48 for VVX 450
$eval See the Poly OBiPhoneXML Applications API
Guide.
@text1 The default information displayed on the (Text Line
1) section of the Line Key Window. Applicable in
the TextLine1, TextLine2,
TextLine1InCall, and TextLine2InCall
parameters.
@text2 The default information displayed on the (Text Line
2) section of the Line Key Window. Applicable in
the TextLine1, TextLine2,
TextLine1InCall, and TextLine2InCall
parameters.
@icon The default icon displayed on the (Icon) section of
the Line Key Window. Applicable to the Icon
parameter.
Call Appearance Line Key Settings
Parameter Group Parameter Value
Call Appearance
IP Phone – Feature Key Customization
– Call Appearance
Enable true (that is, the option is
checked)
Macros for Line Key Window Customizations (continued)
Macro Description Notes

Line Keys and Virtual Line Keys
90
Line Key Tabs
By default, the line keys area to the right of the screen has four tabs of VLKs, and only one tab is visible at
any time. You can disable this feature using the option User Preferences::LineKeyTabs. When disabled,
the phone shows no line key tabs in the status bar and only one page of VLKs is available (none on the VVX
150, VLK 1-4 on the VVX 250, and VLK 1-6 on the VVX 350 and VVX 450). The status icons also display in
the right corner. To handle more calls in this case, you may enable multiple calls per Call (Appearance) Key
as described in the next section.
Calls App Behavior
The Calls App shows a list of current calls on the phone. Calls controlled under the same call key are
grouped together in the list with calls on call keys with a smaller VLK index shown first. New calls are added
to the beginning of the call group of the same call key.
The phone can only highlight one call on the Calls App screen, and the corresponding VLKW shows a white
bounding box to identify the call key the highlighted call belongs to. As a user navigates through the calls
on the screen, the white bounding box moves accordingly.
Normally, the calls display together on the Calls App screen. Hence it’s possible to see two calls belonging
to the same call key on the same screen. If this isn’t desirable, you can disable the option User
Preferences::PackCallsOnDisplay, which causes the phone to display only the calls belonging to the
same call key.
IP Phone – Feature Key Customization
– Call Appearance
TextLine1 @text2
IP Phone – Feature Key Customization
– Call Appearance
TextLine2 @text1
IP Phone – Feature Key Customization
– Call Appearance
TextLine1InCall -- @text2
IP Phone – Feature Key Customization
– Call Appearance
TextLine2InCall @text1
Call Appearance Line Key Settings (continued)
Parameter Group Parameter Value

91
Feature Keys
You can configure feature keys on the phone or VVX EM50 expansion module to perform one of many
different predefined functions with a corresponding multicolor LED that shows the status of the assigned
function instance. Side Car Keys, Virtual Line Keys, and Programmable Keys, and are all feature keys that
you can configure.
Feature Key Functions
Phone administrators can configure each feature key to perform one of the following functions listed in the
following table.

Feature Keys
92
:
Feature Keys and Functions
Feature Key
Function Description Icon
Call
Appearance
Makes or receives one call, and the key is known as a call key in
this case. You must have an unused (idle) call key available to
make or receive a new call. The phone administrator should
allocate as many call keys on the phone as the maximum number
of concurrent calls it’s expected to handle.
The VLKW (Virtual Line Key Window) shows nothing but the idle
phone icon (shown on the right column) when no active call is
assigned to the key. Otherwise, the icon changes to reflect the
current call state (Call States and Call State Icons are described in
the Section Making and Receiving Calls and VLKW shows call
information, if available. VLKW may also change its background
color to further reflect the current state.
A call key may be bound to a voice service and is called a bound
call key in that case (otherwise it’s known as an unbound call key).
A bound call key is used to make/receive calls on the bound voice
service only. This is one of the ways for a user to select a specific
line to make a call.
A call key may be bound to a service that is a Shared line. In that
case when no call is on that key, the VLKW information reflects the
state of the respective Shared Call Appearance (SCA). See the
Shared Line and Shared Call Appearances (SCA)
section for more
details on this topic.
Parameters:
• Service: Optional. The service or line with which to bind the
key
• MaxCalls: Number of calls managed by this call key
No Call
Dial tone
Dialing
Connected
Connected-S
Connected-HD
Connected-HDS
Holding
Trying
Peer Ringing
Ringing
Call Ended
SCA: Error
SCA: Idle
SCA: Line Seized
SCA: Trying
SCA: Proceeding
SCA: Connected
SCA: Call Parked
SCA: Holding
SCA: Private Holding

Feature Keys
93
Line Monitor Monitor a Line (a voice service installed on the phone). The Line
events that are monitored include:
• Idle: no calls
• Ringing: at least one incoming call
• In Use: at least one active call
• Holding: at least one call holding
VLKW shows the monitored service name and account user name
(usually same as the account DID number or extension).
This function must be bound to the specific voice service that it
monitors.
Parameters:
• Service: Required. The service or line to monitor
Idle
Ringing
In Use
Holding
BLF (Busy
Lamp Field)
Monitor the call state of another extension. A BLF key must be
bound to a service (as configured by the phone administrator). The
call events that are monitored include:
• Ringing: at least one incoming call
• Holding: at least one call holding
• Busy: at least one active call
• Idle: no calls
• Call parked (against the monitored extension)
VLKW shows the bound service name and the monitored extension
(or DID number, or account user name).
This function must be bound to a specific voice service.
Parameters:
• Service: Required. The service that provides the monitoring
function
• Number: Required. The extension (on the specified service) to
monitor. It may contain multiple attributes
ptt – (no value). Make the call a Push-to-Talk when calling
the monitored extension
spd – An alternative number to call when calling the
monitored extension
bx – (no value). Enable one-touch blind transfer behavior
Idle
Busy
Call Parked
Ringing
Offline
Holding
Call Park
Monitor
Monitor the call park status of a single orbit in a parking lot. Per
default LED setting, the key’s LED is turned off when no call is
parked in that orbit, or otherwise solid red. When the orbit isn’t
occupied, press the CPM key once to park the highlighted call on
screen onto that orbit (the call must be in the Connected or Holding
state to be parked). When the orbit is occupied, press the CPM key
to retrieve the call as an additional call on the current phone.
Parameters:
• Service: Required. The service that provides the parking lot
orbit: parking and monitoring function
• Number: Required. The parking lot orbit to park and monitor
Idle
One Call Ringing
Offline
Feature Keys and Functions (continued)
Feature Key
Function Description Icon

Feature Keys
94
Presence
Monitor
Monitor the presence/status of one buddy in a Buddy List. It also
serves as speed dial to that buddy.
Parameters:
• Service: Required. The service that provides the XMPP
service for this function
• Number: Required. The JID of the buddy in the buddy list to
monitor. Only the user id portion of the JID is needed. You may
specify at the end such that a partial match of the JID is enough.
For example, if the JID of the buddy is:
Number field to monitor this buddy, provided there’s no other JID
in the buddy list that starts with abcd.
Online
Offline
Extended Away
Away
Do Not Disturb
Unknown
Feature Keys and Functions (continued)
Feature Key
Function Description Icon

Feature Keys
95
Speed Dial If a number has not been assigned, VLKW shows no textual
information. Otherwise it shows the speed dial number configured
and, if the speed dial is bound to a service, the name of the service
that it’s bound to. If the speed dial has a display name configured,
the VLIW shows the display name (such as John Seymour) instead
of the assigned number.
Parameters:
Service: Optional. The suggested service the make the call with
Number: Required. The number to call. It may include the following
attributes:
• ptt (with no value): make the key a Push-To-Talk key.
• bx – (with no value). Enable one-touch blind transfer behavior
• send={digit-codes} to automatically dial some digits after the
call, where {digit-codes} is a sequence of the following
case-sensitive codes:
0-9,*,#,a,b,c,d – The DTMF digit to send to the peer. Each
digit is sent with 100 ms on and 100 ms off.
S – Pause for 3 seconds.
s – Pause for 1 second.
U”{prompt}” – Prompt the user to enter one more digit
manually on the phone with the given {prompt} shown on the
screen, then press OK to continue.
A – Wait for the called party to answer before continuing.
Note that the phones starting executing the first code in {digits}
when the call receives early media or when the call is answered,
whichever happens first.
For example: send=Ass1234U”Enter Passcode”5678
It’s acceptable to have the send attribute specified in a speed dial
without a number (for example, Number=;send=1234#). In this
case, the speed dial can be used to send out the list of digits on a
connected call.
Note that if a voice service is specified for the speed dial either in
the Service Field or the given number is a full number (one that
includes voice service information), the phone doesn’t apply digit
map before calling the speed dial. Hence any *codes in the number
aren’t processed and the result may not be desirable. You can
include the *codes that the phone needs to process by enclosing
them in a pair of [...] at the beginning of the number field. For
example: you may set the number field to [*96]SP1(2113);ptt.
The phone then interprets *96 locally (to request auto-answer on
the called party) and makes the call to 2113 using SP1 service.
Speed Dial
Feature Keys and Functions (continued)
Feature Key
Function Description Icon
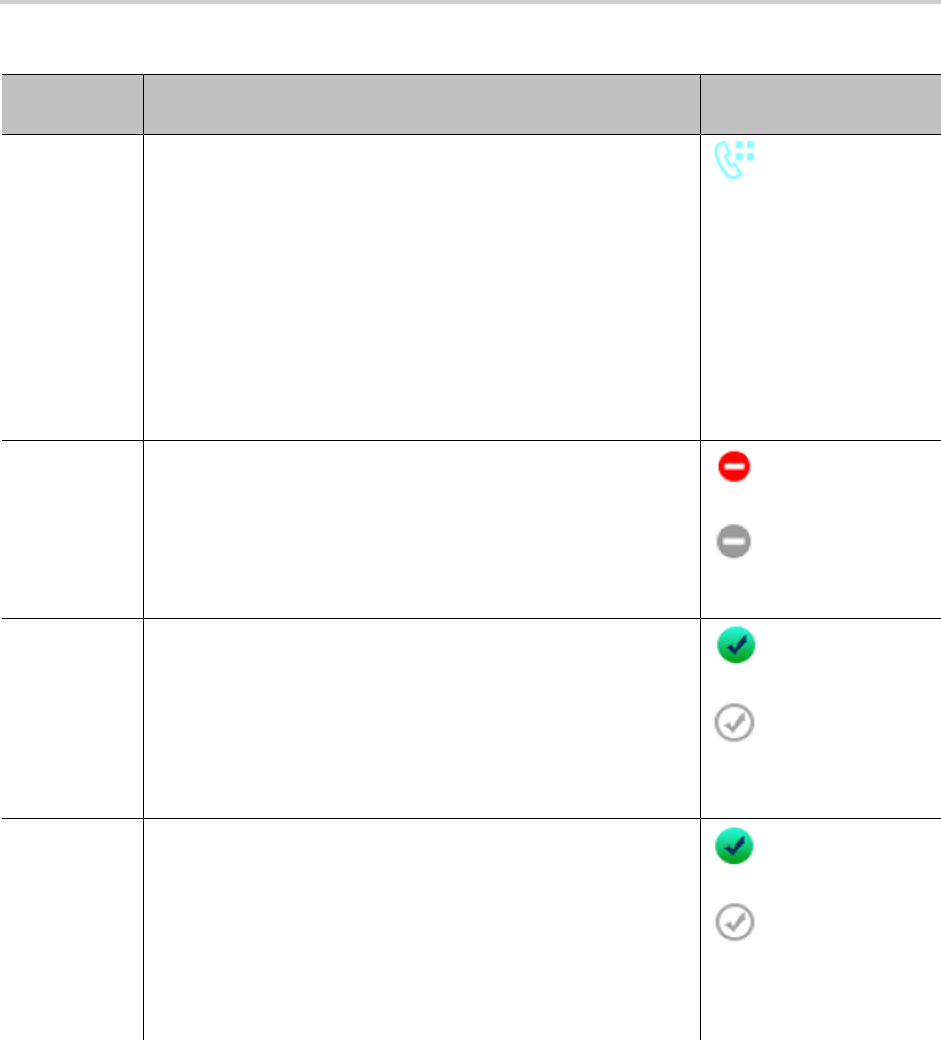
Feature Keys
96
Speed Dial
(continued)
Using Speed Dial to store a Feature Access Code prefix
There are many applications where a function the Service Provider
can perform by calling a feature access code prefix followed by a
target number. For example, the prefix *48 followed by the target
extension such as 1002 may invoke from the Service Provider the
call-monitoring function on extension 1002. You can just dial
*481002 directly. You can also store *48 in a speed dial and label it
as Monitor on the UI. To mark the speed dial as a prefix, you
append 2 or more dots to the number, such as *48… When user
presses the Monitor speed dial, the phone shows a dial box on
screen with *48 entered. Then you can continue to dial the target
extension, or press another Speed Dial or BLF that is the target
extension to monitor.
Speed Dial
Do Not
Disturb
Turn the Do Not Disturb feature on or off. If the function is bound
to a specific voice service, it’s applied to incoming calls on that
service only. Otherwise, it’s applied system wide to all incoming
calls no matter which service the calls come from.
Parameters:
• Service: Optional. The service to apply this feature on. If no
service is specified, the feature applies to all calls the phone
On
Off
Do Not Ring Turn the Do Not Ring feature on or off. When the feature is
enabled, incoming calls come through like normally but phone
doesn’t play audible ring (call waiting tone is played during call
waiting).
This function can’t bound to any specific voice service. It’s applied
system-wide to all incoming calls no matter which service the calls
come from.
Parameters: None
On
Off
Block
Anonymous
Callers
Turn the Block Anonymous Caller feature on or off. If the function
is bound to a specific service, it’s applied to incoming calls on that
service only. Otherwise, it’s applied system wide to all incoming
calls no matter which service the calls come from. If this feature is
enabled, the phone rejects all incoming calls with Caller ID
(name/number) hidden (blocked).
Parameters:
• Service: Optional. The service to apply this feature on. If no
service is specified, the feature applies to all calls on the phone.
On
Off
Feature Keys and Functions (continued)
Feature Key
Function Description Icon
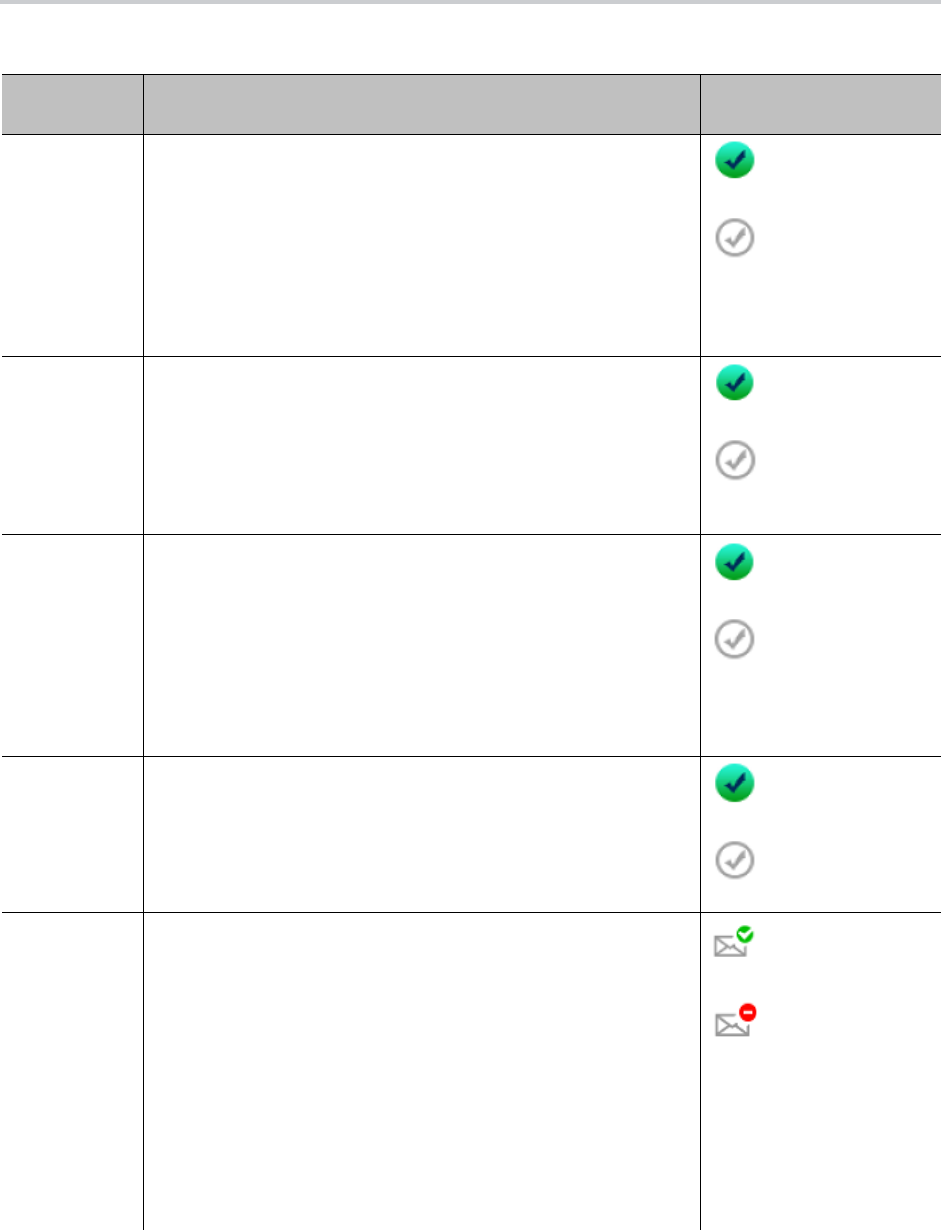
Feature Keys
97
Block
Outgoing
Caller ID
Turn the Block Caller ID feature on or off. If the function is bound
to a specific service, it’s applied to outgoing calls on that service
only. Otherwise, it’s applied system wide to all outgoing calls no
matter which service is used for the calls. If this feature is turned
on, the phone attempts to hide user’s caller ID on outbound calls so
the called party can’t see who’s calling.
Parameters:
• Service: Optional. The service to apply this feature on. If no
service is specified, the feature applies to all calls on the phone.
On
Off
Call Forward
All
Turn the Call Forward All Calls feature on or off. If the function is
bound to a specific service, it’s applied to incoming calls on that
service only. Otherwise, it’s applied system wide to all incoming
calls no matter which service the calls come from.
Parameters:
• Service: Optional. The service to apply this feature on. If no
service is specified, the feature applies to all calls on the phone.
On
Off
Auto Answer Turn the Auto Answer (Intercom Calls) feature on or off. Normally
this feature is turned on so that incoming intercom calls are
answered automatically by the phone on the speakerphone or
headset. If this feature is turned off, incoming intercom calls are
treated as regular calls and the phone rings normally.
This function cannot be bound to any specific voice service. It’s
applied system-wide to all incoming calls, no matter which service
the calls come from.
Parameters: None
On
Off
Call Waiting Turn the Call Waiting feature on or off. Normally, this feature is
enabled and you can accept more incoming calls while already on a
call. If this feature is turned off, all incoming calls are rejected as
busy when you’re on a call.
This function cannot be bound to any specific voice service.
Parameters: None
On
Off
Message
Status
(Monitor
Voicemail
Status)
Monitor the number of messages in a mailbox. The function must
be bound to a SP service that has the MWI (Message Waiting
Indication) feature enabled. The VLKW shows if and how many
new messages are available in the mailbox.
Parameters:
• Service: Required. The SP service that provides the Voicemail
service.
•
Number
: Optional. The number to call (to check voicemail). It may
include the following attributes:
mbox={mailbox-id} where {mailbox-id} is third-party mailbox
to monitor, if it isn’t the same as the main mailbox for the
given SP Service. Don’t specify this attribute if you’re
monitoring the main mailbox for the given SP Service
Messages
No messages
Feature Keys and Functions (continued)
Feature Key
Function Description Icon
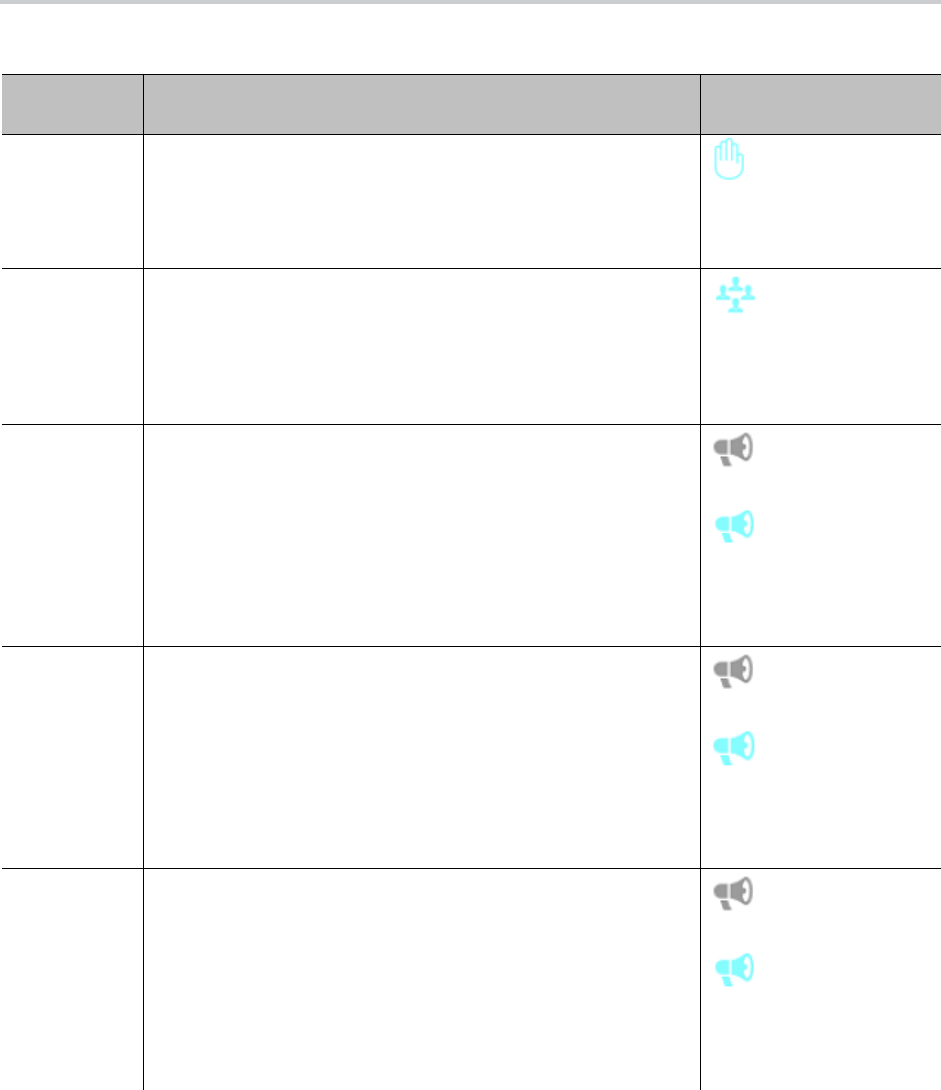
Feature Keys
98
Hold Hold all calls that are in the Connected State. VLKW shows how
many calls are currently in Holding State. The LED turns red if
there’s a least one call in the Holding State, or turned off otherwise.
This function cannot be bound to any specific voice service.
Parameters: None
Hold
Add to
Conference
Add all calls that are in the Holding State to the current
conversation. VLKW shows how many calls are in the Holding
State. The LED turns red is there is at least one call in the Holding
state, or turned off otherwise.
This function cannot be bound to any specific voice service.
Parameters: None
Add to Conference
Join/Leave
Page Group 1
Join/Leave Page Group 1. If the user joins the group, then the
phone automatically turns on the speaker when anyone in the
group starts a page. You can also start the page by pressing down
the feature key. This is known as PTT or Push-to-Talk (otherwise
you’re just listening). If allowed by the phone administrator, you can
also “Clamp On” the feature key to talk continuously without
needing to hold down the key.
This function cannot be bound to any specific voice service.
Parameters: None
Left
Joined
Join/Leave
Page Group 2
Join/Leave Page Group 2. If the user joins the group, then the
phone automatically turns on the speaker when anyone in the
group starts a page. You can also start the page by pressing down
the feature key. This is known as PTT or Push-to-Talk (otherwise
you’re just listening). If allowed by the phone administrator, you can
also “Clamp On” the feature key to talk continuously without
needing to hold down the key.
This function cannot be bound to any specific voice service.
Parameters: None
Left
Joined
Join/Leave
Page Group 3
Join/Leave Page Group 3. If the user joins the group, then the
phone automatically turns on the speaker when anyone in the
group starts a page. You can also start the page by pressing down
the feature key. This is known as PTT or Push-to-Talk (otherwise
you’re just listening). If allowed by the phone administrator, you can
also “Clamp On” the feature key to talk continuously without
needing to hold down the key.
This function cannot be bound to any specific voice service.
Parameters: None
Left
Joined
Feature Keys and Functions (continued)
Feature Key
Function Description Icon

Feature Keys
99
Join/Leave
Page Group 4
Join/Leave Page Group 4. If the user joins the group, then the
phone automatically turns on the speaker when anyone in the
group starts a page. You can also start the page by pressing down
the feature key. This is known as PTT or Push-to-Talk (otherwise
you’re just listening). If allowed by the phone administrator, you can
also “Clamp On” the feature key to talk continuously without
needing to hold down the key.
This function cannot be bound to any specific voice service.
Parameters: None
Left
Joined
Join/Leave
Page Group 5
Join/Leave Page Group 5. If the user joins the group, then the
phone automatically turns on the speaker when anyone in the
group starts a page. You can also start the page by pressing down
the feature key. This is known as PTT or Push-to-Talk (otherwise
you’re just listening). If allowed by the phone administrator, you can
also “Clamp On” the feature key to talk continuously without
needing to hold down the key.
This function cannot be bound to any specific voice service.
Parameters: None
Left
Joined
Join/Leave
Page Group 6
Join/Leave Page Group 6. If the user joins the group, then the
phone automatically turns on the speaker when anyone in the
group starts a page. You can also start the page by pressing down
the feature key. This is known as PTT or Push-to-Talk (otherwise
you’re just listening). If allowed by the phone administrator, you can
also “Clamp On” the feature key to talk continuously without
needing to hold down the key.
This function cannot be bound to any specific voice service.
Parameters: None
Left
Joined
Join/Leave
Page Group 7
Join/Leave Page Group 7. If the user joins the group, then the
phone automatically turns on the speaker when anyone in the
group starts a page. You can also start the page by pressing down
the feature key. This is known as PTT or Push-to-Talk (otherwise
you’re just listening). If allowed by the phone administrator, you can
also “Clamp On” the feature key to talk continuously without
needing to hold down the key.
This function cannot be bound to any specific voice service.
Parameters: None
Left
Joined
Join/Leave
Page Group 8
Join/Leave Page Group 8. If the user joins the group, then the
phone automatically turns on the speaker when anyone in the
group starts a page. You can also start the page by pressing down
the feature key. This is known as PTT or Push-to-Talk (otherwise
you’re just listening). If allowed by the phone administrator, you can
also “Clamp On” the feature key to talk continuously without
needing to hold down the key.
This function cannot be bound to any specific voice service.
Parameters: None
Left
Joined
Feature Keys and Functions (continued)
Feature Key
Function Description Icon
Feature Keys
100
Join/Leave
Page Group 9
Join/Leave Page Group 9. If the user joins the group, then the
phone automatically turns on the speaker when anyone in the
group starts a page. You can also start the page by pressing down
the feature key. This is known as PTT or Push-to-Talk (otherwise
you’re just listening). If allowed by the phone administrator, you can
also “Clamp On” the feature key to talk continuously without
needing to hold down the key.
This function cannot be bound to any specific voice service.
Parameters: None
Left
Joined
Join/Leave
Page Group
10
Join/Leave Page Group 10. If the user joins the group, then the
phone automatically turns on the speaker when anyone in the
group starts a page. You can also start the page by pressing down
the feature key. This is known as PTT or Push-to-Talk (otherwise
you’re just listening). If allowed by the phone administrator, you can
also “Clamp On” the feature key to talk continuously without
needing to hold down the key.
This function cannot be bound to any specific voice service.
Parameters: None
Left
Joined
Change ACD
Agent State
Change/monitor an ACD (or Call-Center) Agent State to one of the
following values:
• Available (to take new calls)
• Unavailable (to take new calls)
• Signed Off
• Wrapping Up (the last call)
ACD stands for Automated Call Distribution is the primary way a
call-center distributes calls among a number of agents working for
the call-center. The ACD controller should only send incoming call
to an agent whose state is “Available”.
Note that an agent can’t change state to “Signed Off” or “Wrapping
Up” directly by pressing the feature key. To change to these states,
an agent must use the corresponding feature key menu item from
the UI (invoked by pressing and holding down the feature key), or
some other means provided by the softswitch, such as a web
portal.
This function must be bound to a specific voice service. The ACD
agent handles calls on the bound service only with respect to the
underlying Call Center. The Call Center isn’t aware of calls the
agent makes or receives with other voice services installed on the
phone.
Parameters:
• Service: Required. The service that provides the ACD Agent
function.
Signed Off
Available
Wrapping Up
Unavailable
Feature Keys and Functions (continued)
Feature Key
Function Description Icon

Feature Keys
101
Guest User
Login/Logout
This feature is also known as Hoteling on some softswitches. The
phone may be set up to be used temporarily by a guest, such as a
visiting employee or temp worker. The guest can press the key and
enter a user-id and password to log in and start using the guest
phone with a personal extension temporarily (until the guest logs
out or the server logs the user out remotely).
This function must be bound to a specific voice service (that
supports this feature).
Parameters:
• Service: Required. The service that provides the Guest Login
function.
Guest Logged In
Guest Logged Out
Enter
Disposition
Code for the
last call.
Enter a Disposition Code for the last call. This is used by a Call
Center agent to enter a disposition code for the last customer call.
This function must be bound to a specific voice service (that
supports this feature).
Parameters:
• Service: Required. The service that provides the Disposition
Code function
Enter Disposition Code
Next Tab Press this key to switch to the next VLK Tab or cycle back to VLK
Tab 1.
This function can’t bound to any specific voice service.
Parameters: None
Note that the multiple Line Key Tabs feature can be disabled also
by disabling the option User Preferences::LineKeyTabs. In that
case the “Next Tab” function does nothing.
Next Tab
Transfer Invoke the call transfer function on the currently highlighted call on
the screen when the Calls App is at the top of the display stack.
The call must be in a transferable state, that is, Holding or
Connected State.
Parameters:
• Service: Optional. The suggested service to use to make the
call to the transfer target, if the Number parameter is also
specified
• Number: Optional. The number of the transfer target to call. User
aren’t prompted to enter the transfer target number if this
parameter is specified
Transfer
Blind Transfer Invoke the blind call transfer function on the currently highlighted
call on the screen when the Calls App is at the top of the display
stack. The call must be in a transferable state, that is, Holding or
Connected State.
Parameters:
• Number: Optional. The number of the transfer target to transfer
the call to. Users aren’t prompted to enter the transfer target
number if this parameter is specified
Blind Transfer
Feature Keys and Functions (continued)
Feature Key
Function Description Icon

Feature Keys
102
Feature Key Configuration Parameters
You can configure each feature key independently. The configuration of each feature key comprises the
following set of parameters:
● Function: Select the function to assign to this feature key.
● Service: The service to bind the key to.
Required for:
ACD Sign On or Off
Busy Lamp Field
Call Park Monitor
Disposition Code
Hoteling
Exec Filter On or Off
Exec Assistant
Line Monitor
Message Status
Presence Monitor
Security Class
Optional for:
Block Anonymous Call
Block Caller ID
Call Appearance
Call Forward
Do Not Disturb
Transfer
Blind Transfer
2
Same as the Transfer function, collecting the target number from
the user, but a blind transfer is performed after the target number is
collected. In contrast to Blind Transfer, Blind Transfer 2 plays dial
tone, applies digit map, and would time out as user enters the
target number.
Blind Transfer 2
Action URL Launch an OBiPhoneXML application at the given URL
Parameters:
• Number: Required. The URL of the OBiPhoneXML application to
run
• Name: A name to identify the application on the phone screen
Launch Action URL
Feature Keys and Functions (continued)
Feature Key
Function Description Icon

Feature Keys
103
Speed Dial
Not used otherwise.
● Number: Required for:
BLF
Call Park Monitor
Presence Monitor
Speed Dial
Optional for:
Transfer
Blind Transfer
● Name: Optional for all functions. It’s used as a nickname to refer to the entity specified in the Number
parameter.
● MaxCalls: Maximum number of calls to overload on the key. This is only applicable if the function is
Call Appearance. Therefore, this parameter isn’t available under Programmable Keys and Side Car
Keys.
● Group: A short name referencing the Line Key Customization Group to use to customize the layout
of this Line Key.
It’s very common to have multiple feature keys defined with the same function, such as Call Appearance
and Speed Dial. It isn’t advisable to have a particular monitor function with the same monitored entity
configured on more than one key. For example, don’t assign more than one BLF key to monitor the same
extension or assign more than one Message Status key to monitor the same mailbox. The phone can update
only one of the keys when the status of the monitored entity changes.

104
Softkeys
You can customize some of the softkey sets by entering a list of softkey specifications as a
comma-separated list in the corresponding softkey parameters.
Softkey Specification
General format:
{id}[?][;attr[;attr[…]]]
{id}
is the standard softkey ID.
?
is an optional syntax to designate if the key shouldn’t be hidden if the hidden condition is matched.
You can include one or more
attr
attribute elements separated by a semicolon (;). Attributes are usually in
the following format
{attribute-name}[={attribute-value}]
. You can enclose
{attribute-value}
in
double quotes (“) to preserve all the enclosed characters. Otherwise, all the white spaces are removed. The
enclosing double quotes aren’t counted as part of the value.
For example:
number=**922222222, name=”Echo Server”
, or
url=”http://abc.com/call.png,auth-token=abcdefg”
. That is, the phone interprets all contents within
the double quotes as part of the attribute value.
Softkey Set Parameter Syntax
A
{softkey-spec}
is a softkey specification and the
|{softkey-spec}
syntax lets you specify an optional
alternative softkey to show when the given softkey is hidden. A softkey is hidden when its hidden condition
is matched. The hidden condition for each softkey is defined internally.
For example, the
missed|lines
option specifies that the Missed softkey displays when it isn’t hidden,
otherwise the Lines softkey displays. If the alternative softkey is an empty key (unspecified or not found),
an <Empty> softkey displays as the alternative. Otherwise, a hidden softkey is packed and doesn’t occupy
any softkey slot on the display.
For example: the set
barge, monitor, , newcall
shows Barge In, Monitor, <Empty>, and New Call when
barge and monitor aren’t hidden, and <Empty>, New Call when barge and monitor are hidden. On the other
hand, the set
barge|,monitor|,,newcall
shows the same when barge and monitor aren’t hidden, but
<Empty>, <Empty>, <Empty>, New Call when they are.
Assignable Softkeys
You can assign these softkeys to the configurable softkey sets.

Softkeys
105
Assignable Softkeys
Softkey
ID Description
Hidden
Condition
Default
Label
Default
Label1
Default
Label2
Default
Label3 Where
aans (User Preferences) Auto Answer
Intercom Calls
Auto
Answer
Auto
Answer
Any
acd ACD Agent Sign On or Off Signed
Out
Availabl
e
Unavail
able
Wrappi
ng Up
Any
achis All Calls History All
Calls
Any
acturl Action URL XML
App
Any
bac (User Preferences) Block
Anonymous Call
Example:
bac;label=”Hide CID”;
label1=”Show CID”;
number=**9222222222
Block
Anony
mous
Call
Block
Anony
mous
Call
Any
bci (User Preferences) Block Caller
ID (also known as Anonymous
Call)
Block
Caller
ID
Block
Caller
ID
Any
cfa (User Preferences) Call Forward
Unconditional (also known as
Call Forward All) enable/disable
Call
Forwar
d
Call
Forwar
ded
Any
chis Call History Call
History
Any
cwa (User Preferences) Call Waiting
enable/disable
Call
Waiting
Any
dnd (User Preferences) Do Not
Disturb
Do Not
Disturb
Do Not
Disturb
Any
dnr (User Preferences) Do Not Ring Do Not
Ring
Do Not
Ring
Any
emlogin A login utility to collect a user
name and password from the
user and trigger ITSP
provisioning (by executing the
currently configured ITSP
ConfigURL) and use the given
user name/password for
authentication. The ITSP can use
this step for binding a device to
the login user name.
Prov
Login
Any

Softkeys
106
lcr (Last) Call Return Call
Return
Any
ldap LDAP directory search LDAP Any
ldn Last Number Redial Redial Any
lines Shows a list of available of lines
on screen to choose from to
make a new call.
Lines Any
mchis Same as missed Missed Any
missed Missed Calls History No New
Missed
Calls
Missed Any
mwi Message Status (also known as
Message Waiting Indication)
Messa
ges
Any
ochis Same as redial. Redial Any
phbk Invokes the Phone Book app. Phone
Book
Any
rchis Received Calls History Receiv
ed
Calls
Any
redial Outgoing Calls History Redial
List
Any
pg1 Page Group 1 Page
Group
1
Page
Group
1
Any
pg2 Page Group 2 Page
Group
2
Page
Group
2
Any
pg3 Page Group 3 Page
Group
3
Page
Group
3
Any
pg4 Page Group 4 Page
Group
4
Page
Group
4
Any
pg5 Page Group 5 Page
Group
5
Page
Group
5
Any
Assignable Softkeys (continued)
Softkey
ID Description
Hidden
Condition
Default
Label
Default
Label1
Default
Label2
Default
Label3 Where

Softkeys
107
pg6 Page Group 6 Page
Group
6
Page
Group
6
Any
pg7 Page Group 7 Page
Group
7
Page
Group
7
Any
pg8 Page Group 8 Page
Group
8
Page
Group
8
Any
pg9 Page Group 9 Page
Group
9
Page
Group
9
Any
pg10 Page Group 10 Page
Group
10
Page
Group
10
Any
Assignable Softkeys (continued)
Softkey
ID Description
Hidden
Condition
Default
Label
Default
Label1
Default
Label2
Default
Label3 Where

Softkeys
108
sd Speed Dial. It takes four
additional optional attributes:
• name: the caller name
corresponding to the speed
dial number
• number: the speed dial
number, which can be full or
simple
• ptt: (no value) enable
Push-To-Talk option
• send: {digit-codes} to
automatically dial some digits
after the call, where
{digit-codes} is a sequence of
the following case-sensitive
codes:
0-9,*,#,a,b,c,d – The
DTMF digit to send to the
peer. Each digit is sent
with 100 ms on and 100
ms off.
S – Pause for 3 seconds.
s – Pause for 1 second.
U”{prompt}” – Prompt
users to enter one or more
digits manually with the
given {prompt} shown on
the screen. Users then
press the OK softkey to
continue.
A – Wait for the called
party to answer before
continuing.
Note that the phones start
executing the first code in {digits}
when the call receives early
media or when the call is
answered, whichever happens
first.
Speed
Dial
Any
Assignable Softkeys (continued)
Softkey
ID Description
Hidden
Condition
Default
Label
Default
Label1
Default
Label2
Default
Label3 Where

Softkeys
109
sd
(cont.)
For example:
send=Ass1234U”Enter
Passcode”5678
It’s acceptable to have the send
attribute specified in a speed dial
without a number (for example,
sd;send=1234#;label=Park
). In
this case, the speed dial is used
to send out the list of digits on a
connected call, which you should
only use in the CallConnected
softkey set.
Example:
sd;label=”Echo Test”;
number=**9222222222
sd;send=1234;label=Park
Speed
Dial
Any
ciurl Invokes the Call-Info URL of the
call as an action URL.
Call-Info
URL not
available
Call
Info
Ringing,
CallConn
ecting,
CallConn
ected,
CallHoldi
ng
dial Calls the entered number. Dial Dialing,
OnDialin
g
backsp
ace
Removes the digit or character to
the left of the cursor in the input
box.
Backsp
ace
Dialing,
OnDialin
g
mm Returns to the Main menu to
select an item as the number to
call.
Main
Menu
Dialtone
mode Switching Input Mode Switch
Mode
Dialtone,
Dialing,
OnDialin
g
switch.li
ne
Switching Line Switch
Line
OnDialin
g
answer Answers the selected incoming
(and ringing) call.
Answer Ringing
Assignable Softkeys (continued)
Softkey
ID Description
Hidden
Condition
Default
Label
Default
Label1
Default
Label2
Default
Label3 Where

Softkeys
110
join Transfers one conferee to the
other in a 3-way (local-mixed)
conference call.
Less than
or more
than two
calls on the
phone are
currently in
the
Connected
state.
Join CallConn
ected
reject Rejects the selected incoming
(and ringing) call as busy.
Reject Ringing
newcall Starts a new call with dial tone. New
Call
Ringing,
CallConn
ected.
CallHoldi
ng,
CallConn
ecting,
CallPark
ed,
SCAInUs
e
end Ends the selected call. End CallConn
ecting.
CallConn
ected.
XferTryin
g,
XferRingi
ng,
XferCon
nected,
ConfTryi
ng,
ConfRing
ing,
ConfCon
nected
hold Holds the selected call. This key
is mutually exclusive with the
Resume key.
Hold CallConn
ected
privhold Holds the selected call privately
when the Call Appearance is an
SCA.
Private
Hold
CallConn
ected
Assignable Softkeys (continued)
Softkey
ID Description
Hidden
Condition
Default
Label
Default
Label1
Default
Label2
Default
Label3 Where

Softkeys
111
resume Resumes the selected call. This
key is mutually exclusive with the
Hold key.
Resum
e
CallHoldi
ng
conf Confer
ence
CallConn
ected,
CallHoldi
ng
add2co
nf
Resumes the holding call to add
to the current conference.
No other
call on the
phone that
is currently
in the
Connected
state
Add To
Conf
CallHoldi
ng
add2co
nf
Answers the incoming call to
directly add it to the current
conference.
No other
call on the
phone that
is currently
in the
Connected
state
Add To
Conf
Ringing
transfer Transfers the selected call. It
takes these additional optional
attributes:
• name: the caller name
corresponding to the speed
dial number
• number: the speed dial
number, which can be full or
simple
Example:
transfer;label=”Supervisor”
;
number=sp2(1034)
Transfe
r
CallConn
ected,
CallHoldi
ng
Assignable Softkeys (continued)
Softkey
ID Description
Hidden
Condition
Default
Label
Default
Label1
Default
Label2
Default
Label3 Where

Softkeys
112
bxfer Blind transfers the selected call.
It takes these additional optional
attributes:
• name: the caller name
corresponding to the speed
dial number
• number: the speed dial
number, which can be full or
simple
Note that bxfer doesn’t time out
on dialing the target number and
doesn’t apply digit map on the
dialed number.
Example:
bxfer;label=”To Vmail”;
number=sp1(*28)
Blind
Transfe
r
CallConn
ected,
CallHoldi
ng
bxfer2 Same as transfer softkey with
respect to collecting the target
number from the user, but a blind
transfer is complete after the
target number is collected. In
contrast to bxfer, bxfer2 plays
dial tone, applies digit map, and
would time out as user enters the
target number.
Blind
Transfe
r
CallConn
ected,
CallHoldi
ng
cbctl Invokes conference bridge
control app to view who’s on the
bridge or to apply certain control
on the selected participants.
Peer isn’t a
conference
bridge.
Bridge
Control
CallConn
ected
park Parks the selected call against
the current extension.
Park CallConn
ected,
CallHoldi
ng
dispcod
e
Enters disposition code for the
selected call.
Disposition
Code
service not
enabled
Dispos
e Code
CallConn
ected,
CallHoldi
ng
trace Starts a call trace for the selected
call.
Call Trace
service not
enabled.
Trace CallConn
ected,
CallHoldi
ng
Assignable Softkeys (continued)
Softkey
ID Description
Hidden
Condition
Default
Label
Default
Label1
Default
Label2
Default
Label3 Where

Softkeys
113
escalat
e
Escalates the selected call to a
supervisor.
Escalate
service not
enabled.
Escalat
e
CallConn
ected,
CallHoldi
ng
rec.start Starts call recording. Call
Recording
service not
enabled.
Rec.St
art
CallConn
ected,
CallHoldi
ng
rec.stop Stops call recording. Call
Recording
service not
enabled.
Rec.St
op
CallConn
ected,
CallHoldi
ng
rec.pau
se
Pauses call recording Call
Recording
service not
enabled.
Rec.Pa
use
CallConn
ected,
CallHoldi
ng
rec.resu
me
Resumes call recording. Call
Recording
service not
enabled.
Rec.Re
sume
CallConn
ected,
CallHoldi
ng
xfer.no
w
Completes call transfer operation Transfe
r Now
XferRingi
ng,
XferCon
nected
conf.no
w
Starts the conference now. That
adds the conference target to the
conference by resuming the
original call where the
conference function was started.
Confer
ence
Now
ConfRing
ing,
ConfCon
nected
split Turns the call to conference
target (that hasn’t joined the
conference yet) into a regular
call, at the same call state. This
is equivalent to pressing the
Cancel key on the phone while
the screen is showing an overlay
of the call progress with the
conference target.
Split ConfTryi
ng,
ConfRing
ing,
ConfCon
nected
split Breaks up a merged conference
call item into individual call items
on screen with each conferee
and places all conferee calls on
hold.
Highlighted
call item is
NOT a
merged
conference
call.
Split Conferen
cing
Assignable Softkeys (continued)
Softkey
ID Description
Hidden
Condition
Default
Label
Default
Label1
Default
Label2
Default
Label3 Where

Softkeys
114
barge Barges in on a (shared) call that
is in progress or holding at
another phone.
(Share)
Call isn’t
connected
or holding.
Barge
In
SCAInUs
e
monitor Monitors a (share) call that is in
progress on another phone.
(Share)
Call isn’t
connected.
Monitor SCAInUs
e
pickup Picks up a parked call at the
highlighted extension
No call
parked
Pickup CallPark
ed
mute Selectively mutes a call. Mute UnMute CallConn
ected,
CallConn
ecting
coach Requests to coach the call peer,
or request to get out of coaching
from the call peer
Coach No
Coach
CallConn
ected
coache
e
Enables Coachee mode on this
call, or disable Coachee mode
on this call.
Coache
e
No
Coache
e
CallConn
ected
nohc No Hold New Call – Starts a new
call without placing the current
calls on hold first.
No
Hold
Call
CallConn
ected
divert Diverts a ringing incoming call to
a target number that user enters.
Divert Ringing
ns.acd Sets ACD Agent State on the
selected SPn service.
Feature
Sync
Disabled
Signed
Out
Availabl
e
Unavail
able
Wrappi
ng Up
NetServi
ces
ns.bci Turns on or off Anonymous Call
feature on the selected SPn
service.
Feature
Sync
Disabled
Anony
mous
Anony
mous
NetServi
ces
ns.dnd Turns on or off Do Not Disturb
feature on the selected SPn
service.
Feature
Sync
Disabled
Do Not
Disturb
Do Not
Disturb
NetServi
ces
ns.exec Turns on or off Executive Call
Filtering feature on the selected
SPn service.
Feature
Sync
Disabled
Exec
Filter
Exec
Filter
NetServi
ces
ns.xass Turns on or off Executive
Assistant Divert on the selected
SPn service.
Feature
Sync
Disabled
Exec
Assist
Exec
Assist
NetServi
ces
Assignable Softkeys (continued)
Softkey
ID Description
Hidden
Condition
Default
Label
Default
Label1
Default
Label2
Default
Label3 Where

Softkeys
115
ns.rmoff Turns on or off Remote Office
feature on the selected SPn
service.
Feature
Sync
Disabled
Rm
Office
Rm
Office
NetServi
ces
ns.simri
ng
Turns on or off Simultaneous
Ringing feature on the selected
SPn service.
Feature
Sync
Disabled
Simlt
Ring
Simlt
Ring
NetServi
ces
ns.cfa Turns on or off Call Forward All
(also known as Unconditional)
feature on the selected SPn
service.
Feature
Sync
Disabled
Call
Forwar
d
Call
Forwar
ded
NetServi
ces
ns.cfb Turns on or off Call Forward
Busy feature on the selected
SPn service.
Feature
Sync
Disabled
Cfwd
Busy
Cfwd
Busy
NetServi
ces
ns.cfna Turns on or off Call Forward No
Answer feature on the selected
SPn service.
Feature
Sync
Disabled
Cfwd
No Ans
Cfwd
No Ans
NetServi
ces
ns.seccl
ass
Gets or sets Security Calls on the
selected SPn service.
Feature
Sync
Disabled
Sec
Class
NetServi
ces
ns.disp
code
Sends a call disposition code on
the selected SPn service.
Feature
Sync
Disabled
Disp
Code
NetServi
ces
ns.hotel Gets or sets Hoteling feature on
the selected SPn service.
Feature
Sync
Disabled
Hotelin
g
NetServi
ces
ns.bwa
nw
Gets or sets BroadWorks
Anywhere feature on the
selected SPn service.
Feature
Sync
Disabled
BW
Anywh
ere
NetServi
ces
ns.dir Loads, views, or refreshes the
network directory on the selected
SPn service.
Feature
Sync
Disabled
Dir NetServi
ces
ns.clog Loads, views, or refreshes the
network call history on the
selected SPn service.
Feature
Sync
Disabled
CLog NetServi
ces
ns.budd
y
Loads, views, or refreshes the
Buddy List on the selected SPn
service.
Feature
Sync
Disabled
Buddy
List
NetServi
ces
blf.call Calls the monitored extension. Call BLFCall
Assignable Softkeys (continued)
Softkey
ID Description
Hidden
Condition
Default
Label
Default
Label1
Default
Label2
Default
Label3 Where

Softkeys
116
blf.ans
wer
Answers the highlighted call that
is ringing on the monitored
extension.
X_BlfDirec
tedCallPic
kup is
disabled
for the SPn
service.
Answer BLFCall
blf.pick
up
Picks up a call that is currently
parked against the monitored
extension
X_BlfCallP
ickup is
disabled
for the SPn
service.
Pick Up BLFCall
blf.barg
e
Barges in the highlighted call that
is currently active on the
monitored extension.
X_BlfBarg
In is
disabled
for the SPn
service.
Barge
In
BLFCall
blf.moni
tor
Barges in to monitor only the
highlighted call that is currently
active on the monitored
extension.
X_BlfBarg
e is
disabled
for the SPn
service.
Monitor BLFCall
blf.coac
h
Barges in to coach (also known
as whisper) only the highlighted
call that is currently active on the
monitored extension.
X_BlfWhis
per is
disabled
for the SPn
service.
Coach BLFCall
Assignable Softkeys (continued)
Softkey
ID Description
Hidden
Condition
Default
Label
Default
Label1
Default
Label2
Default
Label3 Where

117
Broadsoft Server Features
This section provides information on configuring OBi devices and features with Broadsoft servers.
ACD Agent State
ACD stands for Automated Call Distribution and is the primary way a call center distributes calls among a
number of agents. Normally the ACD controller only sends a new call to an agent who is in the “Available”
state. An agent typically “Signs On” when they arrive at work and then “Signs Off” when done for the day (or
taking a very long break). Agents may at any time tag themselves as “Unavailable” when taking a break, or
“Wrapping Up” when filing paperwork for the last call before taking another call. Through as-event
subscription, your phone allows an agent to sign on, sign off, or change their availability states from the
phone UI. To make this feature available on the phone, you must enable the SPn Service – Network
Provided Services::ACDAgent option.
You can invoke this feature in two ways:
● Press the feature key with the function ACD Agent.
● Within the Net Services App, select the SP service, and then select the ACD Sign On/Off item.
With the ACD feature key, the agent can sign on by pressing the key once.
You can sign on or off and change your state from the phone UI. You can set your state to one of the
following values:
● Available (to take new calls)
● Unavailable (to take new calls)
● Signed On
● Signed Off
● Wrapping Up (the last call)
While Signed Off, press the key once to sign on and become Available. While Available, press the key once
to become Unavailable. You must also enter one of the valid unavailable reason codes (such as 11) that are
defined by the Call Center administrator. While Unavailable or Wrapping Up, you can press the key once to
become Available again.
You can’t change your state to Signed Off or Wrapping Up directly by pressing the feature key. To
change to these states, you must use the corresponding feature key menu item from the UI
(invoked by pressing and holding down the feature key), or some other means provided by the
softswitch, such as a system web interface for agents.

Broadsoft Server Features
118
Recording Calls
When you enable this feature, the phone shows one of the following call recording states in the Calls app:
The softkey options for recording controls options are available only when the call is in the Connected or
the Holding state.
Call Recording Controls
Call Recording State Description Available Softkey Options Icon
off Recording is off Rec.Start
on Recording is on Rec.Stop, Rec.Pause
paused Recording is pausedt Rec.Resume
na Recording isn’t enabled

119
Menu Customization Parameters
The parameters for customizing some local interface menus are summarized in the following table.
UI Menu Customization
Parameter Group Parameter Description
Main Menu
IP Phone – Phone Settings – GUI
Menus
MainMenu1 For example:
directories,calls,call-histories,all-p
references,settings,prod-info,messages
,buddy
Preferences Menu
IP Phone – Phone Settings – GUI
Menus
PreferencesMenu1 For example:
language;Language,timeFormat;Time
Format,dateFormat;Date Format
IP Phone – Phone Settings – GUI
Menus
PreferencesMenu2
IP Phone – Phone Settings – GUI
Menus
PreferencesMenu3
IP Phone – Phone Settings – GUI
Menus
PreferencesMenu4
IP Phone – Phone Settings – GUI
Menus
PreferencesMenu5
IP Phone – Phone Settings – GUI
Menus
PreferencesMenu6
Settings Menu
IP Phone – Phone Settings – GUI
Menus
SettingsMenu1 For example:
net;Network,wifi;WiFi,flash;Storage,ri
ngfile;Ringtones
IP Phone – Phone Settings – GUI
Menus
SettingsMenu2 For example:
voice;Voice
Services,sd99,clrcache,admin;Device
Admin,login
Product Information Menu

Menu Customization Parameters
120
Main Menu Item IDs
Main Menu items include the basic set of menu choices on the Home screen, as well as custom proprietary
items that service providers can provision on your phone.
IP Phone – Phone Settings – GUI
Menus
ProductInfoMenu1 For example:
ipaddr,model;Model,obinumber;OBi
Number,mac;MAC Address,wfmac;WiFi MAC
Address,serial;Serial Number
IP Phone – Phone Settings – GUI
Menus
ProductInfoMenu2
Net Services Menu
IP Phone – Phone Settings – GUI
Menus
NetServicesMenu1 For example:
regst,ringtone,acd,bac,bci,bwanw,buddy
,ccs,cfa,cfb,cfna,rec,dnd,dispcode,exe
c,xass,hotel,clog,dir,rmoff,secClass,s
imring
IP Phone – Phone Settings – GUI
Menus
NetDirectoryMenu1 For example:
name,firstName,lastName,ext,number,ema
il,groupId,department,mobile,userId,im
pId,presence
Device Administration Menu
IP Phone – Phone Settings – GUI
Menus
DeviceAdministrationM
enu1
For example:
admin.port,admin.adminPassword,admin.u
serPassword,admin.syslogServer,prov.it
sp.Method,prov.itsp.Interval,prov.itsp
.ConfigURL,fwup.Method,fwup.Interval,f
wup.FirmwareURL
IP Phone – Phone Settings – GUI
Menus
FactoryResetRequireAd
minPassword
This parameter requires the user to enter the
Web Administrator password to issue a factory
reset from the phone. The default is True.
IP Phone – Phone Settings – GUI
Menus
CustomDictionary This parameter enables you to specify an XML
dictionary to replace built-in GUI messages
with custom messages.
Main Menu Items
Main Menu Item ID Default Caption Description
phone-book Contacts Local phone book.
calls Current Calls List all the currently ongoing calls.
UI Menu Customization (continued)
Parameter Group Parameter Description

Menu Customization Parameters
121
Net Services Menu Item IDs
This table lists the menu items on the Net Services menu of the VVX business IP phones, OBi Edition. Item
presence depends on subscribed network service.
call-history Call History Locally stored call logs (for all calls on all services).
settings Settings List all the system level settings.
preferences Preferences Local phone feature preferences.
prod-info Product Info A list of data related to the product such as model
and serial numbers, software and hardware
versions.
netsrv Net Services Access the settings of many network-provided
features for each SPn service, n = 1 – 6.
netdir Net Dir Access the network directory associated with a
specific SPI service or the LDAP service.
buddy Buddy List Access to the buddy list associated with a specific
SPn service.
directories Directories A container that lists the following options:
• Local phone-book (same as Contacts)
• Network directory for each SPn service, when
available, n = 1 – 6
• LDAP Search (if configured)
When only the local phone-book is available, this
item behaves the same as the phone-book item.
messages Messages This option shows a list where each entry is the
message or mailbox status of a SPn service, for n =
1 – 6, if enabled.
all-preferences Preferences A container that lists the following options:
• Phone (same as preferences item)
• SPn service (or its label), for n = 1 – 6, if enabled
If none of SPn preferences are enabled, then the
item behaves exactly as the legacy preferences
item.
call-histories Call Histories A container to access the locally stored call
histories and the call history associated with each
SPn service, n = 1 – 6.
Main Menu Items (continued)
Main Menu Item ID Default Caption Description

Menu Customization Parameters
122
Preferences Menu Item IDs
This table lists the menu items on the Preferences menu of the VVX business IP phones, OBi Edition. Menu
items may vary depending on your phone.
Net Services Menu Items
Net Services Menu
Item ID
Default
Caption Description
acd ACD Agent Sign On/Off
bci Anonymous Call Turn Anonymous Call feature on or off.
bwanw BroadWorks Anywhere
buddy Buddy List
ccs Call Center Status
cfa Call Forward Always
cfb Call Forward Busy
cfna Call Forward No Answer
rec Call Recording Mode
dnd Do Not Disturb
dispcode Enter Call Disposition Code
exec Executive Call Filter
xass Executive Assistance
hotel Hoteling
clog Network Call History
dir Network Directory
rmoff Remote Office
secClass Security Class
simring Simultaneous Ring
Preferences Menu Items
Preferences Menu
Item ID Default Caption Description
sidecar SideCar Background Picture Select a background picture for your side car (VVX
450 only)
language Language Select the Language of the displayed text on the
phone screen.

Menu Customization Parameters
123
timeFormat Time Format Select the format of the time display on the phone
screen.
dateFormat Date Format Select the format of the date display on the phone
screen.
hpTime Auto Home Page Select the amount of idle time before automatically
returning the phone screen to the Home screen.
skin Skin Select the built-in UI scheme (“skin”) to use.
bgpic Background Picture Select an available background picture to use as
wall paper.
dring Default Ringtone Select an available ring tone as the default ring
tone.
dfont Font Select an available font as the default font for the
displayed text.
appCols Home App Columns Select the number of columns to display in the UI
Main menu.
packcalls Pack Calls On Display Enable or disable packing calls on different
services on the same screen of the display.
sdim Dim Screen Enable or disable dimming the screen (to the least
settable brightness level) after the set interval of
no-key-presses-and-no-calls.
sdimDelay Dim Screen Delay Interval of no-key-presses-and-no-calls in seconds
before dimming the screen, if enabled.
ssvr Screen Saver Enable or disable the screen saver feature.
ssvrDelay Screen Saver Delay Amount of idle time in seconds before starting the
screen saver, if enabled.
ssvrType Screen Saver Type Select a screen saver type.
ssvrLock Require Passcode On Wake Up Select whether a passcode is required to exit from
the screen saver.
ssvrPass Wake Up Passcode Passcode to exit from screen saver.
Screen Saver Show Custom
Contents
brightness Screen Brightness Set the brightness of the LCD screen.
audioDevice Preferred Audio Device Select whether to use speakerphone or a headset
as the talk device when a headset is connected.
headsetDevice Preferred Headset Device Select the preferred headset device when more
than one is connected.
Preferences Menu Items (continued)
Preferences Menu
Item ID Default Caption Description

Menu Customization Parameters
124
ehs Electronic Hook Switch
dnd Do Not Disturb Enable or disable Do Not Disturb.
dnr Do Not Ring Enable or disable Do Not Ring.
cfa.enable Call Forward Enable or disable Call Forwarding (all calls,
unconditionally).
cwa Call Waiting Enable or disable Call Waiting.
bac Block Anonymous Call Enable or disable Block Anonymous Caller.
bci Anonymous Call Enable or disable Block Caller ID (also known as
Anonymous Call).
aans Auto Answer Page Enable or disable Auto-Answering incoming page.
pg1 Join Page Group 1 Join Page Group 1.
pg2 Join Page Group 2 Join Page Group 2.
pg3 Join Page Group 3 Join Page Group 3.
pg4 Join Page Group 4 Join Page Group 4.
pg5 Join Page Group 5 Join Page Group 5.
pg6 Join Page Group 6 Join Page Group 6.
pg7 Join Page Group 7 Join Page Group 7.
pg8 Join Page Group 8 Join Page Group 8.
pg9 Join Page Group 9 Join Page Group 9.
pg10 Join Page Group 10 Join Page Group 10.
ringerVol Ringer Volume Ringer Volume.
speakerVol Speakerphone Volume Speakerphone Audio Volume.
micGain Speakerphone Mic Gain Speakerphone Mic Input Gain.
handsetVol Handset volume Handset Audio Volume.
handsetGain Handset Mic Gain Handset Mic Input Gain.
headsetRJ9Vol RJ9 Headset Volume Audio Volume for the RJ9 headset device.
headsetRJ9Gain RJ9 Headset Mic Gain Mic Input Gain for the RJ9 headset device.
EqEnable Equalizer Enable the Equalizer.
AecEnable Acoustic Echo Cancellation Enable the Acoustic Echo Canceler.
Preferences Menu Items (continued)
Preferences Menu
Item ID Default Caption Description

Menu Customization Parameters
125
Settings Menu Item IDs
This table lists the menu items on the Settings menu of the VVX business IP phones, OBi Edition. Some
items require admin login.
Product Info Menu Item IDs
This table lists the menu items on the Product Info menu of the VVX business IP phones, OBi Edition. Some
items require admin login.
edialer Enhanced Dialer Enhanced Dialer (show matching list of recently
dialed numbers while dialing).
dlkt Default Line Key Tab Default Line Key Tab (the Line Key Tab to fallback
to after a configurable duration of idle time).
Settings Menu Items
Settings Menu Item ID Default Caption Description
net Network Show current IP address and launch Network
Settings menu.
wifi WiFi Show Wi-Fi connection status and launch Wi-Fi
Settings menu.
flash Storage View, read, or copy contents in the internal user
data storage or external USB flash drives.
ringfile Ringtones Set up the default ring tone per SPn service.
pkeys Programmable Keys Launch Programmable Keys Settings menu.
lkeys Line Keys Launch Line Keys Settings menu.
voice Voice Services Launch Voice Services Settings menu.
Sd99 Speed Dials 99 Set up 99 speed dial numbers.
clrcache Clear Data Cache Clear the downloaded data cache.
admin Device Administration Show Administrative Settings menu.
login Unlock Admin Settings Log in or out of administrative mode.
Preferences Menu Items (continued)
Preferences Menu
Item ID Default Caption Description

Menu Customization Parameters
126
Product Info Menu Items
Product Info Menu
Item ID Default Caption Description
ipaddress IP Address Current IP address for this phone
model Model Model Number
obinumber OBi Number OBi Number
mac MAC Address (Ethernet) MAC Address
wfmac WiFi MAC Address Wi-Fi MAC Address
serial Serial Number Serial Number
swver Software Version Software Version
hwver Hardware Version Hardware Version
ztinfo Customization Status ZT Customization Status
uptime Up Time UP time since last bootup

127
Phone Fonts
The DefaultFont parameter takes only the font family. The phone automatically applies the style suffix.
You can use the following built-in font families:
● ptsans
● aleo
● banksia
● droidsans
● libre-caslon
● opensans
● quattrocento
● terminal-dosis
When using the Tomáš skin, the font is fixed. A configured DefaultFont value doesn’t take effect.
When using a language other than English, make sure to use a font family that includes all the characters
in the chosen language.
Built-In Fonts
The phone comes with four built-in fonts. Built-in fonts have no accompanying font file on the phone and
cannot be removed from the Preferences > Font menu.
Factory-Installed Fonts
In addition to the built-in fonts, a number of fonts are factory-installed on the phone.
Label Font
ptsans PT Sans Regular
ptsans-bold PT Sans Bold
ptsans-italic PT Sans Italic
ptsans-bold-italic PT Sans Bold Italic

Phone Fonts
128
Custom Fonts
You can add your own TTF or OTF fonts to the phone and make them available to users in the Preferences
> Font menu.
Note: only TTF and OTF fonts are supported.
Font Storage
When you receive your phone, the
font.map
file lists all built-in and factory-installed fonts. By default, all
fonts are mapped to display in the Preferences > Font menu. The left column specifies the string you want
displayed for the font in the menu. The right column specifies the file name providing the actual font. TTF
and OTF files are supported.
The built-in fonts do not appear in the font.map file.
#
# font.map
#
# The left column is a font name that a user can select from
# the Preferences menu. The right column is the corresponding
# physical font file installed on the phone.
# A valid font file must either a ttf or otf file.
#
# You can use any number of white spaces as delimiters between the 2 columns.
#
aleo Aleo-Light.otf
aleo-bold Aleo-Bold.otf
aleo-italic Aleo-LightItalic.otf
aleo-bold-italic Aleo-BoldItalic.otf
banksia Banksia-Regular.otf
banksia-bold Banksia-Bold.otf
droidsans DroidSans.ttf
droidsans-bold DroidSans-Bold.ttf
libre-caslon LibreCaslonText-Regular.ttf
libre-caslon-bold LibreCaslonText-Bold.ttf
libre-caslon-italic LibreCaslonText-Italic.ttf
opensans OpenSans-Regular.ttf
opensans-bold OpenSans-Bold.ttf
opensans-italic OpenSans-Italic.ttf
Label Font
ptsans PT Sans Regular
ptsans-bold PT Sans Bold
ptsans-italic PT Sans Italic
ptsans-bold-italic PT Sans Bold Italic

Phone Fonts
129
opensans-bold-italic OpenSans-BoldItalic.ttf
quattrocento Quattrocento-Regular.ttf
quattrocento-bold Quattrocento-Bold.ttf
terminal-dosis TerminalDosis-Regular.ttf
terminal-dosis-bold TerminalDosis-Bold.ttf
In addition, there are four more built-in fonts:
ptsans
ptsans-bold
ptsans-italic
ptsans-bold-italic

130
Spanish Dictionary File
The following information is the full Spanish dictionary file that is shipped with the phone. The name of the
language is specified in the
lang
attribute of the root element
<dictionary>
and is also the name that
displays in the Preferences language selection.
<obiphone>
<!-- Each dictionary item has a key/value pair, a mode attribute and a namespace.
When applying the dictionary, we match the key against the source phrase.
If mode=”i”, the comparison is case-insensitive; otherwise the comparison
is case-sensitive. The namespace ns must be matched also. -->
<dictionary lang="Español">
<!-- App names -->
<item key="Contacts" value="Contactos"/>
<item key="Current Calls" value="Llamadas"/>
<item key="Call History" value="Historial"/>
<item key="Preferences" value="Preferencias"/>
<item key="Settings" value="Ajustes"/>
<item key="Product Info" value="Producto"/>
<item key="Buddy List" value="Amistades"/>
<item key="Net Services" value="Red Servicios"/>
<!-- Line key function name -->
<item key="AANS" value="Respuesta Automática" mode="i"/>
<item key="acd" value="Distr. automático de llamadas" mode="i"/>
<item key="BXFER" value="Transferencia Ciega" mode="i"/>
<item key="BAC" value="Blq. Llamadas Anónimas" mode="i"/>
<item key="BCI" value="Blq. ID de Llamadas" mode="i"/>
<item key="BLF" value="Monitor de teléfono" mode="i"/>
<item key="call" value="Llamada" mode="i"/>
<item key="CFA" value="Desvío de Llamadas" mode="i"/>
<item key="CWA" value="Llamada en Espera" mode="i"/>
<item key="CONF" value="Unir a Conferencia" mode="i"/>
<item key="disp-code" value="Código Disposición" mode="i"/>
<item key="DND" value="No Molestar" mode="i"/>
<item key="DNR" value="No Suena" mode="i"/>
<item key="HOLD" value="En Espera" mode="i"/>
<item key="hoteling" value="Hoteling" mode="i"/>
<item key="acd" value="ACD Agent State" mode="i"/>
<item key="exe" value="Exec Call Filter" mode="i"/>
<item key="xass" value="Exec Assistant" mode="i"/>
<item key="sec" value="Security Class" mode="i"/>
<item key="LINE" value="Monitor Linea" mode="i"/>

Spanish Dictionary File
131
<item key="lkpg" value="Siguiente Tabla" mode="i"/>
<item key="MWI" value="Mensajes" mode="i"/>
<item key="pg1" value="Grupo de Páginas 1"/>
<item key="pg2" value="Grupo de Páginas 2"/>
<item key="SPD" value="Marcado Rápido" mode="i"/>
<item key="XFER" value="Transferencia" mode="i"/>
<item key="pres" value="Presencia" mode="i"/>
<item key="cpm" value="Monitor de Aparcamiento de Llamada" mode="i"/>
<!-- Product Info entries -->
<item key="Model" value="Modelo" mode="i"/>
<item key="OBi Number" value="Número OBi" mode="i"/>
<item key="MAC Address" value="Dirección MAC" mode="i"/>
<item key="WiFi MAC Address" value="Dirección MAC de WiFi" mode="i"/>
<item key="Serial Number" value="Número Serial" mode="i"/>
<item key="Software Version" value="Versión del Software" mode="i"/>
<item key="Hardware Version" value="Versión del Hardware" mode="i"/>
<item key="Customization Status" value="Estado de Personalización" mode="i"/>
<item key="Up Time" value="Tiempo de Actividad" mode="i"/>
<!-- User Preferences entries -->
<item key="Language" value="Lenguaje" mode="i"/>
<item key="Skin" value="Contraste" mode="i"/>
<item key="Background Picture" value="Imagen de Fondo" mode="i"/>
<item key="Default Ringtone" value="Timbre Predeterminado" mode="i"/>
<item key="Default Font" value="Fuente Predeterminada" mode="i"/>
<item key="Screen Saver" value="Protector de Pantalla" mode="i"/>
<item key="Screen Saver Delay" value="Protector de Pantalla de retardo" mode="i"/>
<item key="Screen Saver Type" value="Tipo de Protector de Pantalla" mode="i"/>
<item key="Screen Brightness" value="Brillo de la Pantalla" mode="i"/>
<item key="Preferred Audio Device" value="Dispositivo de Audio Preferido" mode="i"/>
<item key="Preferred Headset Device" value="Auriculares Preferido" mode="i"/>
<item key="Do Not Disturb" value="No Molestar" mode="i"/>
<item key="Do Not Ring" value="No Suena" mode="i"/>
<item key="Call Forward" value="Desvío de Llamadas" mode="i"/>
<item key="Call Waiting" value="Llamada en Espera" mode="i"/>
<item key="Block Anonymous Call" value="Bloq. Llamadas Anónimas" mode="i"/>
<item key="Anonymous Call" value="Llamadas Anónimas" mode="i"/>
<item key="Auto Answer Page" value="Pagina de Respuesta Automatica" mode="i"/>
<item key="Join Page Group" value="Únete Grupo de Páginas" mode="i"/>
<item key="Ringer Volume" value="Volumen del Timbre" mode="i"/>
<item key="Speakerphone Volume" value="Volumen de Altavoz" mode="i"/>
<item key="Speakerphone Mic Gain" value="Ganancia Mic Altavoz" mode="i"/>
<item key="Handset Volume" value="Volumen de Auriculares" mode="i"/>
<item key="Handset Mic Gain" value="Ganancia Mic Auriculares" mode="i"/>
<item key="RJ9 Headset Volume" value="RJ9 Volumen de Auricular" mode="i"/>
<item key="RJ9 Headset Mic Gain" value="RJ9 Ganancia Mic Auricular" mode="i"/>
<item key="Equalizer" value="Equalizador" mode="i"/>
<item key="AEC" value="Cancelación de Eco Acústico" mode="i"/>
<item key="Home App Columns" value="Columnas de Aplicación Home" mode="i"/>

Spanish Dictionary File
132
<!-- Screen Saver Type -->
<item key="Slide Show" value="Pantalla de Visualizacion" mode="i"/>
<item key="Turn Off Display" value="Desactivar la Visualización" mode="i"/>
<!-- Preferred Audio Device -->
<item key="Speaker" value="Altavoz" mode="i"/>
<item key="Handset" value="Auriculares" mode="i"/>
<item key="Headset" value="Auricular" mode="i"/>
<!-- Preferred Headset Device -->
<item key="RJ9 Headset" value="RJ9 Auricular" mode="i"/>
<!-- Call Forward -->
<item key="Destination Number" value="Número de Destino" mode="i"/>
<item key="Voice Service" value="Servicio de Voz" mode="i"/>
<!-- Phone Book -->
<item key="Phone Book" value="Agenda" mode="i"/>
<item key="Fields" value="Campos" mode="i"/>
<item key="Name" value="Nombre" mode="i"/>
<item key="First Name" value="Primer Nombre" mode="i"/>
<item key="Last Name" value="Apellidos" mode="i"/>
<item key="Number" value="Número" mode="i"/>
<item key="Mobile Number" value="Número Movil" mode="i"/>
<item key="Office Number" value="Número de Oficina" mode="i"/>
<item key="Home Number" value="Numero de Casa" mode="i"/>
<item key="Service" value="Servicio" mode="i"/>
<item key="Picture" value="Foto" mode="i"/>
<item key="Ringtone" value="Timbre" mode="i"/>
<item key="Email" value="Email" mode="i"/>
<item key="Company" value="Empresa" mode="i"/>
<item key="Group" value="Grupo" mode="i"/>
<item key="Groups" value="Groupos" mode="i"/>
<item key="Co-Workers" value="Compañeros de Trabajo" mode="i"/>
<item key="Customers" value="Clientes" mode="i"/>
<item key="Family" value="Familia" mode="i"/>
<item key="Friends" value="Amigos" mode="i"/>
<item key="No Groups Defined" value="Grupo No Definido" mode="i"/>
<item key="Speed Dial" value="Marcación Rápida" mode="i"/>
<item key="Phone Book Filter" value="Filtro de Agenda" mode="i"/>
<!-- Call History -->
<item key="Missed Calls" value="Llamadas Perdidas" mode="i"/>
<item key="Received Calls" value="Llamadas Recibidas" mode="i"/>
<item key="Outgoing Calls" value="Llamadas Realizadas" mode="i"/>
<item key="All Calls" value="Todas las Llamadas" mode="i"/>
<item key="List empty" value="Lista Vacia" mode="i"/>
<!-- Buddy List -->
<item key="My Status" value="Mi Estatus" mode="i"/>
<item key="My Presence" value="Mi Presencia" mode="i"/>
<!-- Presence status -->

Spanish Dictionary File
133
<item key="unknown" value="Desconocido" mode="i"/>
<item key="offline" value="Fuera de Linea" mode="i"/>
<item key="online" value="En Linea" mode="i"/>
<item key="away" value="Fuera de Oficina" mode="i"/>
<item key="xa" value="Fuera de Oficina Extendida" mode="i"/>
<item key="dnd" value="No Molestar" mode="i"/>
<item key="Online (Available)" value="En Linea (Disponible)" mode="i"/>
<item key="Offline (Invisible)" value="Fuera de Linea (Invisible)" mode="i"/>
<item key="Extended Away" value="Fuera de Oficina Extendida" mode="i"/>
<item key="DND (Do Not Disturb)" value="DND (No Molestar)" mode="i"/>
<!-- Network Directory -->
<item key="Enterprise" value="Empresa" mode="i"/>
<item key="Group Common" value="Grupo en Comun" mode="i"/>
<item key="Enterprise Common" value="Empresa en Comun" mode="i"/>
<item key="Personal" value="Personal" mode="i"/>
<!-- Settings -->
<item key="Network" value="Reseteo de Fabrica" mode="i"/>
<item key="Product Information" value="Informacion Producto" mode="i"/>
<item key="WiFi" value="WiFi" mode="i"/>
<item key="Bluetooth" value="Bluetooth" mode="i"/>
<item key="Storage" value="Almacenamiento" mode="i"/>
<item key="User Preferences" value="Preferencias Usuario" mode="i"/>
<item key="Programmable Keys" value="Teclas Programables" mode="i"/>
<item key="Line Keys" value="Teclas de Linea" mode="i"/>
<item key="Side Car 1" value="Consola de Operadora 1" mode="i"/>
<item key="Side Car 2" value="Consola de Operadora 2" mode="i"/>
<item key="Voice Services" value="Servicios de Voz" mode="i"/>
<item key="Device Admin" value="Administracion Dispositivo" mode="i"/>
<item key="Lock Admin Settings" value="Bloqueo Config. del Admin." mode="i"/>
<item key="Unlock Admin Settings" value="Desbloquear Ajustes del Admin." mode="i"/>
<!-- Network -->
<item key="Network Settings" value="Ajustes de la Red" mode="i"/>
<item key="Addressing Type" value="Addressing Type" mode="i"/>
<item key="IP Address" value="Direccion IP" mode="i"/>
<item key="Subnet Mask" value="Mascara Subred" mode="i"/>
<item key="Default Gateway" value="Direccion Gateway" mode="i"/>
<item key="DNS Server" value="Servidor DNS" mode="i"/>
<item key="DNS Query Order" value="Orden de Consulta DNS" mode="i"/>
<item key="DNS Query Delay" value="Retrazo de Consulta DNS" mode="i"/>
<item key="AC Name" value="Nombre AC" mode="i"/>
<item key="Service Name" value="Nombre de Servicio" mode="i"/>
<item key="Password" value="Contraseña" mode="i"/>
<item key="VLAN" value="VLAN" mode="i"/>
<item key="LLDP-MED" value="LLDP-MED" mode="i"/>
<item key="ID" value="ID" mode="i"/>
<item key="Priority" value="Prioridad" mode="i"/>
<item key="NTP Server" value="Servidor NTP" mode="i"/>
<item key="Local Time Zone" value="Zona Horaria Local" mode="i"/>

Spanish Dictionary File
134
<item key="Daylight Saving Time" value="Horario de Verano" mode="i"/>
<!-- WiFi -->
<item key="WiFi Setup" value="Configuracion WiFi" mode="i"/>
<item key="OBiWiFi Setup Mode" value="Modo de configuración OBiWiFi" mode="i"/>
<item key="Security" value="Seguridad" mode="i"/>
<item key="Signal Strength" value="Intensidad de Señal" mode="i"/>
<item key="MAC Address" value="Direccion MAC" mode="i"/>
<item key="0" value="" ns="wfs"/>
<item key="1" value="Débil" ns="wfs"/>
<item key="2" value="Pobre" ns="wfs"/>
<item key="3" value="Pasable" ns="wfs"/>
<item key="4" value="Bueno" ns="wfs"/>
<item key="5" value="Excelente" ns="wfs"/>
<!-- Storage -->
<item key="Device" value="Dispositivo" mode="i"/>
<item key="File System Type" value="Tipo de Sistema de Archivo" mode="i"/>
<item key="Capacity" value="Capacidad" mode="i"/>
<item key="Internal" value="Interno" mode="i"/>
<item key="USB storage 1" value="USB Flash Drive 1" mode="i"/>
<item key="USB storage 2" value="USB Flash Drive 2" mode="i"/>
<!-- Voice Services -->
<!--
Highly technical entries under Voice Services are not translated.
-->
<!-- Admin Settings -->
<item key="Web Server Port" value="Puerto del Servidor Web" mode="i"/>
<item key="Web Admin Password" value="Contraseña del Administrador" mode="i"/>
<item key="Web User Password" value="Contraseña del Usuario" mode="i"/>
<item key="Syslog Server" value="Servidor Syslog" mode="i"/>
<item key="ITSP Provisioning Method" value="Método Aprovisionamiento ITSP" mode="i"/>
<item key="ITSP Provisioning Interval" value="Aprovisionamiento Interno ITSP"
mode="i"/>
<item key="ITSP Provisioning Config URL" value="Aprovisionamiento ITSP Config URL"
mode="i"/>
<item key="Auto Firmware Update Method" value="Metodos de Actualizacion Auto Firmware"
mode="i"/>
<item key="Auto Firmware Update Interval" value="Actualizacion Interno Auto Firmware"
mode="i"/>
<item key="Auto Firmware Update URL" value="Actualizacion Auto Firmware URL"
mode="i"/>
<!-- Provisioning and FW Upgrade Method -->
<item key="System Start" value="Inicio del Sistema" mode="i"/>
<item key="Periodically" value="Periodicamente" mode="i"/>
<!-- Dial App -->
<item key="Enter Number" value="Número de Entrada" mode="i"/>
<item key="Transfer Target" value="Destino de la Transferencia" mode="i"/>
<item key="Conference Target" value="Objetivo Conferencia" mode="i"/>
<!-- Soft Keys -->
<item key="Edit" value="Editar" mode="i"/>

Spanish Dictionary File
135
<item key="Reboot" value="Reiniciar" mode="i"/>
<item key="End" value="Final" mode="i"/>
<item key="Hold" value="Espera" mode="i"/>
<item key="Resume" value="Resumen" mode="i"/>
<item key="Add to Conf" value="Unir a Conferencia" mode="i"/>
<item key="Conference" value="Conferencia" mode="i"/>
<item key="Park" value="Aparcar" mode="i"/>
<item key="Blind Transfer" value="Transferencia Ciega" mode="i"/>
<item key="Dispose Code" value="Deseche Código" mode="i"/>
<item key="Escalate" value="Escalar" mode="i"/>
<item key="Trace" value="Trazar" mode="i"/>
<item key="Rec.Start" value="Iniciar Grabacion" mode="i"/>
<item key="Rec.Stop" value="Parar Grabacion" mode="i"/>
<item key="Rec.Pause" value="Pausar Grabacion" mode="i"/>
<item key="Rec.Resume" value="Resumir Grabacion" mode="i"/>
<item key="Private Hold" value="Espera Privada" mode="i"/>
<item key="Answer" value="Contestar" mode="i"/>
<item key="Reject" value="Rechazar" mode="i"/>
<item key="Redial" value="Rellamar" mode="i"/>
<item key="Missed" value="Perdida" mode="i"/>
<item key="Dial" value="Marcar" mode="i"/>
<item key="Lines" value="Lineas" mode="i"/>
<item key="Switch Mode" value="Cambio Modo" mode="i"/>
<item key="Ph.Book" value="Agenda" mode="i"/>
<item key="Switch Line" value="Cambio Linea" mode="i"/>
<item key="Refresh All" value="Reiniciar Todo" mode="i"/>
<item key="+Buddy" value="Agregar Amigo" mode="i"/>
<item key="Search" value="Busqueda" mode="i"/>
<item key="Refresh" value="Reiniciar" mode="i"/>
<item key="+" value="Agregar" mode="i"/>
<item key="Add" value="Agregar" mode="i"/>
<item key="Remove" value="Remover" mode="i"/>
<item key="Clear List" value="Limpiar Lista" mode="i"/>
<item key="Edit Dial" value="Aditar Marcador" mode="i"/>
<item key="Save" value="Guardar" mode="i"/>
<item key="MyPresence" value="Mi Presencia" mode="i"/>
<item key="MyStatus" value="Mi Estatus" mode="i"/>
<item key="Filter" value="Filtrar" mode="i"/>
<item key="Select" value="Seleccionar" mode="i"/>
<item key="New" value="Nuevo" mode="i"/>
<item key="Clear" value="Limpiar" mode="i"/>
<item key="Sort" value="Ordenar" mode="i"/>
<item key="New Entry" value="Nueva Entrada" mode="i"/>
<item key="Group Filter" value="Filtrar Grupo" mode="i"/>
<item key="Import" value="Importar" mode="i"/>
<item key="Export" value="Exportar" mode="i"/>
<item key="Sync" value="Sincronizar" mode="i"/>
<item key="New Group" value="Nuevo Grupo" mode="i"/>
<item key="Uncheck All" value="No chequear Nada" mode="i"/>
<item key="Check All" value="Chequear Todo" mode="i"/>

Spanish Dictionary File
136
<item key="Factory Reset" value="Reseteo de Fabrica" mode="i"/>
<item key="FW Update" value=" Actializar FW" mode="i"/>
<item key="Pick Up" value="Contestar" mode="i"/>
<item key="Barge In" value="Interrumpir" mode="i"/>
<item key="Monitor" value="Monitorear" mode="i"/>
<item key="Sign Off" value="Cerrar Sesión" mode="i"/>
<item key="Wrap Up" value="Envolver" mode="i"/>
<item key="Scan" value="Escanear" mode="i"/>
<item key="Transfer Now" value="Transferir Ahora" mode="i"/>
<item key="Conference Now" value="Conferencia Ahora" mode="i"/>
<item key="Play" value="Seguir" mode="i"/>
<item key="Stop" value="Parar" mode="i"/>
<item key="Connect" value="Conectar" mode="i"/>
<item key="Rescan" value="Re-escanear" mode="i"/>
<item key="Disconnect" value="Desconectar" mode="i"/>
<item key="Forget" value="Olvidar" mode="i"/>
<item key="Reconnect" value="Reconectar" mode="i"/>
<item key="Explore" value="Explorar" mode="i"/>
<item key="Eject" value="Ejecutar" mode="i"/>
<item key="Mount" value="Montura" mode="i"/>
<item key="Back" value="Regresar" mode="i"/>
<item key="Copy" value="Copiar" mode="i"/>
<item key="Cancel" value="Cancelar" mode="i"/>
<item key="Paste" value="Pasar" mode="i"/>
<item key="New Folder" value="Nuevo Folder" mode="i"/>
<item key="Close" value="Cerrar" mode="i"/>
<item key="OK" value="OK" mode="i"/>
<item key="Replace" value="Reemplazar" mode="i"/>
<item key="Add As New" value="Agragar Como Nuevo" mode="i"/>
<item key=">" value=">"/>
<item key="<" value="<"/>
<item key="Backspace" value="Retroceso" mode="i"/>
<item key="Devices" value="Dispositivos" mode="i"/>
<!-- Misc -->
<item key="Not Found" value="Extraviado" mode="i"/>
<item key="No Entries" value="No Entradas" mode="i"/>
<item key="Unassigned" value="No Asignado" mode="i"/>
<item key="Enable" value="Activar" mode="i"/>
<item key="enabled" value="Activado" mode="i"/>
<item key="disabled" value="Desactivado" mode="i"/>
<item key="Not Configured" value="No Configurado" mode="i"/>
<item key="default" value="Por Defecto" mode="i"/>
<item key="On" value="Encendido" mode="i"/>
<item key="Off" value="Apagado" mode="i"/>
<item key="Non-linear" value="No Linear" mode="i"/>
<item key="Status" value="Estatus" mode="i"/>
<item key="outgoing" value="A" ns="ct"/>
<item key="received" value="De" ns="ct"/>

Spanish Dictionary File
137
<item key="up" value="Arriba" mode="i"/>
<item key="down" value="Abajo" mode="i"/>
<item key="nocfg" value="No Configurado" mode="i"/>
<item key="holding" value="Esperando" mode="i" ns="cs"/>
<item key="peerring" value="Timbrando" mode="i" ns="cs"/>
<item key="proceeding" value="Timbrando" mode="i" ns="cs"/>
<item key="peerring2" value="Timbrando (Espera)" mode="i" ns="cs"/>
<item key="peerring3" value="Timbrando (Conf)" mode="i" ns="cs"/>
<item key="dialtone" value="Tono de Marcación" mode="i" ns="cs"/>
<item key="dialing" value="Marcando" mode="i" ns="cs"/>
<item key="trying" value="Tratando" mode="i" ns="cs"/>
<item key="connected" value="Conectado" mode="i" ns="cs"/>
<item key="connected-HD" value="HD Conectado" mode="i" ns="cs"/>
<item key="ended" value="Llamada Finalizada" mode="i" ns="cs"/>
<item key="ring" value="Timbrando" mode="i" ns="cs"/>
<item key="OBiTALK" value="OBiTALK" mode="i"/>
<item key="Auto" value="" mode="i"/>
<item key="Auto: " value="" mode="i"/>
<item key="OBiTALK: " value="OBiTALK: " mode="i"/>
<item key="Not Available" value="No Disponible" mode="i"/>
<item key="AA1: " value="OBi Asistente: " mode="i"/>
<item key="AA2: " value="IVR: " mode="i"/>
<item key="seized" value="Incautado" ns="cs"/>
<item key="held_private" value="Held Privado" ns="cs"/>
<item key="held" value="Held" ns="cs"/>
<item key="parked" value="Llamar Estacionado" ns="cs"/>
<!-- Misc line key data -->
<item key="error" value="error" mode="i"/>
<item key="Service Not Ready" value="Servicio no está listo" mode="i"/>
<item key="Service Subs. Error" value="Error suscripción de servicio" mode="i"/>
<item key="BLF Subs. Error" value="BLF error suscripción" mode="i"/>
<item key="Hoteling Subs. Error" value="Hoteling error suscripción" mode="i"/>
<item key="Guest" value="Invitado" mode="i"/>
<item key="No Guest" value="Los huéspedes no" mode="i"/>
<!-- ACD State -->
<item key="available" value="Disponible" mode="i"/>
<item key="unavailable" value="No Disponible" mode="i"/>
<item key="wrappingup" value="Terminando" mode="i"/>
<item key="signedoff" value="Cerrar Sesión" mode="i"/>
<!-- Input App Titles -->
<item key="New Status" value="Nuevo Estatus" mode="i"/>
<item key="Edit Status" value="Editar Estatus" mode="i"/>
<item key="New Group Name" value="Nuevo Nombre de Grupo" mode="i"/>
<item key="Enter" value="Entrar" mode="i"/>
<item key="Blind Transfer Target" value="Objetivo Transferencia ciega" mode="i"/>
<item key="Supervisor Extension" value="Supervisor de Extensión" mode="i"/>
<item key="Disposition Code" value="Disposicion de Codigo" mode="i"/>

Spanish Dictionary File
138
<item key="Forward All Number" value="Remitir Todo Número" mode="i"/>
<item key="Unavailable Reason Code" value="No disponible Código de Motivo" mode="i"/>
<item key="Enter Query" value="Entrar Consulta" mode="i"/>
<item key="Hoteling Passcode" value="Codigo de Contraseña Hoteling" mode="i"/>
<item key="Hoteling Guest Extension" value="Extension Huesped Hoteling" mode="i"/>
<item key="Enter Admin Password" value="Ingrese Contraseña del Administrador"
mode="i"/>
<item key="Enter Folder Name" value="Ingrese Nombre del Archivo" mode="i"/>
<item key="Exec Assist Divert Number" value="Exec Asist Numero de Desvio" mode="i"/>
<!-- Call related alerts -->
<item key="No Active Calls" value="No hay Llamadas Activas" mode="i"/>
<item key="Call Error" value="Error de Llamada" mode="i"/>
<item key="No Call Key avaiable to make another call" value="No Tecla de llamada
Disponible para hacer otra llamada" mode="i"/>
<item key="The requested service isn’t available at the moment" value="En este momento
el Servicio requerido no esta disponible" mode="i"/>
<item key="Conference Error" value="Error de Conferencia" mode="i"/>
<item key="No conference port avaiable to add participant" value="No hay puerto de
conferencia para agregar participante" mode="i"/>
<!-- OBiWiFi -->
<item key="OBiWiFi" value="OBiWiFi" mode="i"/>
<item key="Use USB Port 1 for OBiWiFi." value="Use el puerto USB 1 para OBiWiFi."
mode="i"/>
<item key="Connected with: " value="Conectado con: " mode="i"/>
<item key="Connecting with: " value="Conectar con: " mode="i"/>
<item key="Failed to authenticate with " value="Fallado para autenticar con "
mode="i"/>
<item key="Authentication Failed" value="Falla la Autenticación" mode="i"/>
<item key="Failed to associate with " value="Error al asociar con " mode="i"/>
<item key="Association Failied" value="Asociación no" mode="i"/>
<!-- Reboot -->
<item key="Reboot" value="Reiniciar" mode="i"/>
<item key="Press OK to reboot the phone." value="Presione OK para Reiniciar el
Telefono." mode="i"/>
<!-- Factory reset -->
<item key="Press OK to reset all settings to factory default. Phone will reboot
automatically."
value="Presione OK para Resetear Todos los Ajustes de Fabrica por defecto. El
Telefono se Reiniciara Automaticamente." mode="i"/>
<!-- Admin login -->
<item key="Unlock Settings Failed" value="Desbloquear Configuración Error" mode="i"/>
<item key="Invalid Password" value="Contraseña Invalida" mode="i"/>
<!-- OBiTalk -->
<item key="Add Device to OBiTalk" value="Agregue un dispositivo a OBiTalk" mode="i"/>
<item key="Code sent to OBiTalk..." value="Codigo enviado a OBiTalk..." mode="i"/>
<item key="Device not allowed to join!" value="Dispositivo no se le permitió unirse!"
mode="i"/>
<!-- Conference bridge -->
<item key="Conf. Bridge Error" value="Error del Puente de Conferencia" mode="i"/>

Spanish Dictionary File
139
<item key="Call to Conference Bridge failed" value="Llamada al Puente Conferencia
fallado" mode="i"/>
<item key="Conference Bridge ended unexpectedly" value="Puente Conferencia terminó
inesperadamente" mode="i"/>
<item key="Last Call Total Charges" value="Gasto Total de la ultima llamada"
mode="i"/>
<!-- Network directory -->
<item key="Network Directory" value="Directorio Red" mode="i"/>
<item key="refreshed" value="Actualizado" mode="i"/>
<item key="Nothing refreshed" value="Nada Actualizado" mode="i"/>
<item key="Network Directory Search" value="Busqueda de Directorio Red" mode="i"/>
<item key="No items found for your query" value="No se han encontrado en su búsqueda
artículos" mode="i"/>
<!-- Buddy list -->
<item key="Buddy List Error" value="Error de Lista de Amigos" mode="i"/>
<item key="Failed to load buddy list" value="Fracaso en Bajar Lista de Amigos"
mode="i"/>
<!-- Call history -->
<item key="Clear List" value="Limpiar Lista" mode="i"/>
<item key="Press OK to remove all entries in the selected call history"
value="Presione OK para remover todas las entradas en el historial de llamadas
seleccionadas" mode="i"/>
<item key="Duplicate Entry" value="Entrada Duplicada" mode="i"/>
<item key="Select 'Replace' or 'Add As New' to proceed." value="Seleccione
'Reemplazar' o 'Agregar como Nuevo' para proceder." mode="i"/>
<!-- Phone book -->
<item key="Remove Entry" value="Remover Entradas" mode="i"/>
<item key="Press OK to permanently remove this entry from the Phone Book."
value="Presione OK para remover permanentemente esta entrada de la Agenda."
mode="i"/>
<item key="Discard Changes?" value="Descartar Cambios?" mode="i"/>
<item key="Press OK to proceed. Changes to the Phone Book will be discarded."
value="Presione OK Proceder. Cambios a la Agenda sera descartado." mode="i"/>
<!-- Misc -->
<item key="Progress" value="Progreso" mode="i"/>
<item key="More" value="Mas" mode="i"/>
<item key="Disconnected" value="Desconectado" mode="i"/>
<item key="Secured with" value="Asegurado con" mode="i"/>
<item key="Not in range" value="Fuera de rango" mode="i"/>
<item key="Peer to peer" value="De igual a igual" mode="i"/>
<item key="Ad-hoc" value="Ad-hoc" mode="i"/>
<item key="Remembered" value="Recordado" mode="i"/>
<item key="Not Discoverable" value="No detectable" mode="i"/>
<item key="Available" value="Disponible" mode="i"/>
<item key="Seconds remaining" value="Segundos Restantes" mode="i"/>
</dictionary>
</obiphone>
