
Warning - Seizures
A small percentage of people may experience a seizure or blackout triggered by light patterns,
flashing lights, or other images that appear in computer games. If you have an epileptic condition,
consult your physician before installing or playing this game. Even people who have no history of
epilepsy may experience a seizure while viewing a computer game.
A seizure can be accompanied by any of the following symptoms: altered vision, convulsions,
disorientation, eye or muscle twitching, involuntary movements, or loss of movement.
If you experience any of these symptoms, immediately stop playing and consult a doctor.
Parents or guardians of children playing this game should monitor their children closely. If your child
suffers any of these symptoms, stop playing the game immediately and consult a doctor.
Blizzard Entertainment
Blizzard Entertainment
Blizzard Entertainment Europe
TSA 60 001
78143 VélizyVillacoublay Cedex France
http://www.blizzard.com – Blizzard Website
http://www.blizzard.com/support - Customer Support
®
Game Experience
May Change
During Online Play

Chapter 1: Installation 4
Troubleshooting 6
Technical Support Contacts 7
Chapter 2: 9
Creating an Account 9
Billing 10
Chapter 3: Getting Started 11
Choosing Your Realm 12
Creating Your Character 12
Understanding Your Interface 16
Moving in the World 20
Your First Battle 21
The Experience Bar 22
Looting Your Kill 22
Equipping Your Character 24
Leveling Up 24
Adjusting Your Action Bar 25
Dying & Corpse Retrieval 26
Chapter 4: Advanced User Interface 28
Chat Log 31
Macros 34
Pet Action Bar 34
Chatting 35
Interface Panel 37
Help Request 40
Main Menu 40
Appendices 42
I. Glossary and Acronyms 42
II. Customer Support 45
Credits 48
CONTENTS

All Platforms
Controls: A keyboard and mouse are required. Input devices other than
a mouse and keyboard are not supported
Connectivity: You must have an active broadband Internet connection to play
Mouse: Multi-button mouse with scroll wheel recommended
DVD: 4X DVD-ROM drive
HD Space: 25 GB free HD space
Video: For a complete list of supported 3D cards, please visit:
http://www.blizzard.com/support/article/WoWsupportedvideo
Note:
Due to potential programming changes, the Minimum System Requirements
for this game may change over time.
4
Chapter 1
Getting Started
PC System Requirements
OS: Minimum: Windows
®
XP/Windows Vista
®
/Windows
®
7 (Latest
Service Packs)
Recommended: 64-bit Windows Vista
®
/Windows
®
7
Processor: Minimum: Intel Pentium
®
4 1.3 GHZ or AMD Athlon
™
XP 1500+
Recommended: Dual core processor
Memory: Minimum: 1 GB RAM
Recommended: 2 GB RAM
Video: Minimum: NVIDIA
®
GeForce
®
FX or ATI Radeon
™
9500 video
card or better
Recommended: 256 MB NVIDIA
®
GeForce
®
8600 or ATI
Radeon
™
HD 2600 or better
Installation Instructions
Place the
World of Warcraft
DVD into your DVD-ROM drive. If your computer
has autoplay enabled, an installation window will automatically pop up on your
Windows desktop. Click the Install the
World of Warcraft
button and follow the
onscreen instructions to install the
World of Warcraft
to your hard drive. If the
installation window does not appear, open the My Computer icon on your
desktop and double-click the drive letter corresponding to your DVD-ROM
drive to open it. Double-click the Install.exe icon in the DVD-ROM contents and
follow the onscreen instructions.
Installing DirectX
®
PC Users Only: You will need to install DirectX 9.0c in order to properly run
World of Warcraft
. During installation, you will be prompted to install DirectX if
you do not already have the most up-to-date version installed on your
computer.
Mac System Requirements
OS: Minimum: Mac
®
OS X 10.5.8, 10.6.4 or newer
Recommended: Mac
®
OS X 10.6.4 or newer
Processor: Minimum: Intel
®
Processor
Recommended: Intel
®
Core
™
2 Duo processor
Memory: Minimum: 2 GB RAM
Recommended: 4 GB RAM
Video: Recommended: NVIDIA
®
GeForce
®
9600M GT or ATI Radeon
™
HD 4670 or better
Installation Instructions
Place the DVD in your DVD-ROM drive. Double-click the the
World of Warcraft
DVD icon. Then double-click the Installer application to copy the required game
files to your hard drive.

Technical Support Contacts
Web Support
The Blizzard Entertainment Technical Support website has solutions to the most
common game questions and problems. Our Technical Support website is located at:
http://www.blizzard.com/support
Email Support
You can email the Technical Support department at any time at:
https://www.blizzard.com/support/webform.xml
Under normal circumstances you will receive an automated reply within 15 minutes,
detailing solutions to the most common problems. Typically a second email containing
a more detailed solution to your particular problem/question will be sent to you 24 to
72 hours later.
Live Phone Support
Phone support is provided in English, French, Spanish, German and Russian. We also
provide support via our forums and by email. Information about how to reach Customer
Support is available at: http://www.blizzard.com/support
NO GAMEPLAY HINTS WILL BE GIVEN THROUGH THIS NUMBER.
Please be sure to consult our troubleshooting section before calling Technical Support,
and be near your computer if possible when calling.
Note
For updated information about protecting your computer and World of
Warcraft account, along with answers to commonly asked questions and
additional troubleshooting material, please go to our support section
located at: http://www.blizzard.com/support
6
Troubleshooting
If you experience any trouble running World of Warcraft, be sure to read the
most recent readme.txt and patch notes text files. These files detail the latest
changes and any bug fixes made to the game. Your problem might already be
listed there, along with possible solutions.
Many times, errors in running the game can be attributed to a lack of updated
drivers. Ensure that the drivers for all your hardware are up to date before
contacting Blizzard Entertainment for customer support.
General Troubleshooting [PC]
General Lockups/Video Problems
If your computer hard locks without an error message, reboots during
game play, will not start, or has distorted graphics of any sort, please make
sure you have the latest video card drivers for your 3D accelerator. Contact
your hardware manufacturer to find the latest drivers available, or check
our Driver Update Information page on our support website for links to the
most common hardware vendors at:
http://www.blizzard.com/support/article/driverupdates
Sound Issues
If you are experiencing sound distortions, periodic loss of sound, loud
squelches, whistles, or pops, con rm that you have the latest version of DirectX
installed on your system. Also, verify that your sound drivers are compatible
with the newest version of DirectX. Contact your hardware manufacturer to nd
the latest drivers available, or check our Driver Update Information page on our
support website for links to the most common hardware vendors at:
http://www.blizzard.com/support/article/driverupdates
General Troubleshooting [Mac]
Most lockups, video problems, or sound problems can be solved by installing the
latest available software updates from Apple. All of the latest video and sound
drivers are included in the OS available from Software Update from the Apple
menu.
You can nd additional troubleshooting instructions at:
http://www.blizzard.com/support

Chapter 2
Before You Begin Playing World of Warcraft
World of Warcraft is a completely integrated online experience that allows you to earn
achievements and stay connected with friends through Blizzard’s Battle.net service.
Prior to beginning World of Warcraft, you must create a free Battle.net account.
If you already have a Battle.net account, you must associate your Battle.net account
with your copy of World of Warcraft at eu.battle.net/login in order to begin playing.
You will be prompted to create or update your Battle.net account after installing World
of Warcraft, but you can also do so at any time by following the steps listed below under
“Creating and Managing Your Battle.net Account.”
Note: If you purchased World of Warcraft through the Blizzard website, your game key
is already associated with the Battle.net account used to purchase the game.
What is a Battle.net Account?
Your Battle.net account is a system that allows you to manage all of your Blizzard games
under a single login, download any titles you own, and take advantage of advanced
social options. In World of Warcraft, your Battle.net account is used to help you connect
with friends also playing the game, maintain a public profile, join up with other players
for competitive play, and much more.
Creating and Managing your Battle.net Account
To create a Battle.net account, you will need an active Internet connection and a valid
email address. For more information about Battle.net accounts, please visit
us.battle.net/faq. To create or manage your Battle.net account, you must choose the
option “Manage Account” from World of Warcraft’s start-up screen, or, using your Web
browser, navigate to Battle.net’s Account Login page, located at us.battle.net/login.
t To create your account, click “Create an Account” on the Account Login page. You’ll
be asked to input a valid email address, account details, and contact information.
t Check your email account in order to confirm your registration. You should receive
an email from [email protected] that will enable you to complete the creation of
your Battle.net account.
t To manage your account, input the email address and password of your current
Battle.net account, and click “Log In”.
t From the Battle.net Account Home page, you can associate your copy of World of
Warcraft with your Battle.net account by choosing the option “Add or Upgrade a
Game” under the header “Manage Games”.
t Next locate your World of Warcraft game key inside the retail box you purchased.
Input the 26-digit game key and click the “Activate Game” button.
Game Hints
If you are seeking a game tip, hint, or additional game information for World of
Warcraft, please visit: http://www.battle.net/wow
Game Performance
If you encounter slow or choppy game play, there are several game options that can be
adjusted to improve performance. These options are accessible via the Video Options
Menu. Selecting a lower resolution, decreasing the FarClip, World Detail, and Animation
settings will have the greatest effect.
8

Chapter 3
Getting Started
If this is your first time playing a massively multiplayer online role-playing game, then
you may find this chapter helpful. It will walk you through creating a character and
playing through your first level in the game.
If you are unclear about game terms, be sure to read the glossary of terms and
acronyms in Appendix I.
Note
World of Warcraft, like many massively-multiplayer online role-
playing games, is constantly evolving. In an effort to keep the game
challenging and balanced, Blizzard implements changes to the game
through patches. In some cases, new content and game systems are
also added. At the time of the printing of this manual, the information
contained herein was accurate and relevant. However, as the
designers do adjust the game from time to time to create the best
gaming experience possible, some information in this manual may no
longer be current.
To see last-minute amendments to the game, read the readme.txt file
on the DVD. This file records all changes made to World of Warcraft
just prior to release that were too late to include in the manual.
Also be sure to check out the latest patch notes and updated information on the World
of Warcraft official website at: http://www.worldofwarcraft.com
The website is continuously updated to reflect the most current version of the game and
includes more detailed information on the topics covered in this manual.
10
Once you have completed these steps, you will be able to play World of
Warcraft wherever you are. You will also be able to download the World of
Warcraft client by returning to the Account Home page and choosing
“Download Game Clients” from the “Manage Games” menu. You are now ready
to play and take advantage of all of the features Battle.net has to offer!
Starting the Game
After you have successfully installed World of Warcraft, start a game by double-
clicking the World of Warcraft icon on your desktop. You can also start a game
from the Start menu (PC). Once you start the game, you are taken to the
Account Name field screen. After agreeing to the Terms of Use (see below), you
will see a blank Battle.net Account Name field and a blank Password field in the
middle of the screen. Enter your account name and password in the appropriate
fields, and select the Login button. You are now ready to play World of Warcraft.
Note: Employees of BLIZZARD ENTERTAINMENT will never ask for your password.
Internet Connection
You must have an active Internet connection to play this game. Blizzard is not
responsible for any fees you may incur from your Internet service provider that
are in addition to your monthly World of Warcraft subscription fee.
Terms of Use Agreement
The first time you load World of Warcraft, a Terms of Use Agreement will appear
on your screen before you can progress to the Account Name field screen. To
play the game, you must read the agreement in its entirety and click the
“Accept” button. The “Accept” button is grayed out initially but becomes
enabled when you scroll to the end of the agreement. After agreeing to the
Terms of Use, you are allowed to play the game. If you refuse the Terms of Use,
you cannot play the game. Any time the Terms of Use Agreement is updated,
it will reappear when you next start the game. You must read it again and click
the “Accept” button to progress to the Login screen.
Payment Methods
During account creation, you must specify your method of payment. You can
pay your monthlyfees by credit card, with prepaid time cards sold by Blizzard
Entertainment online and in local game stores, or by other methods depending
on your location. More information can be found at http://www.battle.net/wow
Account and Billing Issues
If you have any questions or issues dealing with billing or your World of Warcraft
account, please contact Billing and Account Services. Our representatives can
help you with many issues, including:
t Questions regarding billing
t Registering or setting up an account
t Recovering your account or password
t Canceling your account
t Reactivating a canceled account
t Or any other account or billing issues
Contact our Billing and Account Services staff by emailing us at:
http://www.blizzard.com/support/webform.xml
NO GAMEPLAY HINTS WILL BE GIVEN THROUGH THIS EMAIL.

12
Choosing your Realm
Realm Types
There are two different kinds of realms: Normal realms and Player versus Player
(PvP) realms. Before you create a character, you first must decide what realm
type you want to play on. This decision determines how hard or easy it will be
to fight other players in the game. The conditions for enabling player versus
player combat are different depending on where you play.
Normal Realm
(also Player vs Environment or PvE)
Normal realms are characterised by consensual PvP. For you to participate in
player vs player conflict, you must enable PvP. Players of the opposing faction
may only attack you if you have enabled this option, or if you attack a PvP-
enabled target first.
Player Versus Player Realm
On a player versus player realm, members of the opposing faction can attack
you in most parts of the world. While you keep to friendly territories you can
remain immune, but venturing beyond the lands controlled by your faction will
make you a target for the opposing faction.
Roleplaying Realm
Roleplaying realms encourage immersion in the world of Azeroth, and players
are encouraged to remain ‘in character’ for the most part. Roleplaying realms
can be Normal, or Player vs Player.
For detailed information about the different types of realms and the different
conditions for PvP combat, please see our detailed explanation of realms here:
http://eu.battle.net/wow/game/
Creating Your Character
Once you have created your account and chosen the type of realm which best
suits you, its time to make your character.
Choose Your Race
Your first choice when making a character is your race. The eight races in WoW
are divided into two factions: the Horde and the Alliance. At one time in
Azeroth's past, the Horde was a force of evil, and the Alliance was a bastion of
good. However, in today's war-torn Azeroth, such black and white distinctions
are gone. Both factions are simply fighting to preserve their way of life in the
wake of the Chaos War.
Each faction has four races. The Alliance is comprised of the dwarves, gnomes,
humans, and night elves, while the Horde consists of the orcs, tauren, trolls,
and undead. Each race has a unique set of characteristics and its own list of
available class choices. Some of the different races also begin in their own
unique starting area, while others share a beginning region.
Dwarves – The stoic dwarves of Ironforge are an ancient race of robust
humanoids who live beneath the snow-capped mountains of Khaz Modan. The
Dwarves have always been fast allies with the Humans, and they revel in the
prospects of battle and storytelling alike.
Gnomes – The eccentric, often brilliant Gnomes are one of the most peculiar races of
the world. With their obsession for developing radical new technologies and
constructing marvels of mind-bending engineering, it's a wonder that any Gnomes have
survived to propagate the species.
Humans – The Humans of Stormwind are a resilient breed, having survived an invasion
by the savage Orcs during the First War. During the Second War, the armies of
Stormwind rallied with the Alliance to reclaim their homeland of Azeroth.
Night Elves – The reclusive Night Elves were the first race to awaken in the World of
Warcraft. These shadowy, immortal beings were the first to study magic and let it loose
throughout the world nearly ten thousand years ago.
Orcs – The savage, green-skinned Orcs are one of the most prolific races of Azeroth.
They are commonly believed to be brutal and mindless, possessing no humanity or
empathy for other races.
Tauren – The Tauren are huge, bestial creatures who live in the grassy, open barrens of
central Kalimdor. They live to serve nature and maintain the balance between the wild
things of the land and the restless spirit of the elements.
Trolls – The vicious Jungle Trolls, who populate the numerous islands of the South Seas,
are renowned for their cruelty and dark mysticism. Barbarous and superstitious, the wily
Trolls carry a seething hatred for all other races.
Undead – Having broken free from the tyrannical rule of the Lich King, a renegade
group of undead seek to retain their own free will while destroying all those who
oppose them. Known as the Forsaken, this group is dedicated to serving its leader, the
banshee queen Sylvanas Windrunner.
Note
When choosing a race, remember that you can only interact
meaningfully with members of your own faction. When
dealing with races of the opposite faction, your interaction
options are much more limited, and sometimes, hostile. If
you wish to play with your friends, you should choose races
on the same side.

Choose Your Gender
You can be a male or female character in World of Warcraft. Men and women are equal
in Azeroth, so the only differences between the two genders are cosmetic.
Choose Your Appearance
When making a character, you can customize his appearance by adjusting his skin color,
the look of his face, hair style, hair color, and facial hair. You can create hundreds of
unique appearances with the different combinations, or if you want the game to create
a random appearance, click on the "Randomize" button. To get a better view of your
character, you can click the left and right arrows at the bottom of the screen. These
arrows let you rotate your character 360 degrees.
Name Your Character
Now name your character by typing his name in the field at the bottom of the screen.
Your name can only contain letters and must be 2 to 12 characters in length. Have
several choices ready because your first choice might already be taken. Choose your
names wisely as accounts with names that do not follow our naming policy may be
changed or terminated. Please refer to our naming policy located at:
http://eu.blizzard.com/support/
Enter the World
After creating and naming your character, click the Create button, and if the name is not
already taken, your character is ready. The next time you enter the character screen, your
character will be waiting for you. Click on it now, and press the “Enter World” button.
After watching a movie introducing your racial heritage, you appear in a small village in the
wilderness.
14
Choose Your Class
After choosing your race, it's time to select a class. There are nine classes in the
game, and each has its own unique set of abilities and powers. These nine are
the druid, hunter, mage, paladin, priest, rogue, shaman, warrior and warlock.
Not every class is available to every race.
Druid – The druid is a formidable class with good healing ability, potent
offensive spells, excellent buffs, and the unique ability to shapechange into
different animal types. In its animal forms, the druid can adopt new roles, such
as that of a warrior or rogue, giving it great versatility.
Hunter – The hunter is a unique class in World of Warcraft because it is primarily
a ranged attacker. To support the hunter's ranged attacks, this class has two
main advantages: a loyal pet and a wide array of movement-restricting spells.
Mage – The mage is a master of powerful mystic energies, able to use magic in
the most spectacular and destructive of ways. Mages are a fragile class, with
little health and poor fighting ability. However, they make up for this physical
weakness with their awesome spellcasting.
Paladin – The paladin is a virtuous defender of the weak and a tireless enemy
of the undead. Mixing elements of the warrior and the priest, the paladin is a
tough melee fighter with great health, excellent protection, and very strong
buffs. It also has a useful mix of healing and defensive spells.
Priest – Priests harness the powers of light and shadow, healing allies and
causing damage to their enemies. While only able to wear cloth armor, priests
have a wide array of spells to keep themselves and their allies alive in the face
of danger.
Rogue – The rogue is one of the most lethal character classes in the game, able
to deal out immense damage in a short period of time Yet, for all their fast-
hitting power, rogues are not very durable, relying on quickness and stealth for
protection instead of armor and high health.
Shaman – The shaman is a versatile and flexible class that fulfills many roles in
an adventuring party. While other classes are pure fighters or spellcasters, the
shaman enjoys a happy medium in between. The shaman is an effective
spellcaster, but can also fight extremely well with mace and staff.
Warlock – These spellcasters can summon demons to serve them, and they also
cast many painful spells that slowly eat at the life of enemies. Warlocks are a
physically weak class, but they compensate for this deficiency with their potent
array of spells and their demonic pets.
Warrior – The warrior is the toughest of all classes in World of Warcraft. They
have the highest health of any class, can use the best weapons, can wear the
heaviest armor, and can also deal an excellent amount of damage.

16
To pull back for a bird's-eye view, roll your mouse wheel backward. You can also slowly
roll your mouse wheel to arrive at a view setting in between these two extremes.
You can rotate the camera around your character by clicking on an empty part of the
screen and moving the mouse while holding down the left button. You can tilt the
camera up or down by doing the same.
Bag
Slots
Latency
Bar
Backpack
Your Name
Action Bar
Experience Bar
You!
Smart Cursor
Ailments
and “Buffs”
Tool Tip
Map Zoom Out
Chat Menu
Chat/
Combat Logs
Party Icons
Character
Portrait
Map Zoom In
Mini Map
Zone NameStatus IconsTarget Portrait/Tool Tip
Day/Night Clock
Understanding Your Interface
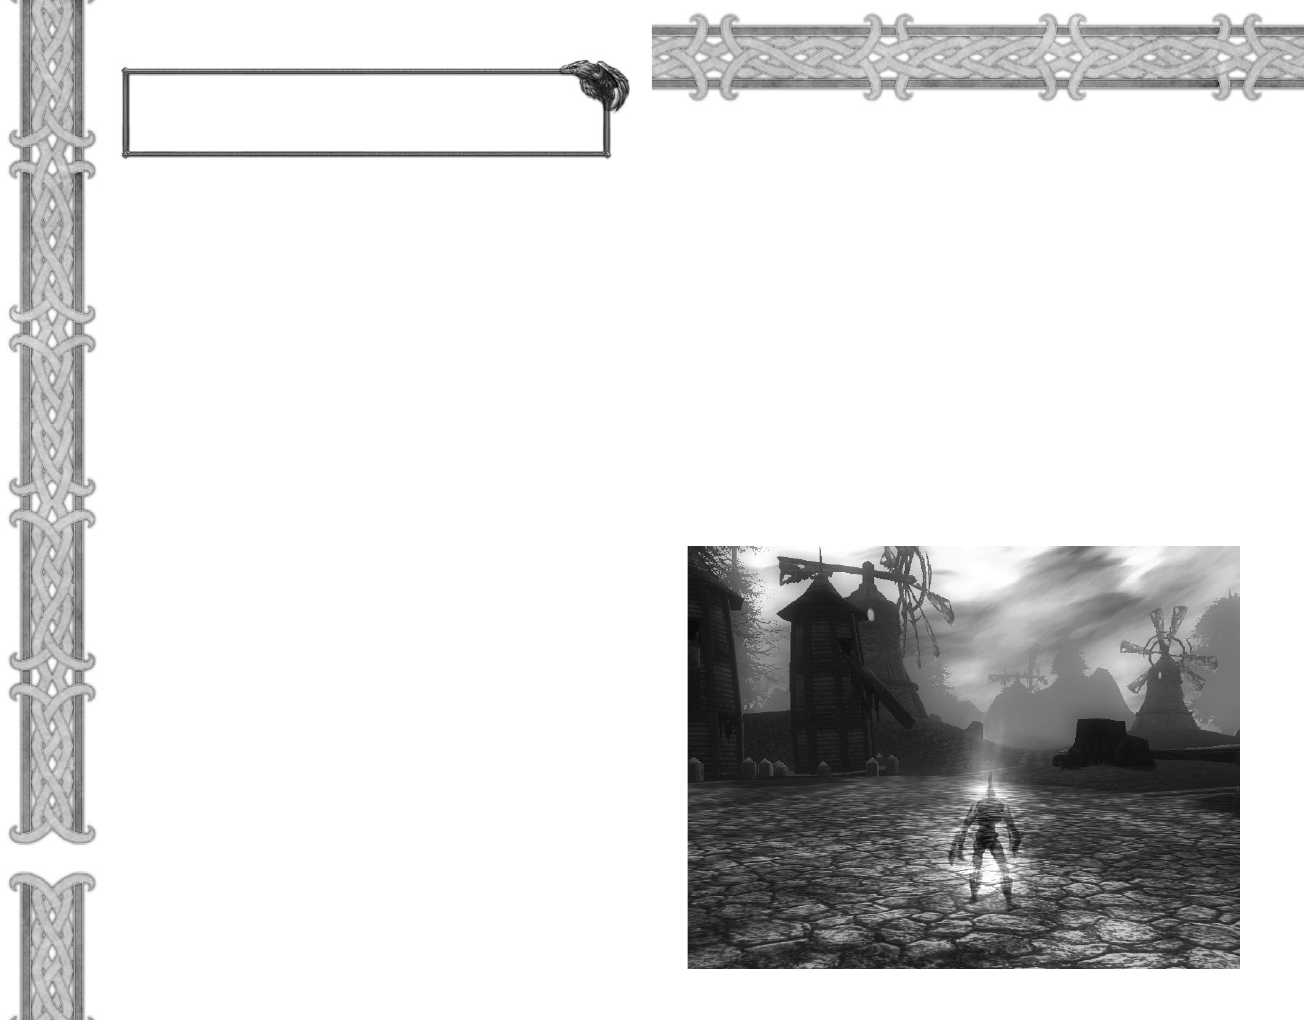
The main screen is the first thing you see when you enter the actual World of
Warcraft. In the middle of the screen is your character, while the rest of the view
is occupied by your environment.
You can adjust this view by using your mouse wheel, or by pressing the Home
and End buttons. To zoom in your view and see through a first-person
perspective, push your mouse wheel forward.
Interface
Panel
World Map Button

Minimap: A miniature map of your character's surroundings. You
can zoom the view in or out using the plus and minus keys. The
name of your current zone or location appears above the minimap.
Towns appear on the edge of the minimap as arrows, while party
members, pets, and resource nodes appear as dots within the
minimap.
Smart Cursor: When your mouse cursor moves over an object or
character that you can interact with, it changes shape to reflect a new action you can
perform. See page 20 for more info.
Status Icons: Any positive conditions, or buffs, affecting your character appear here.
Most buffs are cast on you by yourself, friendly players, or NPCs.
Target Portrait: Shows the name, face, and health bar of any creature or character you
click on in the game. Depending on the target, it might also have a mana, rage, or
energy bar.
18
Description of User Interface Items
Action Bar: Holds any spells or abilities you place here from your Spellbook and
Abilities window. Once placed, they can be activated with a quick hotkey or
mouse click.
Ailments: Any negative conditions, or debuffs, on your character appear here.
Such ailments are usually inflicted upon you by monsters you are fighting.
Buffs: Beneficial spells cast on your character.
Bag Slots: Your inventory in the game. All items not equipped on your character
are stored here. One backpack is automatically provided for you. To fill the other
four slots, you must purchase, find, or make additional bags.
Character Portrait: Shows your character name, face,
level, and health bar. Depending on your class, the
second bar could be your mana, rage, or energy bar.
Chat Button: Click on this button to access party and
guild chats, private messaging of individual players,
emotes, and voiced speech. Many of these same chat options are also available
through hotkeys or commands that you can type at the chat prompt.
Chat Log: All chat messages appear here, along with miscellaneous character
messages. You can scroll up or down this log by clicking the arrows, and jump
to the latest message by clicking on the bottom button
Chat Prompt: Type here to send messages to other players or to the general
area. Press the "Enter" key to open it.
Combat Log: All messages related to combat appear in this window. Watch it
during combat to see how you are affecting your opponent, and vice versa.
Day/Night Clock: This clock shows you the time of day if you mouse over it.
Experience Bar: Shows your current experience point total and how much you
need to reach the next level.
Interface Panel: These tabs enable you to access your character information,
spellbook and abilities window, character talents, quest log, social options, the
looking for group tool, the main menu, and
in-game support.
Latency Bar: Measures the speed of your connection to the World of Warcraft
server. A green bar means your connection is good. A yellow bar means
you may experience intermittent delay, called lag. A red bar means your
connection is poor and you will experience significant delay.
Rest Marker: Shows your rest state. In rested state, you earn 200 percent of
experience from kills. In normal state, you earn 100 percent of experience. Rest
state does not affect quest or exploration experience.
Selection Circle: This circle appears around a target when you select it. The color
of the circle indicates hostility. Red = Aggressive. Yellow = Passive until you
attack. Green = Non-combatant.
Tool Tip: This appears when you click on or mouse over a creature or character.
Inside is the target's name, level, and class or type. The color of the tool tip
indicates hostility. Aggressive targets are red, passive targets that fight when
struck first are yellow, non-hostile targets that cannot be attacked are green,
and player characters are white.
Tracking Your Quests
No matter what race or class you play, you should have several quests to accomplish
after talking to the various NPCs in your starting area. To help you keep track of your
many quests, World of Warcraft offers the quest log. Mouse over the goblet at the
bottom of the screen in the interface panel. The info box that pops up tells you this is
the quest log. The letter “L” in parentheses is the hotkey that corresponds to the quest
log. Click on the goblet or press "L" to open the log.
All the quests you have acquired will be listed here under a heading that corresponds
to the name of your starting zone. Clicking on a quest shows a synopsis of the quest,
the quest description, and the quest reward. If you need to remind yourself of
information regarding a quest, always look in your quest log first. Rereading the quest
description will often give you the clues you seek.
Accomplishing Your First Quest
At least one of your first quests calls for you to slay some monsters to prove your
mettle. The type of beasts will vary depending on your starting region: Gnomes and
dwarves in Coldridge valley must slay rockjaw troggs, while orcs and trolls in the Valley
of Trials must slay mottled boars. Other races will have other required targets.
Now head out into the wilderness around your starting region to hunt for these
monsters.
Looking at Creatures
When you see the monster you must kill, mouse over it. Each time your mouse passes
over a creature, its tool tip appears in the bottom right corner of your screen. As with
NPC tool tips, this box shows you the monster's name, level, and type. The color of the
tool tip is also very important to take notice of. If the color of the monster’s name is red,
then the monster is hostile and will attack you on sight if you get close enough. If the
color is yellow, then the creature is passive, meaning you can walk by it and not provoke
attack. However, passive creatures will fight back if you attack them.
Your First Battle
Left-click on the monster to select it. Now you can rush up and right-click on it to attack!
Notice that after selecting the monster that its portrait shows up at the top of the screen
next to your own, so you can monitor its health as you fight. A circle also appears
around the monster, telling you that it is now selected. Notice that the color of the circle
matches the color of the monster's tool tip.
The monster will now have closed to melee range. Whether you are a warrior or
spellcaster, now you are (you are now) engaged in close-range combat. As you are
fighting, the attack icon in the first slot of your action bar is flashing. That means you are
attacking a foe.
20
Moving In the World
After you acquaint yourself with the interface, it's time
to move around the world.
You move your character primarily using the keyboard.
Movement for forward, backward, turning left, and turning
right, is already mapped onto the w, s, a, and d keys, as well as
the arrow keys. Turning left and right means your character turns, thus
changing the camera view, but your character does not actually move left
or right. To move left or right, you can use the q and e keys, or you can hold
down the right mouse button and press a or d. You will then run to one side or
the other while facing forward. This sort of running is referred to as strafing.
To toggle auto-run, press the Num Lock key.
You can jump while moving by pressing the spacebar. To sit, press the x key.
All your movement commands, as well as other commands, can be customized
from the Key Bindings menu in the main menu.
Interacting with NPCs
Standing in front of you will be one or more non-player
characters (NPCs). Mouse over one and you will see his
name and occupation appear in a pop up box called the
tool tip in the bottom right corner of your screen. Mouse
over any other nearby NPCs to see who and what they
are as well.
One or more of the NPCs in front of you will have a
yellow exclamation point over their heads. This mark
indicates that they are quest givers. If you mouse over
other NPCs, you will find that some are trainers, vendors,
or guards. If you can interact with an NPC, your cursor
will change to a chat balloon or an icon representing the
action you can perform with the NPC. A trainer, for
instance, who offers extra learning for your class, is
represented by a book cursor. A vendor, who sells you
items, is represented by a bag.
To talk to or interact with any NPC, simply right-click on it. A box or window
will then appear on your screen with instructions or options for you to act on.
Acquiring Quests from NPCs
Talk to the first quest giver NPC in your view. You'll notice that your cursor now
appears as a chat balloon. When you right-click on the quest giver, it will begin
talking to you through a dialog box. This dialog box is where you will read
about the NPC’s quest, what objectives you need to accomplish to complete the
quest, and what reward, if any, you'll garner for your success. Many of the
quests in your beginning area are simple. The quest givers here will ask you to
slay some simple beasts to prove your mettle, gather items from the
environment or fallen creatures, or deliver letters to other NPCs.
To accept a quest, click on the Accept Quest button at the bottom of the quest
dialog box.
You'll notice now that the yellow exclamation over the quest giver has changed
to a gray question mark. The question mark tells you that this NPC is who you
need to return to when you finish the objectives for your quest. However, the
gray color indicates that you are not yet ready to speak to the quest giver
because you haven't completed your goals.

Recovering Health
While you were fighting, you lost some health. Now that you've looted your kill, you
can rest. During a battle, be sure to monitor your health by watching your combat log
and your health bar next to your portrait. In some cases, you might have to run away
before you lose all your health and die.
All characters automatically recover health after combat at a gradual rate. This healing
rate increases if you sit down. If you also eat while sitting, this healing rate improves
even more dramatically.
Left-click or right-click on the food icon in the last slot of your action bar. Your character
then sits and begins eating. While your character is eating, it gains back health rapidly.
When it is finished eating, your character will be at full health and ready to attack more
monsters.
Turning In Your First Quest
The quest you are trying to fulfill asks you to kill a certain number of
monsters. When you have fulfilled the requirement and killed the necessary number,
return to the NPC that gave you this quest. Whereas before you saw a gray question
mark over that NPCs head, now you should see a yellow question mark. The change in
color tells you that you have accomplished your objectives and can turn in the quest.
Right-click on the NPC to open a dialog box and speak to it. Click on the Complete
Quest button at the bottom of the box and your quest is erased from your quest log and
a message in your chat log tells you that you finished the quest.
Upon turning in the quest, you'll gain a large experience point reward, which appears
over your character, in your chat log, and in your combat log. Look at your experience
bar and you will see that it has been filled with more experience.
If there was a material reward offered for the quest, it will be added to your backpack.
If you had a choice of rewards, you will need to select one by clicking on it in the dialog
box before you can click the Complete Quest button.
For more information about quests, and tips for managing them, please see the detailed
explanation here : http://eu.battle.net/wow/game/
22
Spellcasting Delays and Interruptions
If you are a spellcaster, you can try to cast a spell in melee combat, but if you
get hit, your spell might get interrupted or delayed. In addition, once you cast
a spell, there is a brief delay before you can cast it again. Watch your action bar
closely. Any ability you use will become grayed out once you use it. You have
to wait for the ability or spell to brighten before you use it again. Depending on
the spell or ability, this wait can be very short or very long.
Using Hotkeys to Fight
Although you began this fight by using your mouse to right-click on the
monster, you can also fight using hotkeys. A hotkey is a key stroke that is
mapped to an action, allowing you to perform that action by pressing the
appropriate key instead of navigating through the user interface to find the
action and then click on it with the mouse. For instance, if you are close to a
monster and want to attack it, you can either right-click on it, or press the 1 key
on your keyboard, which corresponds to the attack icon on the first slot in your
action bar. If you had a spell or ability in the second slot, pressing the 2 key
would activate that spell or ability.
Experience
When the monster dies, it collapses to the ground, and a number appears over
your head. This is the experience point award you just earned for killing the
monster. This experience also appears in your chat log and your combat log.
The Experience Bar
Some purple has also appeared in the experience bar that runs across the bottom
of your screen above the action bar. Mouse over it to see the reading, which tells
you how much experience you have and how much experience you need to
reach the next level. Each time you make a kill, explore a new locale, or
complete a quest, you earn experience, which adds to this bar. When the bar is
full, you gain a new level, and your experience bar resets to zero, while the
amount you need for the next level grows.
Looting Your Kill
Turn back to the monster's corpse. Sparkles of light drift up from its body. That
means you can loot it. Mouse over the corpse, and your cursor changes to a
bag. Right-click on the corpse to open up the loot window.
Inside the loot window should be some items. If you killed a humanoid monster,
such as a kobold, you would find money inside the window. If you killed a
beast, like a wolf, you might find wolf parts. Keep in mind that you won't always
get loot from a kill; some monsters carry nothing.
Right-click or left-click on the items in the loot window to pick them up. When
you pick up the last item in the loot window, the loot window closes, and the
sparkles disappear.
As soon as you loot the corpse, open your backpack. Inside one of the slots you
will find the item you just looted. Different items will take up multiple slots,
unless they are of the same type, in which case they might stack.

Adjusting Your Action Bar
After you learn a new ability or spell, it's time to add it to your action bar. This allows
you to use it easily in battle. Click on the Abilities button on the bottom of your screen.
This button looks like a book. You can also press the “I” hotkey.
In your Abilities window, you see your attack ability, along with any other abilities you
already have. An ability that has the "passive" tag next to it does not need to be
activated and is always on. These types of abilities never need to be placed on your
action bar.
The ability you just learned should be on this ability page. If you learned a spell, it will
be on the spell page. In some cases, you might have to click on the spell or ability tab
at the bottom of your book to access it. Mouse over the new spell or ability icon in your
spellbook or abilities book to see what it does. Then add it to your action bar. Left-click
and hold the icon. Then drag it onto the third slot in your action bar. It now appears
there. You can now use it by clicking on it or by pressing the appropriate hotkey, which
is the 3 key.
Onto Greater Adventures
Now that you have secured greater equipment and grown in power, it is time to
continue your adventures in Azeroth. Complete whatever quests remain for you in your
starting area. Speak to all the non-player characters you can one last time, and at least
one of them will offer you a quest to venture beyond your home to greater settlements
beyond.
Take heart in the lessons you have learned and journey forth with courage. Good luck.
The World of Warcraft awaits.
24
Equipping Your Character
At least one of your beginning quests offers you a material reward that is a piece
of armor. When you gain this reward, you will want to equip it immediately.
Open your Character Info window by clicking on the small portrait of your
character in the bottom of the screen or by pressing the hotkey “C.”
Your character appears in the middle of the info window, with slots on either
side of it. Mouse over these slots to see that they correspond to areas of the
body where you can wear armor. At the start, many of these slots will be empty.
Open your backpack, and left-click on the piece of armor in your backpack. The
slot that you can place it in should now be glowing. Bring the cursor to that
empty slot in your Character Info window, and click on the slot. The armor will
then drop into the slot, improving your character's armor rating. Look at your
character closely. Your character is now wearing the new armor. You can also
equip armor and other items by right-clicking them in your backpack.
Leveling Up
The experience you earned from killing monsters and completing your quests
should fill up your experience bar. If not, kill a few more monsters or try to finish
another quest. When your experience bar fills up, a congratulatory sound and a
flourish of light tell you that you’ve just leveled up. Your chat log also
congratulates you on gaining a level. Every time you level up, your character
increases in power. Not only do you gain extra health, but you also gain
increases to one or more of your primary attributes, such as agility or stamina.
Spellcasters also gain mana when they level up.
Training Your Character
Now that you have gained a level, it's time to visit your class trainer.
Characters gain access to new spells and abilities whenever they attain an even
level of experience (2, 4, 6 etc). To learn these new abilities, you must speak to
your class trainer. Right-click on the trainer to open the Training window.
Inside the window are all the abilities you could possibly learn. Abilities you can
learn right away are green. Abilities that are beyond your current level are red.
You can mouse over an ability to see what it does. If you can't learn it yet,
mousing over it will tell you the minimum level requirement for that ability.
If you see any spell or ability that you can learn right now, click on it and then
click the Learn button at the bottom of the Training window. Learning a new
spell or ability always costs money.
If You Need Money
If you don't have enough money to buy a new spell or ability, sell some of your
loot at a merchant. Merchants are identified as such in their tool tips. To buy or
sell from them, right-click on them to open up their merchant window. Your
backpack also opens at the same time. Right-click on an item you want to buy
or sell and the money automatically trades hands. When you have the money
you need, return to the trainer. If you accidentally sell something you need, you
can repurchase it for the amount you sold it for, using the Buyback option at the
bottom of the merchant’s screen.
Resurrection Spells
You can also be brought back from the dead through magic. Certain character classes can
cast spells to raise you from the dead. The priest, shaman, and paladin all have
resurrection spells. The difference between the resurrection spells of these casters is that
they bring you back at different strengths. None of these classes begin play with their
resurrection spells available, so it is an option that only higher-level characters can
accommodate. When one of these classes casts a resurrection spell on you, you will be
asked to consent to the resurrection. If you agree, you appear next to the caster with
minimal health and mana as dictated by the spell.
Resurrection Sickness
When you are resurrected by a spirit healer, you revive with a condition called
resurrection sickness. It lasts for a few minutes. During this time, all your character
attributes are severely reduced and your maximum health and mana are much lower
than normal. After the resurrection sickness passes, your attributes, health, and mana
are restored to their normal numbers.
Resurrecting a Ghost
Even if you have already released your spirit and are now a ghost running back to your
corpse, you can still benefit from a resurrection spell. In this case, you will get the same
resurrection window asking you to consent to the resurrection. If you agree, you will
appear near the casting shaman, priest, or paladin in your newly revived body.
26
A Special Note on Dying
No matter how good an adventurer you are, eventually
you will know the sting of death. Thankfully, death in
the World of Warcraft isn’t permanent.
Death
When your health is reduced to 0 or less, through battle or accident, you die
and your items will sustain a 10% durability loss (getting killed by another player
does not result in the loss in item durability). A release window pops up over
your corpse with a button you can press to release your spirit. If you choose the
Release Spirit button or if you wait longer than five minutes, your spirit appears
as a ghost at a nearby graveyard. All zones have at least one graveyard where
dead characters reappear.
At the graveyard is a spirit healer. When you are a ghost, you can come back to
life by retrieving your corpse or by asking the spirit healer to resurrect you. If
you ask the spirit healer to resurrect you, your equipment will suffer a durability
loss which must be repaired at a merchant for a fee, and you will also become
afflicted with resurrection sickness. If you do not wish to be raised immediately,
then you must run to your corpse and recover it. It is almost always better to
run to your corpse rather than ask a spirit healer to resurrect you. That's because
all you lose when you run to your corpse is time. Aside from this slight
inconvenience, there are no other penalties associated with dying and
retrieving your corpse.
Corpse Retrieval
While you are a ghost, you run at increased speed. When you get close to your
corpse, a resurrection window appears on your screen. To resurrect yourself,
press the Resurrect Now button in the window. Be very careful about where you
revive yourself. If you died fighting monsters, make sure the monsters are gone.
When you raise yourself from the dead, your new body will replace your ghost,
and you will appear with your health and mana bars half full.
Resurrection Waiting Period
If you have died repeatedly over a short period of time, subsequent
resurrections might have a waiting period of a few minutes before you can
return to life. However, this waiting period resets to zero if you then play for an
extended period without dying. There is no resurrection waiting period if you
are resurrected by the spell of another player.

Interface
Understanding Your Target
As you adventure in World of Warcraft, you will encounter more than just friendly NPCs
and simple beasts. You will meet many creatures and characters, and you will need to
understand how to interpret the information you get when viewing them.
FRIENDLY PLAYERS
Friendly players appear with blue names over their heads. If they belong to a guild,
their guild name will appear under their name. When you mouse over or select a
friendly player, their tooltip will be green if the player is PvP enabled, or white if
they are not.
OPPOSING PLAYERS
By default, all player characters have blue names. However, if a player turns on the
player versus player flag and indicates that he or she wants to fight other players,
then that player's name and tool tip turn red to members of the opposing faction,
indicating that they are hostile.
NON-PLAYER CHARACTERS (NPCS)
NPCs are any humanoid character you can interact with, such as merchants, aerial
mount masters, and quest givers. The tool tips of friendly NPCs are green. The tool
tips of enemy faction NPCs are red. Neutral NPCs have their names and tooltips in
yellow.
MONSTERS
Monsters are any characters that are not also faction's NPCs and that will fight back
if you attack them. There are two categories of monsters: passive and aggressive.
Passive monsters have yellow names and tool tips and only fight if struck first.
Aggressive monsters have red names and tool tips, and attack you on sight. Some
monsters are social, and will call for help from other monsters nearbys if they are in
combat.
CRITTERS
Critters are non-combative animals, such as sheep, rabbits, cows, and prairie dogs.
These animals will never fight you, even if you attack them. Killing a critter earns
you no experience.
28
Chapter 4
Advanced User Interface
This chapter provides additional details and advanced user options for your
interface beyond the beginning information provided in Chapter 3: Getting
Started.
Character Selection Screen
At the Character Selection screen you can make a new character, choose a character
to play, change your current realm, enter the WoW website, access tech support,
and adjust your account settings.
Clicking the Create New Character button takes you to the
character creation screen, where you can generate a
character to play in the game.
The right side of the Character Selection screen lists any characters you have
created. If you haven’t yet made any characters, this area is blank. You can have
up to ten characters per realm.
Each character entry shows the character's name, level, current location.
Clicking on a character displays it in the center of your screen.
To delete a character, select that character and then press
the Delete Character button. You will be prompted to
confirm the deletion. Click the Okay button to permanently erase that character.
Realms are discrete game worlds. You can interact with all
the players in your realm, but not with players in other
realms. When you first play World of Warcraft, your realm will be pre-selected
for you.
If you wish to play in a different realm, press the Change Realm button. A list
appears showing all available realms and the current number of players in each
realm. Click on the realm you want to join, and press the Okay button.
Chat Log
In addition to chat messages from players in your immediate surroundings, the chat log
also displays private messages from other players, guild messages, yells from other
players, and any non-chat messages relating to your character development, such as
notices for when you gain a level, earn a skill point, or acquire a quest. Only the last
eight lines of messages are displayed, although you can scroll the log up to view
previous messages. To jump back to the latest message, click on the bottom arrow key
next to the chat log.
CHAT BUTTON
The chat button is especially important because it houses all the commands for
effectively communicating with other players in World of Warcraft. By clicking on
this button, you have access to party and guild chats, private messaging of
individual players, emotes, and voiced speech. Many of these same chat options
are also available through hotkeys or commands that you can type at the chat
prompt.
CHAT PROMPT
The chat prompt appears below the chat log when you press the Enter key. At the
chat prompt, you type the messages you want to say to your fellow players. Chat
commands, such as yelling and whispering, can also be typed at the chat prompt
instead of selected through the chat button.
For more information about chatting and using the special chat commands, refer to
page 35: Community, which tells you how to interact with other players in the
World of Warcraft.
COMBAT LOG
The combat log displays your actions and the actions of other nearby players, NPCs,
and creatures. Combat, purchases, item creation, experience awards, or other
activities are recorded in this combat log. The actions of monsters and other players
appear in different colors to distinguish them from your actions.
The arrow keys to the right of the combat log let you scroll up and down the log to
see previous actions. To jump back to the latest action, click on the bottom arrow key.
Action Bar
At the bottom of the screen is your action bar: the toolbar where you can store
frequently used actions for quick and easy access. You can place abilities or inventory
items in your action bar and then use them with the click of a mouse or the press of a
key. For example, instead of opening your inventory bag and clicking on a hunk of bread
to replenish your health, you can just click the hunk of bread icon on your action bar.
There are 12 slots on your action bar, and each can hold one spell, ability, or usable
inventory item. Each action icon also has a hotkey – displayed in the icon's upper left
corner – that corresponds to the 1 through 0 keys and the – and + keys on your keyboard.
You can perform the action in an action slot by clicking on the icon there or by pressing
the hotkey on your keyboard.
30
Additional Portraits
PET PORTRAIT
Some character classes can summon pets. If such a
character is currently controlling a pet, a pet portrait
appears underneath the main character portrait. The
pet portrait displays the pet's name, health bar, and
energy, mana, or rage bar. You can mouse over the bars for exact numbers.
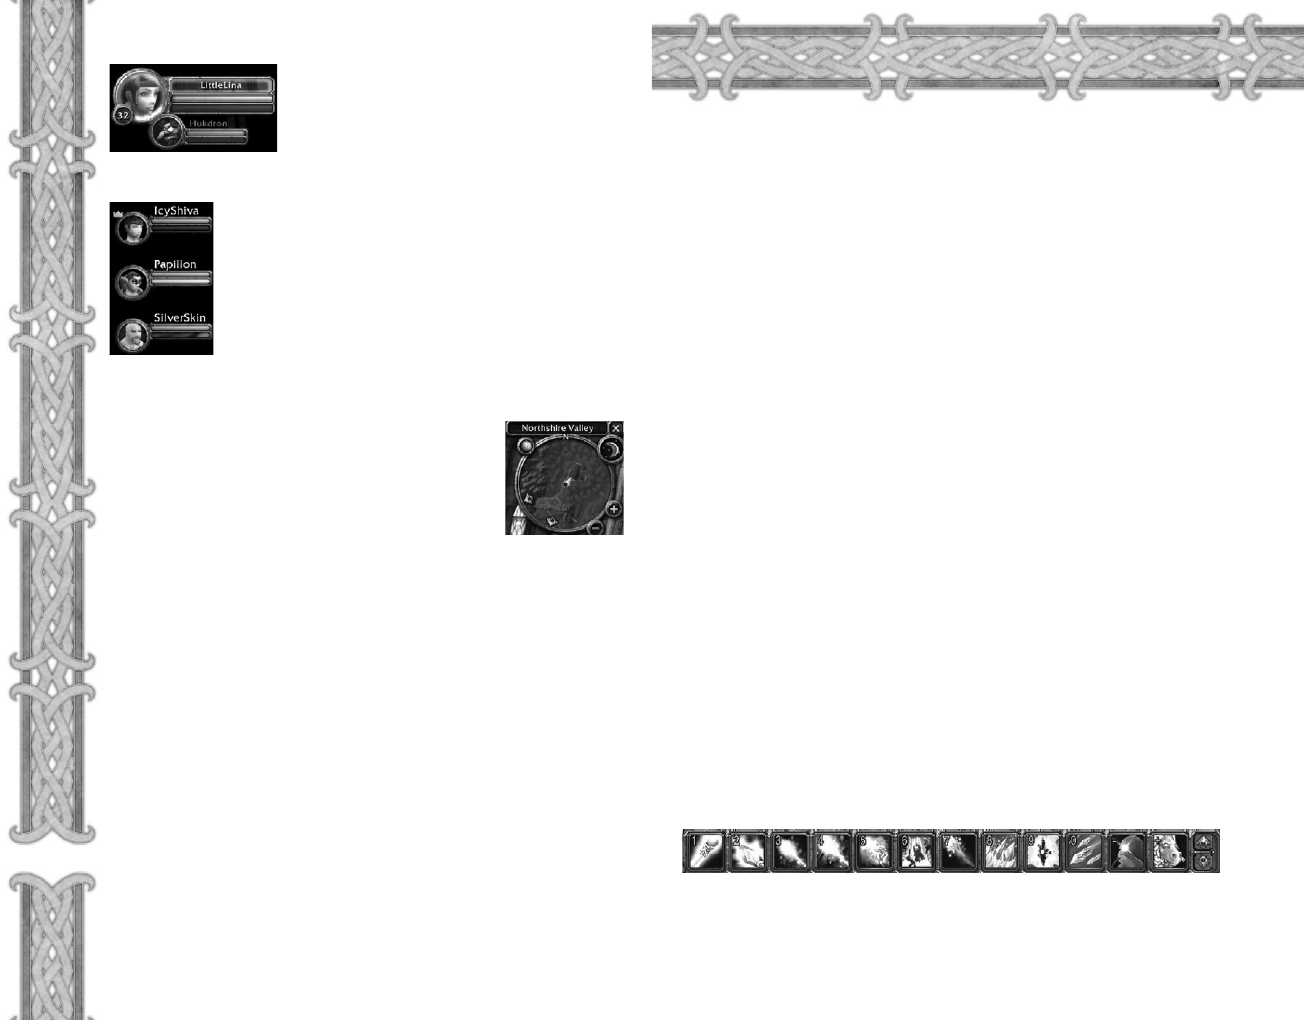
PARTY MEMBER PORTRAITS
If you are grouped with other players, their portraits appear
under yours as well. If you also have a pet, the party member
portraits appear under your pet portrait. Each party member
portrait displays the character's name, health bar, and energy,
mana, or rage bar. Mousing over the party member's portrait
also reveals its level and class, as well as any spell effects that
are currently affecting the selected party member.
Spell and Ability Icons
Any beneficial spell or ability affecting your character appears in the upper right
area of your screen as an icon. You can mouse over the icon to see the spell or
buff’s effect and duration. You can prematurely end any buff by right-clicking on
its icon here.
Minimap
Simple geographical features, like rivers, mountains, and
towns, are shown on your minimap. If you are near a town,
its direction is indicated as a white arrow at the edge of your
minimap.
If you have a pet or are grouped with another player, then
this pet or player is shown on your minimap as a large blue dot. If a party
member is outside the radius of your minimap, then a yellow arrow at the edge
of the minimap shows you his or her direction.
Whenever you use an ability that finds resources, such as find herbs or find
minerals, then any applicable resources that are sufficiently nearby appear on
your minimap as yellow dots. When you mouse over one of these dots, you see
the name of whatever resource it represents. If the resource's name is grayed
out, then that particular resource node is underground.
You can zoom the minimap in or out by pressing the plus and minus arrows on
the edge of the minimap.
You can close the minimap by clicking the x above it. This closes the map, but
not the name of the area.

32
POPULATING YOUR ACTION BAR
To place an action in a slot on your action bar, open the window where the
action appears (such as your spellbook or backpack), left-click and drag (or shift-
left-click) the icon of the action to one of the 12 slots on the bar. To remove the
command from your action bar, pick the action icon up by left-clicking on the
icon in the action bar and then click on an empty area of your screen. This
removes the icon from your bar, although the action still remains in your
Spellbook & Abilities panel or your inventory.
Holding your mouse over an action slot tells you what the action in that slot is.
For actions involving weapons and wands, the ability to use the weapon or the
wand is what must be added to the action bar from the Spellbook and Abilities
panel, not the weapon from your inventory.
NAVIGATING YOUR ACTION BARS
You can customize how the action bars are displayed from the Interface Options
selection from the Main Menu. You can also navigate through these action bars
in three ways:
t You can scroll up or down your action bars by pressing the up and down
arrows to the right of the action bar.
t You can jump to an action bar by holding down the Shift key and
pressing any number key from 1 to 6. That will take you to one of the six
action bars.
t You can scroll through the action bars by holding down the Shift key and
scrolling with your mouse wheel.

Chatting
Your window for chatting is your chat log, which is located in the lower left area of your
screen, above the Action Bar. The messages displayed in your chat log are from all chat
channels you have joined in the current zone. A number and channel name in brackets
precede every chat message. The name is the chat channel that the message originated
from, and the hotkey number corresponds to that channel. By default, whenever you
enter a zone, you automatically join the zone’s General and Trade channels. To talk in a
channel, press Enter to open the chat window, and then type ‘/1 your sentence’ to send
the message to channel 1.
To see a list of all channels in the zone, type /chatlist.
JOINING AND LEAVING CHANNELS
To join a chat channel, type /join followed by the name of the chat channel. For
example: /join trade.
To leave a channel, type /leave followed by the name of the channel you wish to exit.
For example: /leave general.
CREATING A CHANNEL
To create a channel, type /join followed by the name of the channel you wish to create.
If no channel by that name exists, one will be created for you. Others can then join your
channel with the join command.
Chat Modes
There are different types of chat. Pressing the Chat Button next to the chat log shows
you these different options. Simply click on the desired chat type to begin chatting in
that manner, whether it is yelling, guild chatting, or whispering. You can also bypass the
Chat Button by pressing the Enter key to pull up the chat prompt and then typing /
followed by the appropriate chat command or hotkey.
SAY
Say broadcasts your chat to all players in your vicinity. This is the default chat mode. You
can also type /s at the chat prompt to begin saying a message if your chat prompt is
set to a different chat type.
PARTY
Party chat only chats with members of your party. Use this chat to speak with your party
members without cluttering the chat window of other players. You can also type /p to
begin a party message.
GUILD
Guild chat broadcasts a message to all people in your guild, no matter where they are.
You can also type /g to begin a guild message.
YELL
Yell broadcasts a message to all players in your zone. The chat message appears red by
default in everyone’s chat window, making it stand out. You can also type /y to yell a
message.
34
MACROS
Macros are a very advanced type of user option that allows you to create hotkey
buttons for your action bar that duplicate text messages, actions, and
spellcasting. You could, for instance, bind the phrase "Hello everyone" to a
single button using macros so that whenever you wanted to greet your
guildmates, you only had to press your macro button instead of retyping the
phrase each time.
You can even bind spells and abilities to your macro, and add text to your
casting. Some players bind a healing spell, for example, and a phrase such as "I
am healing %t [targeted player name]" to a single button.
Macros can save you a lot of time by automating some of your more common
and repeated actions in the game.
To create a macro, open your chat prompt and type /macro, or open the
Options menu (ESC) and select Macros.
For more detailed instructions on how to create and use macros, you can refer
to the World of Warcraft website at:
http://eu.battle.net/wow/game/
Pet Action Bar
If your character has access to a combat pet as a class feature, then anytime you
summon a pet, a smaller action bar appears above your own. This pet action bar
is used and populated the same way as your regular action bar. The hotkey for
pet action bar icons is ctrl plus the appropriate number key. For example, the
hotkey combination for your pet's first action bar icon is ctrl+1.

Interface Panel
The interface panel is the line of buttons at the
bottom of your screen to the right of your action bar.
By pressing on the individual buttons, you can view
your character, open your spells and abilities book, select your character's talents, access
your quests, interact with other players, look for group members, adjust game options,
and get help from a Game Master. If you hold your mouse over each tab in the interface
panel, you can see the name of the panel and its corresponding hotkey.
Character Info
The first button on the interface panel is Character Info. Clicking on this panel
opens a window that shows your character and any equipment it is currently
wearing. In addition to equipping yourself with items, you can also see the
attributes, skills, reputation and PvP statistics of your character
REPUTATION
Your standing with the different groups and alliances within the World of Warcraft is
reflected in the Reputation tab. As your character comes into contact with new groups,
they will be added to the list, with information about your current standing with that
faction. For detailed information about how factions work and which factions might
benefit you, you can refer to the website here:
http://eu.battle.net/wow/game/
SKILLS
All of the skills possessed by your character, including weapon skills, proficiency with
armor, and profession skills, are listed under the skills tab. You can see which skills you
have trained and to what level you have developed each skills.
PVP
This tab shows the honor you have accumulated by participating in PvP battles and the
number of kills, both lifetime and recent. If you are part of one or more Arena teams,
the number of points accumulated and the current standing of the teams will be shown.
36
WHISPER
Whispering sends a private message to one player. Unlike other chat types, you
must specify a player to whisper to. After clicking the whisper command or
typing /w at the chat prompt, type the name of the player you wish to whisper
to. Then type your message. Whispers cannot be sent to players in the opposing
faction or players who are offline.
REPLY
If a player sends you a whisper or tell, you can reply to that player either by
choosing Reply from the Chat Button menu or by pressing r.
Chat Memory
By default, when you hit the Enter key to pull up the chat prompt, your chat will
be a /say message. However, if you send a different type of chat, such as
"/party," the next time you pull up your chat prompt, you will still be in party
chat mode. The chat prompt remembers your last chat mode and stays there
until you specify a new one.

When you complete a quest, it disappears from your quest log.
Your quest log can hold a maximum of 25 quests at a time. If you try to acquire a new
quest, you get a message telling you your quest log is full. If that happens, you can
complete a current quest to free up room to take on another quest, or abandon a quest
to remove it from your quest log. Abandoned quests can be reobtained from the same
NPC you received it from.
Social
The Social window is where you keep track of your friends in the game, search for
specific players, and display lists of players in the game by level, zone, name, or
class. The four different sections of the Social window are: Friends, Who, Guild and
Raid. You can switch between sections by clicking on the tabs at the bottom of the window.
FRIENDS
You can add people you enjoy playing with to the list in your Friends section. You
can then refer to your friends list to see which friends are logged on and where they
are playing. You are also notified when your friends log on or off. The tab at the top
of the Friends section allows you to also block contact from others by placing them
on your Ignore list. A player on your Ignore list will not be able to speak or whisper
to you with that character.
WHO
This section is used to search for groups of players using key words, such as guild
names, character classes, and races.
GUILD
The guild section is only available if you are a guild member. This section allows you
to manage your guild relationships. It displays all members of your guild, and
shows their basic character information. If you are not a member of a guild, this tab
is grayed out.
RAID
If you are currently a member of a raid party, the other groups will show in this tab.
You can see the names and classes of the other raid members, and which groups
they are in.
38
Spellbook & Abilities
Clicking on the Spellbook & Abilities tab opens a book containing all the
spells and abilities your character has. Most spells and abilities are
acquired by purchasing them from a trainer, but some are only available
as quest rewards. Any spell or ability you acquire shows up here once you pay
for it. Holding your mouse over a spell or ability in the book tells you what that
spell or ability does, how often you can cast it, and how much energy, mana, or
rage it costs to use.
To use a spell or ability, you can open this book and then right-click or
left-click on it to activate it. However, a much easier way to use an ability or
spell is to add it to your action bar.
Your spells and abilities are kept in separate sections. To switch between
sections, press the appropriate tab at the side of the book. If you have more
spells or abilities than can fit on one page, you can scroll to successive pages
by clicking the left and right arrows at the bottom of the book.
If you have a combat pet, you will have a second tab on the bottom of your
book with your pet's abilities.
In addition to class abilities and spells, the Spellbook & Abilities panel also is
where your profession abilities show up. The associated ability of a profession,
such as the Find Herbs ability you get when you learn herbalism, appears in the
General section of your Spellbook & Abilities panel. You can drag these
profession abilities to your action bar and use them as you would class abilities.
Talents
The Talents button opens up your character’s Talent window. Talents are
additional powers you can select for your character that not only improve
your existing abilities and spells, but that also customize your character.
Using talents, two players of the same class can differentiate their characters
greatly.
The World of Warcraft online strategy guide at:
http://eu.battle.net/wow/game/ is your best source for up to date Talent
information.
Quest Log
Whenever you acquire a quest, that quest is added to your quest log. All
your currently active quests appear here.
The Quest Log window is organized into two sections: the quest list and the
quest information window. The quest list shows all the quests you currently
have, organized by the zone in which you acquired the quest. A zone only
appears if you have a quest from there.
When you select a quest from the list, the quest info window displays all the
information you need to complete it. The summary gives you the bare essentials
for the quest: the goal you must achieve and the NPC you must talk to in order
to complete the quest. Below the summary is the same text you received when
you first acquired the quest, including the exact instructions and location of the
quest, and any additional information you received at the time you acquired it.
At the bottom of the quest info window is the reward heading, which tells you
what you get if you complete the quest. Keep in mind that not all quests specify
their possible rewards, and some quests unlock other quests.

World Map
The World Map tab (M) opens up a full-screen map of the world. The world
map defaults to a hand-drawn map of your current zone. Any locations you
have explored appear on the hand-drawn map. As you continue exploring,
more locations will be drawn added to your map.
Your character appears as a grey arrow on the world map. If you are grouped, party
members also appear as blue dots. To tell who each dot is, hold your mouse over the
dot. The character's name will then pop up on your mouse cursor.
Major cities already appear on your world map, even if you haven't explored them yet.
To zoom out to a view of your continent, right-click on the map. Right-click again to
zoom out for a map of the world. You can also adjust the view by clicking on the Zoom
Out button at the top of the map.
The name of the zone or continent you are viewing is always displayed at the top of the
world map. If you mouse over an explored location or known landmark, such as a city
or mountain range, its name will appear at the top of the map instead.
You can also jump to a map of a specific zone by selecting a zone from the zone
pulldown menu at the top of the screen. Left-click on the arrow next to the menu to
open it, and then click on the desired zone. To jump to a different continent, press the
arrow in the continent pulldown menu to the left. Jumping to a new continent will reset
the zone pulldown menu to the zones in that continent.
Note
The world map covers your entire screen, blocking out your main
window and the action bar. Be careful when opening the world
map while you are in combat or running.
40
Looking for Group
The Looking for Group tool makes it easy to find other players to join you
in a quest or instance. Clicking the button on the toolbar opens a window
where you can select whether you are a player looking for a group, or an
existing group looking for more players.
You can then select whether you are looking for a group for a dungeon, a quest
or a raid, nominate the specific instances or quests you wish to do, and add
comments about what members you are seeking, or what skills you would bring
to a group. Once this information is completed, you can be automatically added
to a group by the LFG tool, or if you would rather be contacted about grouping
opportunities first, you can deselect Auto Join.
Adding yourself to the Looking for Group tool also automatically adds you to
the Looking for Group channel, allowing you to connect with other players who
are also seeking party members.
Main Menu
Clicking on the Main Menu tab opens up the main menu. From here, you
can adjust video and sound options, customize controls, logout, quit, or
resume playing. You can also open the Main Menu by pressing the Escape key.
VIDEO OPTIONS AND SOUND OPTIONS
Here you will find a range of options to customize the way the game is
displayed and heard according to your computer’s specifications. You may need
to experiment to find the right settings for you.
INTERFACE OPTIONS
From this menu you can turn on more advanced
options such as inverting the mouse, turning on the
status bar (combat log), showing your pet melee
and spell damage, turning on the right-click to
move option, and more. More information on
these advanced options can be found at the World
of Warcraft website at :
http://www.worldofwarcraft.com
KEY BINDINGS
The Key Bindings menu lists all the hotkey
commands in World of Warcraft and the default buttons associated with them.
You can then customize all these hotkeys by typing in your own letters or mouse
buttons. If you are later dissatisfied with your own key bindings, you can restore
the Blizzard defaults.
LOGOUT AND QUIT
Clicking the Logout button takes you back to the Character Selection screen,
while the Quit button closes World of Warcraft and takes you to the desktop.
CONTINUE
Pressing this button closes the main menu and takes you back to the game.
Help Request
The Help Request button opens up the Knowledge Base which provides
you with answers to common questions. You can open a ticket here to
request assistance from a Game Master (GM) . For more information on
tickets, refer to Appendix II: Customer Support.

Int An abbreviation of intelligence.
Kiting A style of combat in which a player continually stays out of combat range of
an enemy, while simultaneously causing damage to it.
Log Logging off or disconnecting from the game.
Loot To take treasure from a monster corpse or object, such as a chest or box. Also
used to mean the treasure itself.
Lvl An abbreviation of level.
Mez Any spell that temporarily incapacitates a target. Sometimes used as a verb
to mean the act of incapacitating a target. An abbreviation of mesmerize.
Mob Any computer-controlled character in the game, whether hostile or not. An
abbreviation of mobile.
Newbie Any new player to the game. Sometimes abbreviated as newb or noob.
Some players consider it a insulting term.
Pet A combatative or non-combative NPC, such as a parrot, dog, or cat, owned
by a player.
Pop Respawn.
Port To transport yourself or other players to another location in the world through
spells or abilities. An abbreviation of teleport.
Pull To draw a monster away from its current location and back to the party.
Pulling is done so that the party can fight individual monsters and not groups
of them.
Puller A player that pulls monsters for the party.
Raid A large-scale attack on an area by a group of parties and players.
Res An abbreviation of resurrect or resurrection. Also rez.
Respawn The act of a dead monster's spawning, or appearing, again. Also used to
describe the respawned monster itself.
Spawn The location or process of a monster or monsters appearing when they are
created in the world.
Spi An abbreviation of spirit.
Sta An abbreviation of stamina.
Stack A number of identical items placed in a single inventory slot to conserve
space. Only certain items can be stacked.
Str An abbreviation of strength.
Tank A character that engages in melee with enemies and can withstand a lot of
damage. Warriors and paladins are two examples of tanks. Also used as a
verb to describe the act of engaging in melee with enemies.
Taunt To provoke a monster into attacking your character, thereby pulling its
attention away from its current target.
Threat See Hate.
Train To lead monsters so that they will attack another player.
Twink A low-level character made more powerful by higher-level characters,
usually through gifts of armor and weapons that the character would not
normally have at such a low level. Also used as a verb to describe the act of
giving low-level characters powerful items uncommon at their level.
XP Experience points. Also called exp.
I. Glossaire
These are common terms and acronyms used all the time in chat in World of Warcraft.
Common Terms
Add An extra monster that joins an existing battle. This is often used as a warning
by a group member: "Add!"
Alt Other characters on your account besides the one you are currently playing.
This is an abbreviation for alternate. Usually alt refers to any character other
than your highest-level character.
Aggro The act of a monster becoming hostile and attacking you. Often invoked
when a player moves too close to a monster and unintentionally provokes it
to attack. Aggro also refers to a monster's aggression level towards you.
Aggro – The radius around a monster at which point you will provoke it to attack you.
Radius Aggro radius depends upon your level and the monster's level.
Agi An abbreviation of agility.
Avatar Your character.
Buff A beneficial spell cast on a monster or player. An example of a buff is the
mage's Arcane intellect.
Carebear A disparaging term for a player that prefers not to attack other players in a
player versus player environment. Usually this term is used by players who
prefer PvP combat.
Caster A character that primarily stays away from the front of combat in order to cast
helpful spells on allies and harmful spells on enemies. Mages and priests are
two examples of casters.
Combat Pet An NPC controlled by a player that can fight monsters and assist the player
and his party members.
Cooldown The waiting time before an ability, skill, or spell can be used again.
Creep A monster.
Critter A creature that doesn't attack back, like a rabbit or deer.
Debuff A negative spell cast on a monster or player that weakens it. An example of
a debuff is the warlock's curse of weakness.
Drop The treasure left behind by a monster when you kill it. Used this way, it is
synonymous with loot. Also a verb meaning the act of a monster leaving
behind treasure.
Griefer A person who purposely tries to annoy or anger other players.
Grinding Staying in the same area fighting the same types of monsters for a very long time.
Hate The amount of aggression, or aggro, a monster has built up against you.
When a monster has more hate against you than any other surrounding
players, it will attack you. Different actions, such as healing players or
damaging the monster, will generate different levels of hate. Hate is
synonymous with threat.
Incoming It means an attack or monster is coming. Sometimes abbreviated as inc.
Instance A unique copy of a dungeon created when you and your group enter that
dungeon. Only you and your group will be in your copy of the dungeon. Another
group that enters the same area will enter their own copy of the dungeon.
42

II. Customer Support
If you encounter a problem with the game or with other players while playing World of
Warcraft, you can contact a Game Master (GM) for support.
GMs are customer support representatives who are online 24 hours a day, seven days a
week, to assist you with any trouble you experience in the game.
How to Contact a GM
To contact a GM, click on the Help Request icon, which appears as a red question mark,
at the bottom of your screen.
Once the Knowledge base is open, you can search for an existing answer to your issue by
entering keywords. If you cannot find the answer to your question, or you still need to
contact a Game Master, choose ‘Open a Ticket’ to start the petition process. Game Masters
can only assist with in-game issues related to equipment, gameplay and the world
environment. For other issues, you will need to contact a different support team. More
information can be found here: http://www.blizzard.com/support
Contacting a GM in the Game
At the next screen, you will want to select the category that fits closest to the issue you
are trying to report.
You will then be prompted to enter a description of your situation. Please try to be as
descriptive as possible.
After typing your description and clicking the Submit button, a ticket icon appears at the
upper right corner of your screen. This tells you that you have an active ticket and that a
GM will contact you.
Once contacted, explain your situation to the GM. When the issue is resolved, the GM will
erase the ticket from your screen.
Identifying a GM
Game masters can be identified in-game by the GM
tag that accompanies their player name. For
example: <GM>Taredan
In addition, any message that a GM says in general or
sends to you privately is prefaced with the “<GM>”
tag. For example: “<GM> Junco whispers: Hello…”
GMs also look distinct, since they wear a unique
game master uniform consisting of a dark blue robe
that is unavailable to other players.
GM-related Issues
If you have a concern with a GM, or would like to send positive or negative feedback,
please send an email to WoWConcer[email protected]
Other support:
For support related to technical issues, billing queries and other out of game incidents,
please use the webforms for the appropriate department. They can be found here:
http://www.blizzard.com/support
AC Armor Class
AoE Area of Effect
AE Area Effect
AFK Away From Keyboard
BRB Be Right Back
DD Direct Damage
DOT Damage Over Time
DPS Damage Per Second
FH Full Health
FM Full Mana
FvF Faction versus Faction
GM Game Master
GTG Good To Go
HP Hit Points or Health Points
IF Ironforge
KS Kill Stealing (or Kill Steal or
Kill Stealer)
LFG Looking For Group
LFM Looking For More
LOL Laugh Out Loud
LOM Low On Mana
MMO Massively-Multiplayer
Online
MMOG Massively Multiplayer
Online Game
MMORPG Massively Multiplayer
Online Role-Playing Game
MT Mistell
NM Never Mind
NP No Problem
NPC Non-Player Character
OOM Out Of Mana
PC Price Check
PC Player Character
PK Player Kill or Player Killer
PST Please Send Tell
PvE Player versus Environment
PvP Player versus Player
R Ready to go
SW Stormwind
TB Thunder Bluff
TY Thank You
UC Undercity
WF Westfall
WB Welcome Back
WoW World of Warcraft
WTB Want To Buy
WTS Want To Sell
Acronyms
44


Game Design
Blizzard Entertainment
Executive Producer
Mike Morhaime
Team Lead
Mark Kern
Art Director
William Petras
Creative Director
Chris Metzen
Lead Animator
Kevin Beardslee
Lead Artist
Justin Thavirat
Lead Character Artist
Brandon Idol
Lead Designers
Rob Pardo
Allen Adham
Lead Programmer
John Cash
Lead Technical Artist
Kyle Harrison
Producers
Shane Dabiri
Carlos Guerrero
Additional Production
Chris Sigaty
Programming
Jesse Blomberg
Dan Buckler
Robert Bridenbecker
Jeff Chow
Scott Hartin
Sam Lantinga
Twain Martin
Loren McQuade
Collin Murray
David Ray
Joe Rumsey
Derek Sakamoto
Tim Truesdale
Matthew Versluys
Jeremy Wood
Additional Programming
James Anhalt III
Andy Bond
Bob Fitch
Don Grey
Monte Krol
Graham Madarasz
Jay Patel
Evelyn Smith
Install/Patch/Distribution
Programming
Brian Fitzgerald
John Mikros
John Stiles
Tony Tribelli
Stephen C. Wong
Install/Patch/Distribution
Producer
Derek Simmons
Macintosh Programming
John Mikros
Additional Macintosh
Programming
Rob Barris
John Stiles
Animators
Adam Byrne
Jay Hathaway
Eric Henze
Solomon Lee
Dungeon/City Artists
Jose Aello, Jr.
Roger Eberhart
Dana Jan
Aaron Keller
Jimmy Lo
Matt Mocarski
Brian Morrisroe
Jamin Shoulet
John Staats
World Content Artists
Carlo Arellano
Sam Didier
Brian Hsu
Roman Kenney
Maxx Marshall
Matt Milizia
Dan Moore
Ted Park
Gary Platner
Technical Artist
Peter Underwood
Exterior Level Designers
Bo Bell
James Chadwick
Mark Downie
Alen Lapidis
Matt Sanders
Additional Art
Dave Berggren
Allen Dilling
Toph Gorham
Trevor Jacobs
Tom Jung
Cameron Lamprecht
Rob McNaughton
Mickey Nielson
Matt Oursbourn
Game Designers
Tom Chilton
Eric Dodds
Michael Heiberg
Kevin Jordan
Jeffrey Kaplan
John Yoo
Quest Designers
Alex Afrasiabi
Michael Backus
Suzanne Brownell
Shawn Carnes
Michael Chu
Jeffrey Kaplan
Pat Nagle
World Designers
Geoff Goodman
Andy Kirton
Joshua Kurtz
Steven Pierce
Additional Design
Tom Cadwell
Dave Fried
Dave Hale
Eric Maloof
Scott Mercer
Matt Morris
Jennifer Powell
Dean Shipley
Cinematic Intro Director,
Writer
Matt Samia
Cinematic Trailer Director,
Writer
Harley D. Huggins II
Cinematics Producer
Scott Abeyta
Video Processing & Post
Production Supervisor
Joeyray Hall
Cinematic Artists
Jonathan Berube
Nicholas S. Carpenter
Jeff Chamberlain
Aaron Chan
Ben Dai
Fausto DeMartini
Sheng Jin
Jeramiah Johnson
Jon Lanz
James McCoy
Matthew Mead
Joe Peterson
Dennis "wiz" Price
Jarett Riva
Xin Wang
Kenson Yu
Cinematic Technical Artists
John Burnett
Joe Frayne
Steeg Haskell
Jared Keller
Hung Le
Nelson Wang
Render Farm Supervisor
Mike Kramer
Additional Cinematic Artists
Dan Burke
John Chalfant
Ryan Duncan
Mark Skelton
Patrick Thomas
Seth Thompson
Ru Weerasuriya
Jason Wen
Audio Supervisor
(Cinematics)
Glenn Stafford
Sound Producer
Gloria Soto
Lead Composer
Jason Hayes
Lead Sound Designer
Brian Farr
Music
Tracy W. Bush
Derek Duke
Jason Hayes
Glenn Stafford
Sound Design
Tracy W. Bush
Victor Crews
Brian Farr
Casting Supervisor/ VO &
Sound Editor
Tami Donner Harrison
Voice Direction
Chris Metzen
Micky Neilson
Voice Acting
Michele Arko
Tracy W. Bush
Joey Cash
Johnny Cash
Victor Crews
Samwise Didier
Tami Donner Harrison
Derek Duke
Michelle Elbert
Brian Farr
Ron Frybarger
Manuel Gonzales
Carrie Gordon-Lowrey
Trula Hoosier
Harley Huggins
Timothy Ismay
Monte Krol
Abe Lasser
Jon Mankin
Twain Martin
Holly Matecki
Sean McCrea
Chris Metzen
Kaeo Milker
Lani Minella
Mike Morhaime
Collin Murray
Gloria Neely
Mickey Neilson
Nicholas Pisani
Gary Platner
David Saunders
Evelyn Smith
Glenn Stafford
Snoopy Watkins
Sunda Zafrin
Worldwide Launch Executive
Paul Sams
Worldwide Launch
Management
Itzik Ben-Bassat
Lisa Pearce
Manual Layout
Eli Catalan
Manual Producer
Jason Hutchins
Manual Development and
Editing
Eli Catalan
Elliott Chin
Jason Hutchins
Mark Kern
Denise Lopez
Jonathan Mankin
Chris Metzen
Rob Pardo
Lisa Pearce
Evelyn Smith
Manual Artwork
Carlo Arellano
Adam Byrne
Samwise Didier
Allen Dilling
Eric Henze
Brian Hsu
Brandon Idol
Semi Kim
Chris Metzen
Ted Park
Bill Petras
Glenn Raine
John Staats
Justin Thavirat
Ru Weerasuriya
Thanks to White Wolf
Quality Assurance Manager
John Lagrave
Quality Assurance Assistant
Managers
Sean McCrea
Mark Moser
Q.A. Night Supervisor
Jonathan Mankin
Q.A. Lead Testers
Robert Foote
Michael Murphy
Q.A. Lead Assistant
Kelly Chun
Q.A. Technical Engineers
Jason Fader
Evelyn Smith
Q.A. Compatibility Testing
Omar Gonzalez
Danny Nguyen
Taylor Russ
Q.A. Team Leads
Michele Marie Arko
Scott N. Army
Ben Brode
Shane S. Cargilo
Jamie Chang
Michael Chen
Steven Chow
Dennis Crabtree
Les W. Douglas
Michelle Elbert
Ron Frybarger
Ed Kang
World of Warcraft Credits

Jin Kim
Ray Laubach
Chris Manprin
Justin K. Parker
Lee Sparks
Craig Steele
Stan Wang
Game Testers
Nicholas Betteker
Edward Bui
Jeff Chang
Jack Chen
James Cho
Aaron Contreras
Brandon Crumpler
Tim Daniels
Foster Michael Elmendorf
Mei Dean Francis
Jon Graves
Josh Hilborn
Timothy Ismay
Michael Maggard
Stuart Massie
Jeff McLean
Kurtis Paddock
RA Pearson
Nicholas M. Pisani
Anthony Reyes
Chuck Salzman
David Sanchez
Samuel Schrimsher
Michael Schwan
Anant Singh
Brian Stankowitz
Shawn Su
Michael Mooteh Sun
Alex Tsang
Joseph Vales
Brandan Vanderpool
Sean Wang
Geoffrey Yeh
Tengying Yu
Additional Game Testing
Zach Allen
Zebulon Batke
Josh Bertram
Zach Callanan
Wesley Campbell
Greg Cucchissi
Dustin Chang
Yuan Cheng
Jack Cheung
Joel Clift
Matt Coalson
Beni Elgueta
Dave Eliasberg
Brian Fattorini
Gary Gibson
Manuel Gonzales
Justin Hamilton
Jason Thor Hall
Patrick Henry
Lyno Hychong
Jeff Jones
Stephen Kim
Jason Liang
Richard Lin
Robert Lohaus
Brian Love
John Meyers
Brandon Norton
Haz Novoa
Wale Oyejide
David Potts
Emilio Segura
Kenneth Shaw
Steve Shin
Geordie Swainbank
Walter Takata
Joshua Tapley
Jeffrey Therrien
Christopher Van Der
Westhuizen
David G. Wagner
Constance Wang
Ian Welke
Daniel Westmoreland
Technical Support Manager
Thor Biafore
Assistant Technical Support
Manager
Jason Stilwell
Billing and Account Services
Lead
Doug Abel
Technical Support
Programming
David Nguyen
In-Game Support
Management
Eric Avila
In-Game Support Leads
Mitchell Bricker
Chris Manley
Jason Park
John Schwartz
Max Whitaker
Localization Producer
Jason Hutchins
Associate Localization
Producer
Jonas Laster
BLIZZARD EUROPE
TEAM
Blizzard Europe
Management
Itzik Ben Bassat
Blizzard Europe
Management Team
Cedric Marechal
Jean-Michel Courivaud
Benoit Dufour
Anne Berard
Julia Gastaldi
Frederic Menou
Benoit Mechineau
Delphine Le Corre
Administration Team
Elodie Dupuis
Development Team
Mathieu Chauvin
Laurent Bourcier
Fanny Hermant
Philippe Peeters
Network Team
Julien Mariani
Thierry Sudan
Jean-Claude Krijestorac
Mourad Kaci
Marketing and Online
Marketing Team
Eric Chauveau
Matthew Arthur
Web Team
Guillaume Sartre
Sebastien Garnault
Prune Moldawan
Yann Pallatier
Martin Leidenfrost
Pierre Rosenthal
Community Team
Gernot "Garry" Leusch
Jean-Baptiste Pennes
Technical Support
and Billing Team
Robert Ashby
Cedryck Poitelon
Alexandre Vallee
Lisa Cree
Christian Czubatinski
Marie-Helene Atienz
In-Game Support Team
Christian William Scharling
Mark Clements
Gregory Bourgeois
Owen James Thomas
Sebastiaan Van Doornspeek
Kasper Giehm
Richard Barham
Sebastian Nachtigall
Rainer Mayer
Rinaldo Andreolli
Alexander Ipfelkofer
Clemens Krainer
Heiko Dieregsweiler
Christian Reshœft
Emmanuel Obert
Sophie Bellegarde
Jean-Pierre Poulain
Romain Dijoux
Yann Dessaude
Nicolas Guion
Stephane Perroud
Gesine Fischer
VUG LOCALIZATION
TEAM
General Manager
Gerry Carty
European Localisation
Manager
Barry Kehoe
Project Manager
Eithne Hagan
Translation Vendor Manager
Annette Lee
Linguistic Project Manager
Laura Casanellas
Linguistic Coordinator
Corina Zaha
Engineering Manager
Lawrence Moran
Software Engineering
David Doheny
Q.A. Manager
David Hickey
Q.A. Lead
Conor Harlow
Q.A. Testers - French
Maurice Larkin
Russell Perin
Dimitry Renardet
Q.A. Testers - German
Sandra Rothig
Henry Ertner
Hugh Lawton
Graphics/Audio Coordination
Bill Sweeney
David Fleming
RTM Validation
Philippe Gendreau
BLIZZARD
ENTERTAINMENT
Business Development &
Business Operations
Paul Sams
Business Development &
Operations
Elaine DiIorio
Denise Lopez
Isaac Matarasso
Lisa Pearce
Sarah Tucker
Information Technologies
Manager
Robert Van Dusen
Information Technologies
Edward Hanes
Brian Hill
Mike Kramer
Hung Nguyen
Mike Pearce
Mike Schaefer
Jeremy Smith
Casey Suyeto
Stephen T. Wong
IT Engineering & Network
Design
Adrian Luff
Jeff Berube
Data Archivist
Kris Mackey
Office Administration/
Human Resources/ Facilities
Management
Kacy Dishon
Jeanette Gullock
Kaeo Milker
Jamie Neveaux
Hugh Todd
Talishia Thompson
Financial Management
David Gee
Paul Sams
Public Relations
Lisa Bucek-Jensen
Elliott Chin
Gil Shif
George Wang
Web Team
Lisa Bucek-Jensen
Mathieu Chauvin
Geoff Fraizer
Mike Hein
Jon Jelinek
Gil Shif
Alex Sun
Blaine Whittle
Community Management
Lisa Bucek-Jensen
Daniel Chin
Paul Della Bitta
Kristen DeMeza
Gil Shif
Legal Counsel
Kevin Crook
Terri Durham
Rod Rigole
Eric Roeder
Tracy Gibbs-Sargeant
James Shaw
Global Brand Management
Neal Hubbard
Marc Hutcheson
Matt Kassan
North American Sales
Philip O'Neil
Bruce Slywka
Lowell Vaughen
Marketing Creative Services
Kathy Carter-Humphreys
Jessica Drossin
Zachary Hubert
Steve Parker
Raul Ramirez
Hayley Sumner
Bill Watt
Recruiting
Jack Sterling
Packaging Artwork
Brom
William Petras
Justin Thavirat
Manufacturing
Tom Bryan
Bob Wharton
Hosting Partners
AT&T
DACOM/KIDC
Telia
Director of Dunsel
Development
Frank Pearce
Dunsel Specialist
Alan Dabiri
Thanks To
Chris Sigaty
Brad Mason
Don Grey
Huong Grey
Kirk Mahony
Jimmie Nelson
Donna Anthony

Beau Yarborough
Ian Welke
DJAMES Goddard
Christophe Ramboz
Michael Fuller
Flavie Gufflet
Stu Rose
Duane Stinnett
Brenda Perdion
Special Thanks
Blizzard North
Bruce Hack
Jean-Francois Grollemund
Bob & Jan Davidson
Cinematic Sound Contractors
David Farmer
Paul Menichini
Jeff Kurtenacker
Michael Aarvold
Robert Michael Sherlock
Tom Brewer
Original choir music
performed by the University
Choir & California State
University, Long Beach
Original music recorded at
Citrus College, Glendora, CA
WE WANT TO EXTEND
A VERY SPECIAL
THANKS TO ALL OUR
FAMILIES. YOUR
NEVER-ENDING
PATIENCE AND
UNDERSTANDING
MADE IT ALL
POSSIBLE.
WE LOVE YOU!
Additional Thanks
Michael Fuller
Christophe Ramboz
Yan Kahle
Jean-Claude
All European Guilds
All our Families
Our Wives and Husbands
Our kids
Our poor red eyes
The parents of the unique
"Famous"
The coffee machine
"Mum and Dad"
The inventor of the cheese
sandwich
"Mamie in the kitchen"
Our new chairs
The Japanese restaurant
The double brain theory
"Zickouille"
"Boomshaker"
"Pompounette"
The GMs that keep their shoes
on
"The Pitbull"
"Graou"
"Ricounet"
"Douds"
Uncle Scrooge
Le "Check"
The "bobox" pushers
All the clowns
"$%#% me, I am famous!"
The Sexy HR Girls
All the "boulets"
The Galapagos Islands
The Famous Danish Humour
The holy moving plan
"M" fast food feeding our GM
teams
Parisien Vampire society
"Yes... But... No... Well...
Basically... Hum... Honestly..."
Spygurl for the hooter to Eric for
loosing at War 3 and babyfoot
Cédric's wine cave
"Yes... soooooooon" TM
William, the Danish knight
Gali Mehl
The great city of Holon
"The Kibbutz"
Celeste Aviva, Tracy Farr, Amber
Ray, Tiffany and Taylor Hayes,
Andrea Lobo, The Idols & Pat
Morrison, Shane Hensley,
Michele Henze, Claudia &
Alanna Guerrero, My brother
Brad…we all
need heroes, Kim & Ashley
Bridenbecker, Alexander K. Lee,
The Chosen & Bill, Peter Milizia,
The Petras Family, Rob Chacko,
Kandice Murray, Michelle
Delgado, The Thavirats &
Corinna Lee, Kayla Hong-Tim
Nguyen, Mike Phillips, Cathy
Tsai and The Chow Family,
Suzanne Di Piazza, Pooka, Kerri
Jaquith Simmons, Patricia, Nate,
Chris, Matt & Jenna, Laura
Szigeti, Sofia Vergara, Sarah
Arellano, Olivia Lee Heiberg,
Nikita Mikros, April & Sofia
Metzen, Girls of Starbucks,
Mary, Johnny, and Joey Cash,
Katherine & Penelope Jordan,
Danna, Jessica, Tisa,
Jade and Breanna, Gammaray
Helen Mckenney,
Bill & Kathie Blomberg, The
Sakamoto Family, Nick “Blood
Angel” Betteker, Angelista,
Napoleon Dynamite, Joohyun
Lee, April and Noah Beardslee,
Dawn Marshall, Mandilynn
Weygandt, Stephanie Keefer, the
good people of The Daily Blab,
Ed, May, & Sheryl Narahara,
Arleen Powell, Andrew Thorson,
Imelda & Alex Kern,Olivia Lee,
Peter Jackson, Victoria, Garrett,
& Cassandra, Katherine Jordan,
Gina MacGregor, Karen & Julia
Barris, The Infamous Kitt3n,
Hilary & F.C. Carnes, Happy
30th to RUSH, Lara Lee, Brenda
Perdion, Tina & Melissa Maloof,
The Pearce Family, Smoove TB,
The Bandit, The PUNisher, The
Leaky Faucet, T. Blave, The
Censor, Susan, Matthew &
Michael Sams, Megan Wooley,
Tina Chan, Stacey Frayne, Haibo
Li, Katelynn Hassler, Lucianna
Kochnoff, Shelly Mead, Debbie
Lanz, Jessica Ellis, Khana Le,
Brian Flora, Chen Bin Hua, The
Price Family, Deana Matarasso,
Harminder Brar, The McCoy
Family, The Yu Family, The Wang
Family, The Samia Family, The
Chamberlain Family, The Burnett
Family, The Haskell Family, The
Dai Family, The Peterson Family,
The Carpenter Family, Joe
“Vargen” Biafore, Beverly &
Shangreaux Lagrave, Dee Ann
Fifer, Riley & The Sigaty Family,
Melissa Huggins, Laura Clifton,
Jason & Damian Hall, Koren
Buckner, Gali Mehl, The Ben-
Bassat Family, David, Cameron
& Brianna Di Iorio, Nicole
Hamelin, Matt, Shaun &
Amanda Smiley, Ty, Noel &
Marge Williams, Silvia, Kai, and
Kiana Van Dusen, Astrid and
K.C. Ross, Janée Laster,
Everyone at Hewlett-Packard,
Everyone at Cisco.
No pixels were harmed in the
making of this game.

WORLD OF WARCRAFT
®
END USER LICENSE AGREEMENT
IMPORTANT! PLEASE READ CAREFULLY. PLEASE READ THE FOLLOWING WORLD OF WARCRAFT END USER
LICENSE AGREEMENT BEFORE DOWNLOADING OR INSTALLING THIS SOFTWARE PROGRAM. THIS SOFTWARE IS
LICENSED, NOT SOLD. IF YOU DO NOT AGREE WITH THE TERMS OF THIS AGREEMENT, PLEASE DELETE THE SOFT-
WARE PROGRAM IMMEDIATELY AND ARRANGE TO RETURN THE GAME TO YOUR RETAILER.
This software program, and any fi les that are delivered to you (via on-line transmission or otherwise) to “patch,”
update, or otherwise modify and/or enhance the software program, as well as any printed materials and any on-line
or electronic documentation (the “Manual”), and any and all copies and derivative works of such software program
and materials (collectively, together with the “Game Client” defi ned below, the “Game”) are copyrighted works of
Blizzard Entertainment, Inc. (“Blizzard Entertainment”), who has licensed its rights to exploit the Game in the
European Union to its affi liate Blizzard Entertainment, SAS (“Blizzard”). All use of the Game is governed by the terms
of this End User License Agreement (“License Agreement” or “Agreement”). To play the Game, you must have
registered an account on Blizzard’s Battle.net
®
game service (the “Battle.net
®
Account”), which is subject to a
separate Terms of Use agreement available at http://www.battle.net/legal/termsofuse.shtml (the “BNET Terms of
Use Agreement). Blizzard’s Battle.net® game service (the “Battle.net
®
Service) is provided to you by Blizzard. In
addition, the Game may only be played by obtaining access to Blizzard Entertaiment’s World of Warcraft massively
multi-player on-line role-playing game service (the “Service”), which is subject to a separate Terms of Use agreement
(the “WoW Terms of Use”) and which is provided to you by Blizzard. The Service includes the use of a voice over
Internet protocol technology, which enables you to communicate orally with other users and which includes certain
features to determine who to speak with (the “Voice Client”). Blizzard is your contractual partner for the performance
of the Service. If your purchase of the Game included a limited period of “free access” to the Service, the WoW Terms
of Use also govern your access to the Service during the period of “free access.” The Game is distributed solely for use
by authorized end users according to the terms of this License Agreement. Any use, reproduction or redistribution of
the Game not expressly authorized by the terms of the License Agreement is expressly prohibited.
1. Grant of a Limited Use License. The Game installs computer software (hereafter referred to as the “Game Client”)
onto your hardware to allow you to use your Battle.net® Account to play the Game through access to the Service.
To play the Game you must therefore: (i) register for and login using an authorized Battle.net
®
Account, (ii) obtain
access to the Service and (iii) agree to the terms of this License Agreement, the WoW Terms of Use and the BNET
Terms of Use Agreement. Subject to your agreement to and continuing compliance with this License Agreement,
Blizzard hereby grants, and by installing the Game Client you thereby accept, a limited, revocable, nontransferable,
non-sublicensable and non-exclusive license and right to install the Game Client for your personal and non-commer-
cial use on one (1) or more computers which you own or which are under your personal control. All use of the Game
is subject to this License Agreement, the BNET Terms of Use Agreement, and the WoW Terms of Use, each of which
you must accept before you can use your Battle.net
®
Account to play the Game through access to the Service.
Blizzard Entertainment and/or Blizzard reserve the right to update, modify or change the Game for the reasons stated
in Section 9 below. Changes to the License Agreement will be notifi ed and enter into force according to Section 15
below.
2. Pre-Loaded Software. The media on which the Game Client is distributed may contain additional software and/or
content for which you may not have a valid license and which is specially protected against unauthorized access (the
“Locked Software”). You agree that Blizzard Entertainment and/or Blizzard may install the Locked Software onto your
hard drive during the Game Client installation process. You also agree that you will not access, use, distribute, copy
or display any Locked Software, or create any derivative works based on the Locked Software. PLEASE NOTE THAT
THE CIRCUMVENTION OF ACCESS OR COPY PROTECTION MEASURES MAY CONSTITUTE A CRIMINAL ACT UNDER
THE COPY PROTECTION LAWS OF YOUR COUNTRY OF RESIDENCE. You can get access to and use the Locked
Software, or parts thereof, if you (a) purchase or otherwise legally obtain a valid license and (b) accept the End User
License Agreement(s) for this Locked Software, in such case you will receive an alphanumeric key from Blizzard to
unlock the software. Please note that you will only be allowed to unlock those portions of the Locked Software for
which you accepted the respective End User License Agreement (“the Unlocked Software EULA”) and were granted
a valid license (the “Unlocked Software”). The terms of this Agreement, the WoW Terms of Use and the BNET Terms
of Use Agreement shall apply to Unlocked Software in addition to the Unlocked Software EULA. However, to the
extent any provision of this Agreement confl icts with any provision in the Unlocked Software EULA, the provisions
of the Unlocked Software EULA shall prevail, but only with regard to the Unlocked Software.
3. Service and Terms of Use. As previously stated, you must have registered a Battle.net
®
Account to access the
Service and play the Game. The Battle.net
®
Service is subject to the BNET Terms of Use Agreement, which you may
view http://www.battle.net/legal/termsofuse.shtml and which you must accept to register a Battle.net
®
Account.
You must also accept the WoW Terms of Use in order to access the Service to play the Game. The WoW Terms of
Use govern all aspects of game play. You may view the Terms of Use by visiting the following website:
http://www.battle.net/legal/termsofuse.shtml. If you have purchased a hardcopy of the Game and do not agree with
the BNET Terms of Use Agreement, or the WoW Terms of Use, you should (i) not register for a Battle.net
®
Account
to play the Game, (ii) not access the Service to play the Game, and (iii) return the Game to the place where you pur-
chased the Game within thirty (30) days of the original purchase date.
4. Ownership.
A. All intellectual property rights in and to the Game, including without limitation the Locked and Unlocked
Software, and all copies thereof (including, but not limited to, any user accounts, titles, computer code, themes,
objects, characters, character names, stories, dialog, catch phrases, locations, concepts, artwork, character inven-
tories, structural or landscape designs, animations, sounds, musical compositions, audio-visual effects, storylines,
character likenesses, methods of operation, moral rights, any related documentation, and “applets” incorporated
into the Game) are owned or expressly licensed by Blizzard Entertainment or Blizzard. The Game is protected by
the copyright laws of the United States, international copyright treaties and conventions, and other laws. All rights
are reserved. The Game may contain certain licensed materials, and licensors of those materials may enforce their
rights in the event of any violation of this License Agreement.
B. In order to access the Service and to play World of Warcraft , you are required to establish a Battle.net
®
Account
as described in the BNET Terms of Use Agreement that is unique to you and non-transferable. To access the
Service, you will be asked to provide Blizzard with an Authentication Key of the Game that will be exclusively
linked to the Battle.net
®
Account you have established. Therefore, Blizzard does not allow you to transfer owner-
ship of the Game Client to third parties.
5. Responsibilities of End User.
A. Subject to the Grant of License herein, you may not, in whole or in part, copy, photocopy, reproduce, translate,
reverse engineer, derive source code, modify, disassemble, decompile, or create derivative works based on the
Game, or remove any proprietary notices or labels on the Game. Failure to comply with the restrictions and limi-
tations contained in this Section 5 shall result in immediate, automatic termination of the license granted hereun-
der and may subject you to civil and/or criminal liability. Notwithstanding the foregoing, you may make one (1)
backup copy of the Game Client, the Unlocked Software and the Manuals.
B. You agree that you shall not, under any circumstances,
(i) sell, grant a security interest in or transfer reproductions of the Game to other parties in any way not expressly
authorized herein, nor shall you rent, lease or license the Game to others;
(ii) exploit the Game or any of its parts, including, but not limited to, the Game Client, for any commercial purpose,
including, but not limited to, use at a cyber café, computer gaming center or any other location-based site without
the prior express written consent of Blizzard;
(iii) host, provide or develop matchmaking services for the Game or intercept, emulate or redirect the communi-
cation protocols used by Blizzard in any way, including, without limitation, through protocol emulation, tunneling,
packet sniffi ng, modifying or adding components to the Game, use of a utility program or any other techniques
now known or hereafter developed, for any purpose, including, but not limited to, unauthorized network play over
the Internet, network play utilizing commercial or non-commercial gaming networks or as part of content aggre-
gation networks; or
(iv) create or maintain, under any circumstance, any unauthorized connections to the Game or the Service. All con-
nections to the Game and/or the Service, whether created by the Game Client or by other tools and utilities, may
only be made through methods and means expressly approved by Blizzard. Under no circumstances may you con-
nect, or create tools that allow you or others to connect, to the Game’s proprietary interface or interfaces other
than those expressly provided by Blizzard for public use. (v) use the Voice Client for any unlawful purposes. In par-
ticular you shall not (i) eavesdrop, intercept or monitor any communication which is not intended for you, (ii) use
any type of spider, virus, worm, trojan-horse or any other codes or tools that are designed to distort or otherwise
interfere with the communication, (iii) use the Voice Client for any commercial communication, or (iv) expose any
other user to communication which is offensive, harmful to minors, indecent or otherwise objectionable.
6. Parental Control. Parents can restrict the use their child makes of the Service by way of a parental control system.
Further information can be found here: http://www.battle.net/parents
7. Termination. This License Agreement is effective until terminated. Upon termination for any reason, all licenses
granted herein as well as licenses for Unlocked Software shall immediately terminate and you may terminate the
License Agreement at any time by cumulatively (i) destroying the Game; and (ii) removing the Game Client from
your hard drive; and (iii) notifying Blizzard by mail of your intention to terminate this License Agreement to the fol-
lowing address: Blizzard Entertainment S.A.S., TSA 60 001, 78143 Vélizy-Villacoublay Cedex, France. Blizzard
reserves the right to terminate this License Agreement without notice, if you fail to comply with any terms and con-
ditions contained herein, the WoW Terms of Use and/or the BNET Terms of Use Agreement. In case of minor viola-
tions of these rules Blizzard will provide you with a prior warning of your non-compliance prior to terminating the
License Agreement. If, however, your behavior is utterly inacceptable, in particular if it endangers the gaming expe-
rience of other players, Blizzard is not required to provider you with such prior warning. A behavior is utterly inac-
ceptable in case of a serious violation of important provisions of this License Agreement, the WoW Terms of Use
and/or the BNET Terms of Use Agreement. Important provisions include a violation of Sections 1, 2 and 5 above. In
such event, you must immediately destroy the Game and remove the Game Client from your hard drive.
8. Export Controls. The Game may not be re-exported, downloaded or otherwise exported into (or to a national or
resident of) any country to which the U.S. has embargoed goods, or to anyone on the U.S. Treasury Department’s
list of Specially Designated Nationals or the U.S. Commerce Department’s Table of Denial Orders. By installing the
Game, you are agreeing to the foregoing, and you are representing and warranting that you are not located in, under
the control of, or a national or resident of any such country or on any such list.
9. Patches and Updates. Blizzard Entertainment and/or Blizzard shall have the right to deploy or provide patches,
updates and modifi cations to the Game, as needed or as useful to: (i) enhance the gaming experience by adding
new content to the Game, (ii) incorporating new features to the Game, (iii) enhancing content or features already in
the Game; (iv) fi xing ‘bugs’ that may be altering the Game; and (v) determining how you and other players utilize
the Game so that the Game can be enhanced for the enjoyment of the Game’s users; and (vi) protect you and other
players against cheating; and (iii) make the gaming environment safer for you. These patches, updates and modifi
cations to the Game must be installed for the user to continue to play the Game. For these purposes, Blizzard
Entertainment and/or Blizzard may update the Game remotely, including, without limitation, the Game Client resid-
ing on the user’s machine, without knowledge or consent of the user, and you hereby grant to Blizzard Entertainment
and/or Blizzard your consent to deploy and apply such patches, updates and modifi cations to the Game.
10. Duration of the “On-line” Component of the Game and of the Voice Client. This Game is an ‘on-line’ game
that must be played over the Internet through the Service, as provided by Blizzard. It is your entire responsibility to
secure an Internet connection and all fees related thereto shall be at your own charge. Blizzard will use reasonable
efforts to provide the Service all day, every day. However, Blizzard reserves the right to temporarily suspend the
Service for maintenance, testing, replacement and repair of the telecommunications equipment related to World of
Warcraft, as well as for transmission interruption or any other operational needs of the system. Blizzard can neither
guarantee that you will always be able to communicate with other users, nor that you can communicate without dis-
ruptions, delays or communication-related fl aws. Blizzard is not liable for any such disruptions, delays or other omis-
sions in any communication during your use of the Voice Client. Blizzard agrees to provide the servers and software
necessary to access the Service until such time as World of Warcraft is “Out of Publication.” World of Warcraft shall
be considered “Out of Publication” following the date that World of Warcraft is no longer manufactured and/or
54

distributed by Blizzard Entertainment, or its affi liates. Thereafter, Blizzard may, in its sole and absolute discretion,
continue to provide the Service or license to third parties the right to provide the Service. However, nothing
contained herein shall be construed so as to place an obligation upon Blizzard to provide the Service beyond the
time that World of Warcraft is Out of Publication. In the event that Blizzard determines that it is in its best interest to
cease providing the Service, or license to a third party the right to provide the Service, Blizzard shall provide you
with no less than three (3) months prior notice. Neither the Service nor Blizzard’s agreement to provide access to
the Service shall be considered a rental or lease of time on or capacity of Blizzard’s servers or other technology.
11. No Responsibility for Individual Communication. You acknowledge that the content of the communication
with other users through the Voice Client is entirely the responsibility of the user from whom such content originates.
You may therefore be exposed to content that is offensive, harmful to minors, indecent or otherwise objectionable.
Blizzard is not liable for any such sort of communication of other users through the Voice Client.
12. Additional Manufacturer’s Guarantee for the Game Client. In the event that tangible media (e.g. CD-ROMs or
DVDs) containing the Game Client were purchased in the European Union and they prove to be defective and pro-
vided you inform Blizzard of such defect within (i) two (2) months from the day you detected such defect and (ii)
within two (2) years from the date of the purchase of the Game, Blizzard will, upon presentation to Blizzard of proof
of purchase of the defective media and the media itself, at its sole discretion 1) correct any defect, 2) replace the
Game, or 3) refund your money. This guarantee does not affect or restrict the statutory warranty claims that you may
have against the retailer of the Game Client.
13. Limitation of Liability. As regards the online service provided by Blizzard, for damages or compensation of
unavailing expenditures, whatever the legal basis including tort may be, the following rules apply: Blizzard may only
be liable in cases of where it is adjudged that Blizzard: (i) engaged in intentionally damaging conduct; (ii) was grossly
negligent; and/or (iii) is in breach of the requirements of the Product Liability Act according to statutory law. If you
acquired the media containing the Game Client in Germany or Austria or if you access the Service from the territory
of Germany or Austria or in such other countries where local laws would apply, Blizzard may also be liable in case
of death or personal or physical injury according to statutory law where Blizzard is adjudged to be responsible for
such death or personal or physical injury. Blizzard shall not be liable for slight negligence. However, if you acquired
the media containing the Game Client in Germany or Austria or if you access the Service from the territory of
Germany or Austria, Blizzard may also be liable for slight negligence if Blizzard is adjudged to be in breach of such
contractual obligation hereunder, the fulfi llment of which is required for the due performance under this Agreement,
the breach of which would endanger the purpose of this Agreement and the compliance with which you may con-
stantly trust in. In such cases, Blizzard’s liability is limited to typical and foreseeable damages; in other cases Blizzard
shall not be liable for slight negligence.
14. Rights on Breach. The Game, Game Client as well as the Locked Software, trademarks and copyrighted content
contained therein and associated with the Game are the copyrighted property of Blizzard Entertainment, and, through
the efforts of Blizzard Entertainment, has established substantial goodwill and recognition. In the event of a signifi cant
breach of the terms of this Agreement, Blizzard Entertainment reserves its right to take all legal actions which may be
available to a licensor of intellectual property under the law to protect its rights in its property. In the event that
Blizzard Entertainment is the prevailing party in any such actions, Blizzard Entertainment shall see any and all rights
that may be available to Blizzard Entertainment under the law to recover damages, costs of suit and its attorneys fees.
15. Changes to the Agreement. Blizzard may, from time to time, change, modify, add to, or supplement this License
Agreement. Those changes will become effective upon prior notice as follows: Blizzard will post notifi cation of any
such changes to this License Agreement on the World of Warcraft website located at http://www.battle.net and will
post the revised version of this License Agreement in this location, and may provide other notice which may include
by email, postal mail or pop-up screen. After expiry of one month following the notifi cation the continued use of the
Game and Services by you will mean you accept any and all such changes. By means of the notifi cation Blizzard will
inform you about the fact that the License Agreement has been amended and shall point out that after expiration of
one month following the notifi cation your installation or use of the Game shall be deemed as consent to the modifi
cation or amendment. If any future changes to this License Agreement are unacceptable to you or cause you to no
longer be in compliance with this License Agreement, you may terminate this License Agreement in accordance with
Section 7 herein. The modifi ed version of the License Agreement shall enter into force at the beginning of the second
month following the notifi cation unless Blizzard has received a notifi cation of termination from you by that time.
16. Miscellaneous. In the event that any provision of this License Agreement shall be held by a court or other tribunal
of competent jurisdiction to be unenforceable, the remaining portions of this License Agreement shall remain in full
force and effect. This License Agreement constitutes and contains the entire agreement between the parties with
respect to the subject matter hereof and supersedes any prior oral or written agreements; provided however, that this
agreement shall coexist with, and shall not supersede, the WoW Terms of Use and the BNET Terms of Use Agreement.
To the extent that the provisions of this Agreement confl ict with the provisions of the WoW Terms of Use, the confl
icting provisions in the WoW Terms of Use shall govern. In the event of a confl ict between the terms of this
Agreement and the BNET Terms of Use Agreement, this Agreement shall govern and supersede the BNET Terms of
Use Agreement. Sections 4A, 11, 12, 13, 14, 154 and 16 hereof shall survive the termination of this Agreement. I
represent that I am a ‘natural person’ over the age of eighteen (18) years or over the age of majority in my country of
residence. I hereby acknowledge that I have read and understand the foregoing License Agreement. I further agree
that the action of installing the Game Client is an acknowledgment of my agreement to be bound by the terms and
conditions of the License Agreement contained herein on behalf of myself and, as far as applicable, for one minor child
for whom I am a parent or legal guardian and whom I have authorized to use the Service and to play the Game.
© 2004-2010 Blizzard Entertainment, Inc. All rights reserved. Blizzard, Blizzard Entertainment, Battle.net, Warcraft and
World of Warcraft are registered trademarks of Blizzard Entertainment, Inc. in the U.S. and/or other countries. Windows,
Windows Vista and DirectX are trademarks or registered trademarks of Microsoft Corporation in the United States and/or
other countries. Macintosh is a registered trademark of Apple, Inc. Pentium is a registered trademark of Intel Corporation.
Dolby and the double-D symbol are trademarks of Dolby Laboratories. All other trademarks referenced herein are the
properties of their respective owners.
