
1
EndNote X9 for Thesis & Publications Writing (Mac)
EndNote for Thesis and Publications Writing
Version X9 for Mac
Contents:
MAC VERSIONS X9.3.2 AND ABOVE ....................................................................................................................... 3
UPGRADING TO NEW VERSIONS: ........................................................................................................................... 3
CHECKING FOR UPDATES: ...................................................................................................................................... 3
BACKING UP YOUR LIBRARY .................................................................................................................................. 3
CREATING A COMPRESSED LIBRARY: .................................................................................................................................. 4
FILE NAMING FOR YOUR ENDNOTE LIBRARY: ........................................................................................................ 5
CLOUD STORAGE: .................................................................................................................................................. 5
SETTING PREFERENCES IN ENDNOTE: ..................................................................................................................... 6
CHANGING DISPLAY FIELDS: ............................................................................................................................................. 6
CHANGING HOW LIBRARIES OPEN: .................................................................................................................................... 7
ADDING AUTOMATIC PDF IMPORTS: ................................................................................................................................. 7
CLEANING UP YOUR ENDNOTE LIBRARY ................................................................................................................ 8
REMOVE DUPLICATES: ..................................................................................................................................................... 8
TIDYING YOUR REFERENCES:................................................................................................................................ 10
CORPORATE AUTHOR: ................................................................................................................................................... 10
CAPITALISATION: .......................................................................................................................................................... 10
ENTERING AUTHOR (EDITOR ETC) NAMES: ........................................................................................................................ 11
UPDATING REFERENCES: ................................................................................................................................................ 11
USING SYNC: ........................................................................................................................................................ 12
CREATING AN ENDNOTE ONLINE ACCOUNT: ..................................................................................................................... 12
USING ENDNOTE ON TWO DIFFERENT COMPUTERS: ........................................................................................................... 12
HOW TO SHARE AN ENDNOTE LIBRARY: .......................................................................................................................... 13
EDITING OUTPUT STYLES ..................................................................................................................................... 15
JOURNALS TERM LIST .......................................................................................................................................... 20
WHEN TO USE TERM LISTS: ........................................................................................................................................... 20
INSTALLING A JOURNAL TITLE ABBREVIATIONS TERM LIST: .................................................................................................... 21
MODIFYING THE OUTPUT STYLE SO THE ABBREVIATED JOURNAL NAME IS USED: ..................................................................... 23
COMBINING DIFFERENT LIBRARIES ...................................................................................................................... 23
IMPORTING ONE LIBRARY INTO ANOTHER: ........................................................................................................................ 23
ADDING REFERENCES FROM ANOTHER LIBRARY: ................................................................................................................ 25

2
EndNote X9 for Thesis & Publications Writing (Mac)
MERGING CHAPTERS ........................................................................................................................................... 25
INSTANT FORMATTING ........................................................................................................................................ 25
USING REFERENCES IN TEXT BOXES: .................................................................................................................... 26
CONVERTING TEXT BOXES TO FRAMES: ............................................................................................................................ 26
CREATING REFERENCE LIST AT END OF EACH CHAPTER ........................................................................................ 27
MODIFY THE STYLE: ...................................................................................................................................................... 28
ADDING SECTION BREAKS IN WORD: ............................................................................................................................... 30
USING TRACK CHANGES AND ENDNOTE .............................................................................................................. 31
HOW TO CONVERT TO PLAIN TEXT: .................................................................................................................................. 31
ENDNOTE DISASTER RECOVERY: MY ENDNOTE LIBRARY IS DAMAGED OR DELETED ............................................ 32
USING THE RECOVER LIBRARY FUNCTION: ......................................................................................................................... 32
REBUILDING A LIBRARY FROM THE .DATA FILE: ................................................................................................................... 33
REBUILDING A LIBRARY WITH THE TRAVELING LIBRARY: ....................................................................................................... 33
HELP .................................................................................................................................................................... 34

3
EndNote X9 for Thesis & Publications Writing (Mac)
Mac Versions X9.3.2 and above
• From late 2019, Apple no longer supported 32 bit software and EndNote Mac changed to a 64
bit program. This means libraries created in Mac version X9.3.2 and above are no longer
compatible with earlier Mac versions or Word versions X9.3.2 or earlier.
• If you upgrade to Mac version X9.3.2 or above, you can only open libraries created in this
version or above or on Windows version X9.3.3 and above.
• If you are using the Catalina OS or above, you must upgrade to this version.
• Libraries created in older versions will be converted when opened in the newest version.
However, once converted, libraries will no longer open in earlier versions. This process can not
be reversed. Always create backups of your libraries before upgrading.
• Libraries from different versions can be shared using EndNote Online. Further information is
available from https://web.library.uq.edu.au/research-tools-techniques/referencing-
software/endnote/using-endnote/syncing-and-sharing-your-endnote-library
Upgrading to New Versions:
• It is not always necessary to upgrade to latest version. In most cases, the previous version will
be fine to use.
• If upgrading, always create a backup of your libraries first.
• When to upgrade to a new version:-
➢ You are two or three versions behind the most recent one.
➢ There have been significant improvements/changes with the new version.
➢ You have been having issues with an older version.
➢ You have upgraded your device.
➢ Your current version is no longer compatible with updated versions of Microsoft Word
or your operating system.
Checking For Updates:
1. In EndNote, click on the EndNoteX9 option in the top, left corner of the screen.
2. Click on the Check for updates option.
3. Follow on the on screen prompts.
Backing Up Your Library
• Save 3 copies in 3 locations
• Backing up weekly is recommended.
• Do not use your backups as your working library.
• Using the Compressed Library option in EndNote is recommended for creating backups.

4
EndNote X9 for Thesis & Publications Writing (Mac)
Creating A Compressed Library:
When an EndNote library is created, two files are produced. One has an .enl file extension eg. My Thesis
Library.enl and the other is a folder with the same name but ending in .DATA eg. My Thesis
Library.DATA. These files must remain together for your library to fully function.
Note: This option will not work for libraries that are 4GB or larger.
1. In EndNote, have your library open.
2. Click on File > Compressed Library.
3. A Compressed Library window will open. Click on OK.
4. Give your compressed library a name. For a backup, we recommend adding “Backup” and the
date to the name eg. BACKUP My Thesis Library 3May2018. Click on Save.
5. The file will now be saved. Add to your backup locations.

5
EndNote X9 for Thesis & Publications Writing (Mac)
6. To open the file, double click on it on any computer with EndNote installed.
Recommended:
• Post graduates have access to the UQ server which is backed up every day with a 30 day archive
• Internet based email account
o Quarantine it from your online shopping, Facebook, banking etc.
o Computer hard drive
• Frequency of back up if at the discretion of the user, but it is recommended at least once a week
File Naming for your EndNote library:
• Make it descriptive but not too long or you may get an error message eventually
• No spaces in the file name. Use under scores or hyphen if you want to separate words or even
capitalize the first word.
• Include the date in the filename when backing up, using the YY_MM_DD format. This lets you
know the last time you backed up your library and also helps when sorting files.
Passwords:
• Minimum of 12 characters, alphanumeric with characters, upper and lower case
o As an example - Her$t0n_L!br@ry951
o The longer the password, the more variation on possibilities and the harder it is to
“crack”
Note:
• Constantly assess the risks
• Evaluate the inconvenience and stress of losing your data/thesis/EndNote library
• Evaluate your security measures regularly
• Make sure you don’t breach any ethics approval with your Research Data Management
Cloud Storage:
Examples: iCloud, Dropbox, OneDrive, Google Drive, UQRDM
• Do not work on your EndNote library from a cloud storage drive. Issues such as corrupted
libraries can occur.
• Cloud storage can be used as storage, eg. backing up, or as a way of accessing your EndNote
library from different locations.
• To work on your EndNote library from cloud storage, first download it or copy it to your local
device. You can then work on it. When finished, add the saved version back to your cloud
storage.

6
EndNote X9 for Thesis & Publications Writing (Mac)
Setting Preferences in EndNote:
Changing Display Fields:
1. You can change which fields display in your library. For example, it is useful to know the unique
record number of each reference.
2. Go to EndNote X9 > Preferences > click on Display Fields.
3. Choose which field you want to display from the drop down menu of each column.

7
EndNote X9 for Thesis & Publications Writing (Mac)
4. Click on Save then close the window.
Changing How Libraries Open:
1. By default, when you open EndNote, the last library you had open will be displayed.
2. If you work with multiple libraries and don’t wish to accidently add imports to the wrong library,
you can change this setting through the Preferences.
3. Go to EndNote X9 > Preferences and click on Libraries.
4. From the When EndNote starts drop down menu, select the Prompt to select a library option.
5. Click on Save then close the window.
Adding Automatic PDF Imports:
You can set EndNote to automatically import a PDF when it is added to a specific folder.
NOTE: Not all PDFs will import fully.
1. Go to EndNote X9 > Preferences.
2. In the Preferences window, click on PDF Handling.
3. In the PDF Auto Import Folder section, check the Enable automatic importing box.

8
EndNote X9 for Thesis & Publications Writing (Mac)
4. You will be asked to select which folder you wish to use. Choose your folder.
5. Click on OK.
6. Note: It will automatically import a PDF into the currently open library. If EndNote is not open, it
will import the PDF the next time EndNote is opened (either into most recently opened library
or EndNote will ask which one, depending on your settings).
Cleaning Up Your EndNote Library
Remove Duplicates:
Before using EndNote with Word
1. Highlight the first reference, and press [Command] + A on the keyboard to highlight all the
terms.
2. Go to References in the top grey menu bar and choose Find Duplicates from the drop down
menu.

9
EndNote X9 for Thesis & Publications Writing (Mac)
Removing One By One:
1. If you have duplicates in your library, EndNote will ask you which one you wish to keep. It will
highlight where there are differences.

10
EndNote X9 for Thesis & Publications Writing (Mac)
2. Carefully check each record and choose the one you want to keep by clicking Keep This Record.
You can also click on Skip to more on to the next one without removing either record.
Bulk Removal:
1. If you have a lot of duplicates (which sometimes happens, especially when doing a systematic
review), choose the Cancel option.
2. EndNote will then highlight ALL your duplicates and you will be able to drag and drop them into
Trash.
Always check that all duplicates have been removed by sorting your EndNote library by article title (click
on Title in the grey menu bar and references will be sorted by article title).
Tidying Your References:
Corporate Author:
• Make sure corporate authors names eg. government departments, company names, are
followed by a comma ie. World Health Organization, otherwise they will display like this:
Organization, W.H.
Capitalisation:
• Ensure article titles are NOT in capital letters in your EndNote library.
• Only the first letter of the first word of the title is in capital letters or the first letter of any
proper noun. Also capitalize any words that must have one eg. country names.
Co-morbidity of Obsessive-compulsive Disorder and Other Anxiety Disorders with Child and Adolescent
Mood Disorders.
Paul, I.; Sinha, V. K.; Sarkhel, S.; Praharaj, S. K.; East Asian Archives of Psychiatry, Jun2015; 25(2): 58-63.
6p. (Journal Article - research, tables/charts) ISSN: 2078-9947
To correct article titles displaying in capital letters:
1. Double-click on the reference in EndNote.
2. Highlight the article title and click on Edit in the menu bar and choosing Change Case then
Sentence Case.

11
EndNote X9 for Thesis & Publications Writing (Mac)
3. Close your reference.
Entering Author (Editor etc) Names:
• If you have manually added references to EndNote, ensure each author name is on a separate
line.
Updating References:
• Sometimes when references are exported from a database, they may not contain all the details
eg. very new, published online first.
• EndNote can check if there have been any updates for a reference.
• This can also be used to add reference information for incomplete PDF imports. Just copy either
the article title or DOI into the references and Save.
How to check for updates:
1. Highlight the references you wish to check.
2. Click on References > Find Reference Updates or right click and choose Find Reference
Updates.
3. If EndNote finds any updates, a window will appear, listing the reference and any updates. The
differences are highlighted.
4. You can then choose to update all fields, update empty fields or edit the reference. You can also
skip references if you don’t wish to make any changes.
5. Make the changes as required.
12
EndNote X9 for Thesis & Publications Writing (Mac)
Using Sync:
• EndNote’s Sync function uses EndNote Online, a cloud based version.
• You need to first create an account with EndNote Online before you can use Sync.
• Syncing can be used for backup, for collaboration or for accessing your library from two
different computers.
• Sync works with only one library and only one EndNote online account.
• Your sync library can be shared with up to 100 other EndNote users on version X7.2 or later
• Before syncing for the first time, create a backup using the Compressed Library option in
EndNote.
Creating An EndNote Online Account:
Access to EndNote Online is free as part of UQ’s subscription to EndNote.
Using a UQ Computer:
1. Go to EndNote online at http://www.myEndNoteweb.com/
2. Register using your UQ email address and choose a password.
Using Your Personal Device:
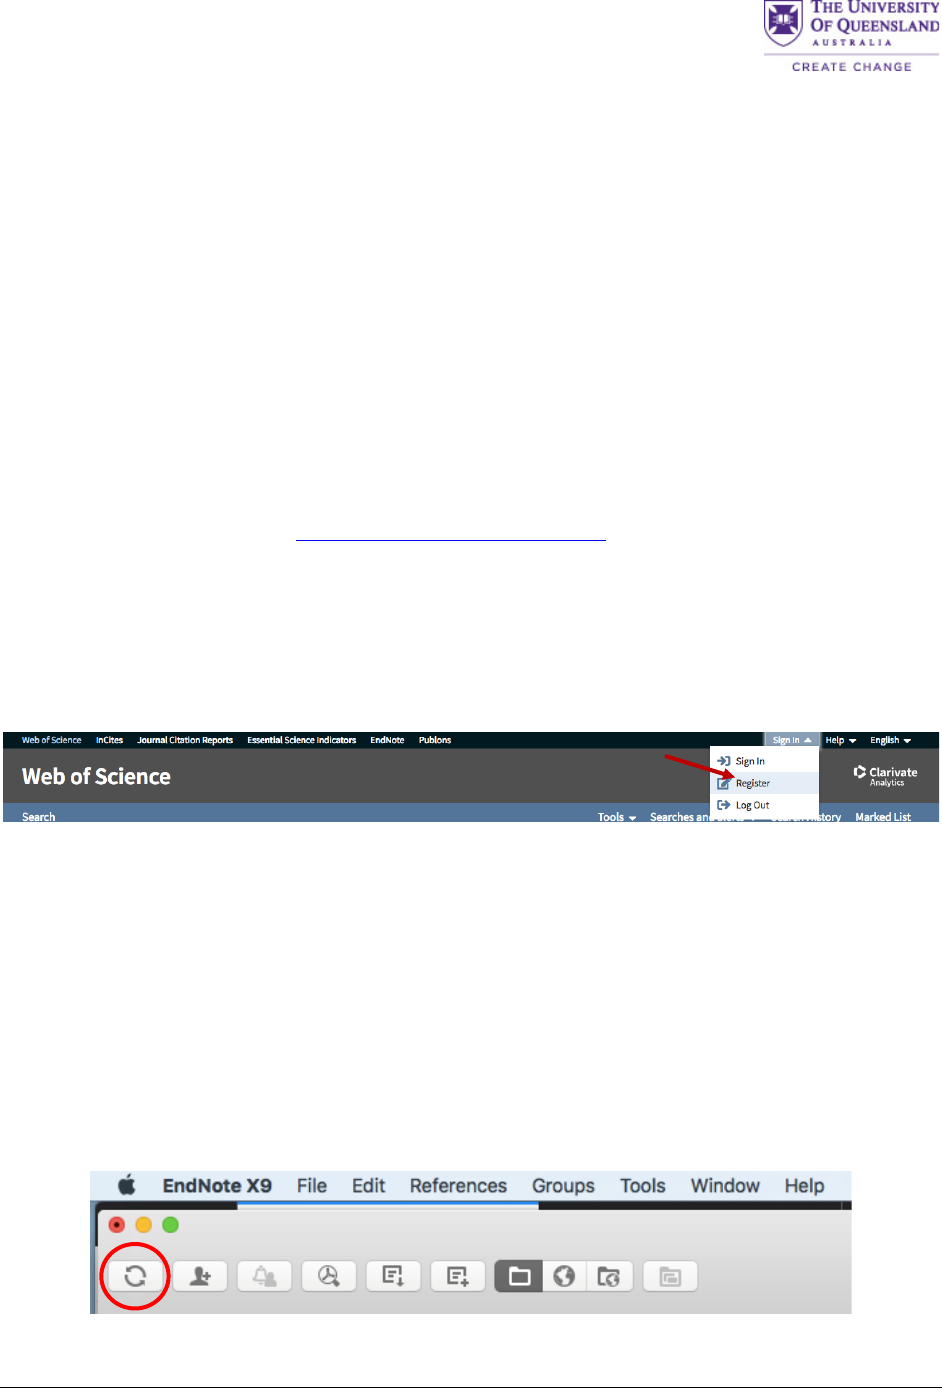
1. Go to the Web of Science database via the UQ Library website and access it using your UQ
username and password.
2. In Web of Science, click on Sign in and select Register.
3. Once you have registered, you will be able to access EndNote online using that account.
Using EndNote on Two Different Computers:
1. You can use this between Windows & Mac platforms. Note: This can only be done for ONE
library.
2. On your first machine, open the EndNote library you wish to use and sync it with EndNote
Online.
3. Note the name of the library – they need to be exactly the same on the two computers.
4. On your second computer, open EndNote and create a new library with exactly the same name
as the library on your first computer.
5. Sync the library on your second computer with EndNote Online by clicking on the Sync button.
6. A window will appear asking you to enter EndNote Online credentials. Click on OK.
13
EndNote X9 for Thesis & Publications Writing (Mac)
7. The synced library’s references and groups will now be added to the library on your second
library.
8. The computers will now sync to EndNote Online every 15 minutes and when you close it
automatically. (This can be changed in EndNote X9 > Preferences > Sync).
https://www.youtube.com/watch?v=7Qv8O0E5cR0
How To Share An EndNote Library:
• With EndNote X8 and X9, you can share library with up to 100 other users (EndNote X7 – 14
users). It also has an Activity Feed that enables users with access to library to see what others
are doing in the library.
• There is no limit to the size of the library or cloud storage.
• All users must have EndNote Online accounts.
• Be aware of copyright considerations. Do not share attachments with people outside your
organization as they may not have access to these PDFs. You are responsible for the
attachments in your library.
Sharing A Library:
1. Sync the library you wish to share with your EndNote Online account. The library must be fully
synced before you start sharing it.
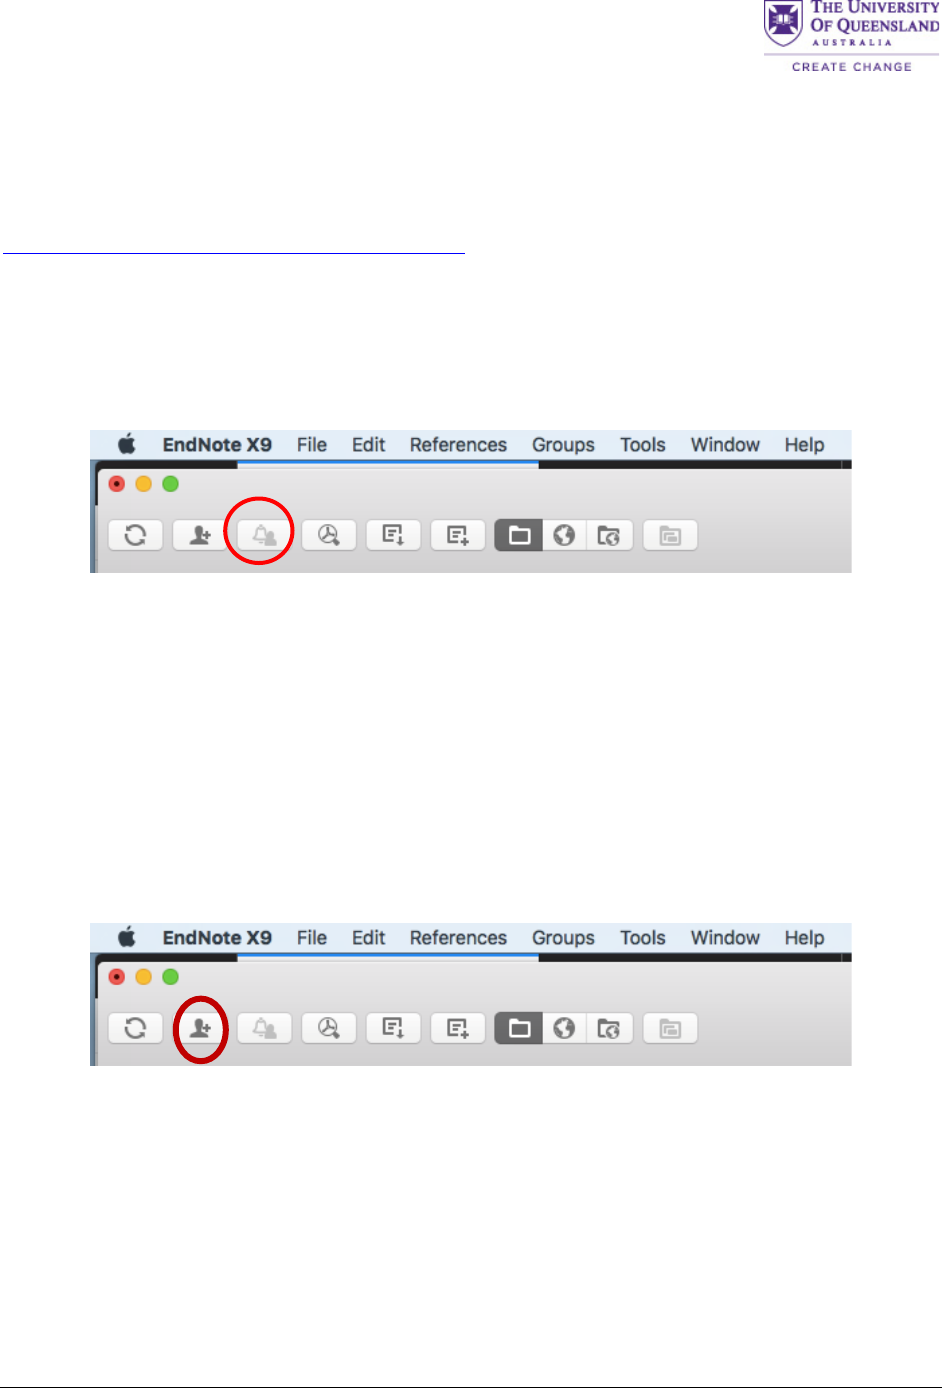
2. Invite members of your group using the Share Library button in EndNote.
3. If you aren’t already signed in to EndNote Online, you will be asked to log in.
4. Enter the email addresses of those you wish to invite. You can invite people at any time. This
window also allows you to remind people who haven’t accepted an invitation or remove people
from sharing the library.
5. Set the type of access people will have to the shared library. You can select read-write or read-
only.

14
EndNote X9 for Thesis & Publications Writing (Mac)
6. People who are invited will receive an email with a link to accept the invitation. The link will take
them to a page where they can sign in with their EndNote Online credentials or sign up for an
account.
7. A message will appear confirming that the shared library is then available.
8. The group members can then access the shared library by going to EndNote and to File > Open
Shared Library. A list of the libraries that been shared with that group member will appear.

15
EndNote X9 for Thesis & Publications Writing (Mac)
9. Select the library to be used and a local copy will be opened.
10. All (EndNote X8 and above) users will be able to view the activity feed for the shared library. It
shows the last 500 activities in reverse, chronological order.
11. Any activity that appears in bold indicates that more information is available by clicking on it.
12. What users are able to do will depend on the permissions you set in the invitation to share.
Users with read-write access can add, change or delete references, attachments, PDF
annotations and groups. Read-only access users will only be able to view the shared library.
Changes will be synced for all group members to view.
https://www.youtube.com/watch?v=z2WhHJBQeFc
Editing Output Styles
Many journals have a specific referencing style. Numerous journal styles are available for EndNote.
Additional styles can be downloaded from https://endnote.com/downloads/styles/
ALWAYS rename your style before editing.
1. Go to Edit > Output Styles > Open Style Manager
2. Select style you wish to edit.

16
EndNote X9 for Thesis & Publications Writing (Mac)
3. The style will open. Save selected style with a new name File > Save As.

17
EndNote X9 for Thesis & Publications Writing (Mac)
There are different options in the column of the left where you can
make changes to a style. You can edit the style globally, the
citations, the bibliography (reference list) or the footnotes.
Format Page Numbers:
• Click on Page Numbers – choose option required – save style

18
EndNote X9 for Thesis & Publications Writing (Mac)
Format Number of Authors Listed in Citation:
• Click on Author Lists – choose required option
Format How Authors Appear in Citation If Have Same Last Name:
• Go to Author Name – choose Use initials only for primary authors with the same name

19
EndNote X9 for Thesis & Publications Writing (Mac)
Volume of the journal article to bold:
• Go to Bibliography > Templates > Journal Article > highlight Volume and click on Edit > Font >
Bold
Author name to be capitalised:
• Go to Bibliography > Author name > select from pick list
Hanging indents in your bibliography:
• Go to Bibliography > Layout > Hanging indent pick list (bottom right)

20
EndNote X9 for Thesis & Publications Writing (Mac)
Inserting a tab after a hanging indent
• Go to Insert field > use pick-list to select Tab (arrow symbol)
Journals Term List
Note:
• Used to maintain the consistency and accuracy of journal titles and abbreviations
• Some citation formats use abbreviations for the journal name rather than the full journal name.
EndNote uses the Journals Term List to substitute abbreviated journal titles for full journal titles.
• The Journals Term List allows for both the full and abbreviated titles to be entered, enabling you
to switch between them depending on your output style.
• EndNote comes with a range of ready-made journal term lists, e.g. Bioscience, Chemical, Law,
Medical and Humanities that can be imported into your library.
• They are located under Applications > EndNote X9 > Terms. (e.g. “Australian Journal of Earth
Sciences”) and two forms of abbreviation – one with and the other without periods/full stops
(e.g. “Aust. J. Earth Sci” and “Aust J Earth Sci”).
When To Use Term Lists:
• To maintain consistency of journal titles.

21
EndNote X9 for Thesis & Publications Writing (Mac)
• When your referencing style requires abbreviated journal names in your bibliography.
• When you import references from a database where the titles have appeared in abbreviated
form, and your referencing style requires the full journal title.
Look at video and steps on importing terms list:
http://libguides.mq.edu.au/content.php?pid=587153&sid=5094791
EXAMPLE: Rockwood K, Graham JE, Fay S. Goal setting and attainment in Alzheimer's disease patients
treated with donepezil. J Neurol Neurosurg Psychiatry [Internet]. 2002 [cited 2009 Mar 7];73(5):500-7.
The full title of the journal is Journal of Neurology, Neurosurgery and Psychiatry
Installing a Journal Title Abbreviations Term List:
Import and Edit the Journal Term List:
1. In EndNote, go to Tools > Open Term Lists > Journals Term List.
2. Highlight the first journal. Press [Command]+A to highlight all journals in the list.
Note: If the Journal Terms List is empty, skip to step 4.
3. Press the Delete Term button to the right to empty the list of old terms.

22
EndNote X9 for Thesis & Publications Writing (Mac)
4. Go to the Lists tab at the top, and click on the Import List button.
5. It should open the relevant place. If not, go to Hard Drive > Applications > EndNote (EndNote
Version Number) > Terms
6. Click Open to import the journal names and abbreviations from the file into the Journals Term
List.
7. To ensure the list is up to date, press Update List. This will add journal titles from the citation in
your library.
8. To edit the list to add or modify journal name/abbreviations, go to the Terms tab > Select the
journal you wish to edit > go to Edit Terms…

23
EndNote X9 for Thesis & Publications Writing (Mac)
Modifying The Output Style So the Abbreviated Journal Name Is Used:
1. Make sure the style is using the correct substitution. Go to Edit > Output Styles > Open Style
Manager.
2. In the list of styles, highlight the style you are using and click the Edit button.
3. Click on Journal Names on the left.
4. Make sure the style is using the full journal name or one of the abbreviations as needed.
Please note: Only use 1 term list at a time to avoid the problems associated with duplicate titles.
Combining Different Libraries
Note: You should always only use one library with one Word document. Using multiple libraries
within one Word document can cause corruptions and other issues.
Importing One Library Into Another:
Do this PRIOR to adding references into a Word document.
1. Open your library.
2. Go to File > Import

24
EndNote X9 for Thesis & Publications Writing (Mac)
3. From the window that opens, choose the library you wish to import. In the Import Option,
choose EndNote Library.
NOTE: Click on the Options button if you don’t see the Import Option etc
4. Click on Import.
5. All of the references of that library should now be imported and appearing in the library.

25
EndNote X9 for Thesis & Publications Writing (Mac)
Adding References From Another Library:
Do this PRIOR to using any references in a Word document.
1. Open both libraries in EndNote.
2. Highlight the reference(s) you wish to add to the other library. Click on References > Copy
References to > choose the library.
OR
Manually resize both open library windows so you can view references in both. Highlight the
reference(s) you wish to add and drag and drop them into the second library.
Note that the record number is different in the new library.
Merging Chapters
1. Make sure all your chapters are backed up.
2. Your EndNote library must be open.
3. In Word, convert citations to unformatted in each chapter.
4. Click on EndNote X9 at the top, right of the window. Select Tools > Convert to Unformatted
Citations.
5. Open a new, blank document and save it.
6. Copy and paste each chapter into the new document in the order required.
7. Place cursor at the end of the document and click on the EndNote X9 tools. Click on Update
Citations and Bibliography.
Instant Formatting
When your document gets large, each time you enter a new reference it will take a long time to update
because it has to format the entire document with Cite While You Write.
To prevent this:
1. In Word, go to the EndNote X9 tools. Click on Tools and choose Convert to Unformatted
Citations.

26
EndNote X9 for Thesis & Publications Writing (Mac)
2. In the Instant Formatting is On option, click on the drop down arrow and select the Turn
Instant Formatting Off option.
3. This will stop the document having to reformat each time you enter a new reference. It will
show them in the unformatted style eg. {Connors, 2016 #36}.
4. To turn the instant formatting back on, click on the drop down menu again and select the
Instant Formatting is On option.
5. The unformatted citations should again update to the formatted version. If this doesn’t
happen, try clicking on Update Citations and Bibliography.
Using References in Text Boxes:
https://support.clarivate.com/Endnote/s/article/EndNote-Citation-numbers-out-of-
order?language=en_US
• This affects numbered styles the most.
• In-text references added to text boxes will not appear in the correct numbered sequence. This is
because EndNote will format in-text references in text boxes first. They will appear at the top of
your reference list.
• You need use Frames rather than text boxes.
Converting Text Boxes To Frames:
1. Save a backup copy of your document.
2. Go to File > Save As. Save the document in Compatibility Mode by selecting Word 97-2004
Document in the File Format option. Click on Save.
3. Locate one of the text boxes that contains an EndNote citation.
4. Go the Format menu and select Text Box.
27
EndNote X9 for Thesis & Publications Writing (Mac)
5. Select the Text Box tab and click the Convert to Frame button, then click OK to confirm the
conversion.
6. Now try to format bibliography and see if it makes any difference with this citation.
Note: Word 2016 for Mac is not able to change text boxes into frames. Try using a different version of
Word or remove the text box with the Frame command.
Adding Frame Command:
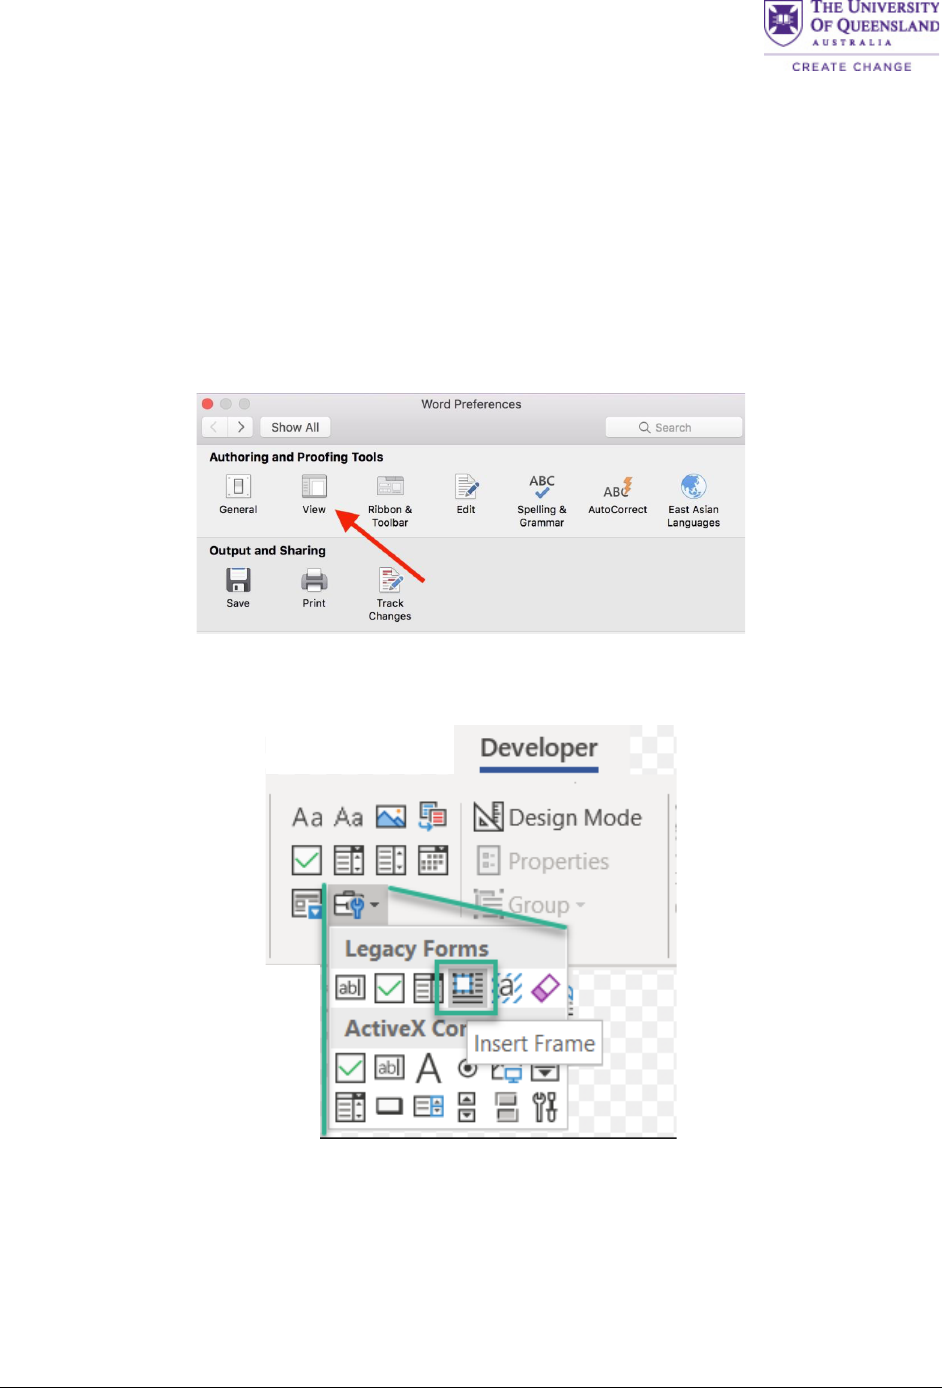
1. Click on Word and choose Preferences.
2. Select View and check Show developer tab. Close the window.
3. Click on the Developer tab. Click on the Insert Frame option. You can use this instead of the text
box.
Creating Reference List at End of Each Chapter
1. Modify the output style required.
2. Include section breaks at the end of each chapter in your manuscript.
Note: This cannot be done if you are using section breaks elsewhere in your document.

28
EndNote X9 for Thesis & Publications Writing (Mac)
Modify the Style:
1. From the EndNote Library, go to Edit > Output Styles > Open Style Manager.
2. Choose the style you wish to modify (e.g. Vancouver)
3. Save and rename the modified style e.g. Vancouver (Sections)
4. From the left-hand column, select Sections.
5. Check Create a bibliography for each section.

29
EndNote X9 for Thesis & Publications Writing (Mac)
6. Save the style by clicking on File > Save. Close the style window.
7. Go to Edit > Output Styles > Open Style Manager and choose your new style to include in your
list of preferred output styles.
8. This style should now also appear in your EndNote Toolbar in Word. If it doesn’t, select the style
from the Style Manager.
Note: You may be lucky to avoid this first step, as the EndNote program does include variations of styles
for sections eg. APA 6th – sections. Check the list in the Style Manager to see if your style has a sections
version.

30
EndNote X9 for Thesis & Publications Writing (Mac)
Adding Section Breaks in Word:
1. In Word, ensure all citations are unformatted. Place your cursor at the end of the first chapter.
2. Insert a section break by clicking on Layout > Breaks > Next Page.
3. Repeat for each chapter or as needed.

31
EndNote X9 for Thesis & Publications Writing (Mac)
4. Go to the EndNote toolbar in Word. Ensure that your sections style is in the Style box. If not,
select it. Click on Update Citations and Bibliography.
Using Track Changes and EndNote
• Using track changes in conjunction with EndNote is not recommended.
• It can cause issues such as Word tools disappearing, Word freezes when attempting to use Word
tools or the wrong references may be linked in a document.
• Best option to avoid potential issues – convert document to plain text and send that version to
your supervisor.
How to Convert to Plain Text:
1. Make sure your document is saved.
2. Go to the EndNote X9 tools in Word. Click on Tools and choose the Convert to Plain Text
option.
3. A message box will appear explaining it will create a copy that is plain text while keeping the
EndNote linked version.
4. Save the untitled plain text copy. Give it a name that identifies it as the plain text version eg.
PDF_chapter_1_plain_text.
• Send the plain text copy to your supervisor where they can use track changes.
• Manually make required changes to EndNote linked document.
• Repeat with new plain text version each time the document is sent to your supervisor.

32
EndNote X9 for Thesis & Publications Writing (Mac)
EndNote Disaster Recovery: My EndNote library is damaged or deleted
• The best way to avoid a disaster is to have backup copies of your document, EndNote library and
data folder.
• If your backups are on cloud storage, copy the files to a local drive before opening them.
Using the Recover Library Function:
The Recover Library function can, in many cases, be used to repair a corrupted library.
1. Close the library if it is currently open.
2. In EndNote, go to Tools and click on Recover Library.
3. A window will appear explaining what EndNote is about to do. Read the information then click
OK.
4. You will then be asked to select the library that needs to be repaired. Click Open.
5. EndNote creates a copy of the library with the suffix “-Saved” added to the file name. Open this
file and the library should be restored.

33
EndNote X9 for Thesis & Publications Writing (Mac)
Rebuilding a Library from the .Data file:
Try this option if you have accidently deleted the .enl file of your library. If you still have the .Data file,
you should be able to rebuild your library. Also try this option if the Recover Library option in EndNote
didn’t work.
1. Move the .Data folder to a new location.
2. Open the TextEdit program from Applications.
3. Use Save to create an empty file with exactly the same name as the data folder. Change the file
extension from .txt to .enl in Finder by clicking on File > Rename. Make sure the new file is
saved in the same directory as the .Data folder.
4. Click on Use .enl
5. Open the newly created .enl file by double clicking on it and the library should be open in
EndNote.
Rebuilding a Library With The Traveling Library:
This can be used if you have lost both your .enl and .Data files.
If you have a Word document that contains some or all of your lost references, you can use the
Traveling Library tool to recover the references in the Word document and recreate an EndNote library.
1. Open the Word document that contains the references you wish to use to rebuild your library.
2. Go to the EndNoteX9 tools and click on the Tools drop down menu. Select Export Traveling
Library.

34
EndNote X9 for Thesis & Publications Writing (Mac)
3. You can choose to export the library to an existing one or a new one. Choose the A new
EndNote library option.
4. Name and save the new library. Once all the references have been exported, an Export
complete message will appear.
5. You can now open the library you created in EndNote.
Note: The record numbers of the references will have changed and none of the PDFs or groups will
be restored.
Configuring EndNote Direct Export:
https://web.library.uq.edu.au/research-tools-techniques/referencing/referencing-
software/EndNote/using-EndNote/configuring-mac-import-EndNote
Help
• Contact your librarian. Their details can be found at
o https://web.library.uq.edu.au/library-services/liaison-librarians
• AskUs:-
o Available UQ Library opening hours (check website for current hours)
o Email: askus@library.uq.edu.au
• UQ Library EndNote Help
o https://web.library.uq.edu.au/research-tools-techniques/referencing/referencing-
software/EndNote/using-EndNote
• Clarivate Analytics EndNote Help
o http://clarivate.libguides.com/endnote_training/home
