
TTUHSC Finance Systems Management January 2023 Page 1|6
Upload and Attach Receipts Directly to Expense Report Header
Once you have entered the header information for a new expense report (Report Name,
Start/End dates, Approver), scroll down to the Attachments section.
There are two ways to attach images:
1. Drag and drop images onto DRAG IMAGE HERE TO UPLOAD.
2. Select ADD ATTACHMENTS to browse for images on your device for upload or
add a document from the Receipt Gallery.
Please note that all expense line items will require separate receipt attachments.
Documentation uploaded directly to the Expense Report Header should be used for
miscellaneous supporting documentation and not individual receipts or invoices.
If you forget to add a supporting document to an expense report, you can upload
documentation to an expense report header even after it has been submitted. Simply
find the report in the Submitted list and select it. When the preview of the expense
report appears on the right, scroll to the bottom and add by using the Drag and Drop or
Add Attachments option.
Upload and Attach Receipts Directly to an Expense Line Item
When adding a credit card transaction to an expense report, receipts can be added
directly to that specific line item.
After choosing the appropriate expense tile, attachments can be added by using one of
the two options available at the bottom of the form:
1. Drag and drop images onto DRAG IMAGE HERE TO UPLOAD.
2. Select ADD ATTACHMENTS to browse for images on your device for upload or
add a document from the Receipt Gallery.
Line items that have an attached document will display a paper clip.
If you uploaded a receipt or invoice at the header level, you can drag an image from the
header to a specific line item on the report.
Upload to the Receipt Gallery
Receipts can be uploaded and stored in this gallery prior to creating an expense report.
Chrome River uses Optical Character Recognition (OCR) to extract data such as date,
amount, and vendor from uploaded receipts.

TTUHSC Finance Systems Management January 2023 Page 2|6
There are three methods for uploading documentation to the Receipt Gallery:
1. Direct Upload to the Receipt Gallery
Access the Receipt Gallery by opening the main menu on the top left corner of the
Chrome River dashboard and choosing the eReceipts option.
Use the Upload button or drag and drop files from your desktop to add them to the
Gallery. Receipts are shown as a preview picture or a list.
Select
eReceipts
Select
Upload
Receipts
Gallery

TTUHSC Finance Systems Management January 2023 Page 3|6
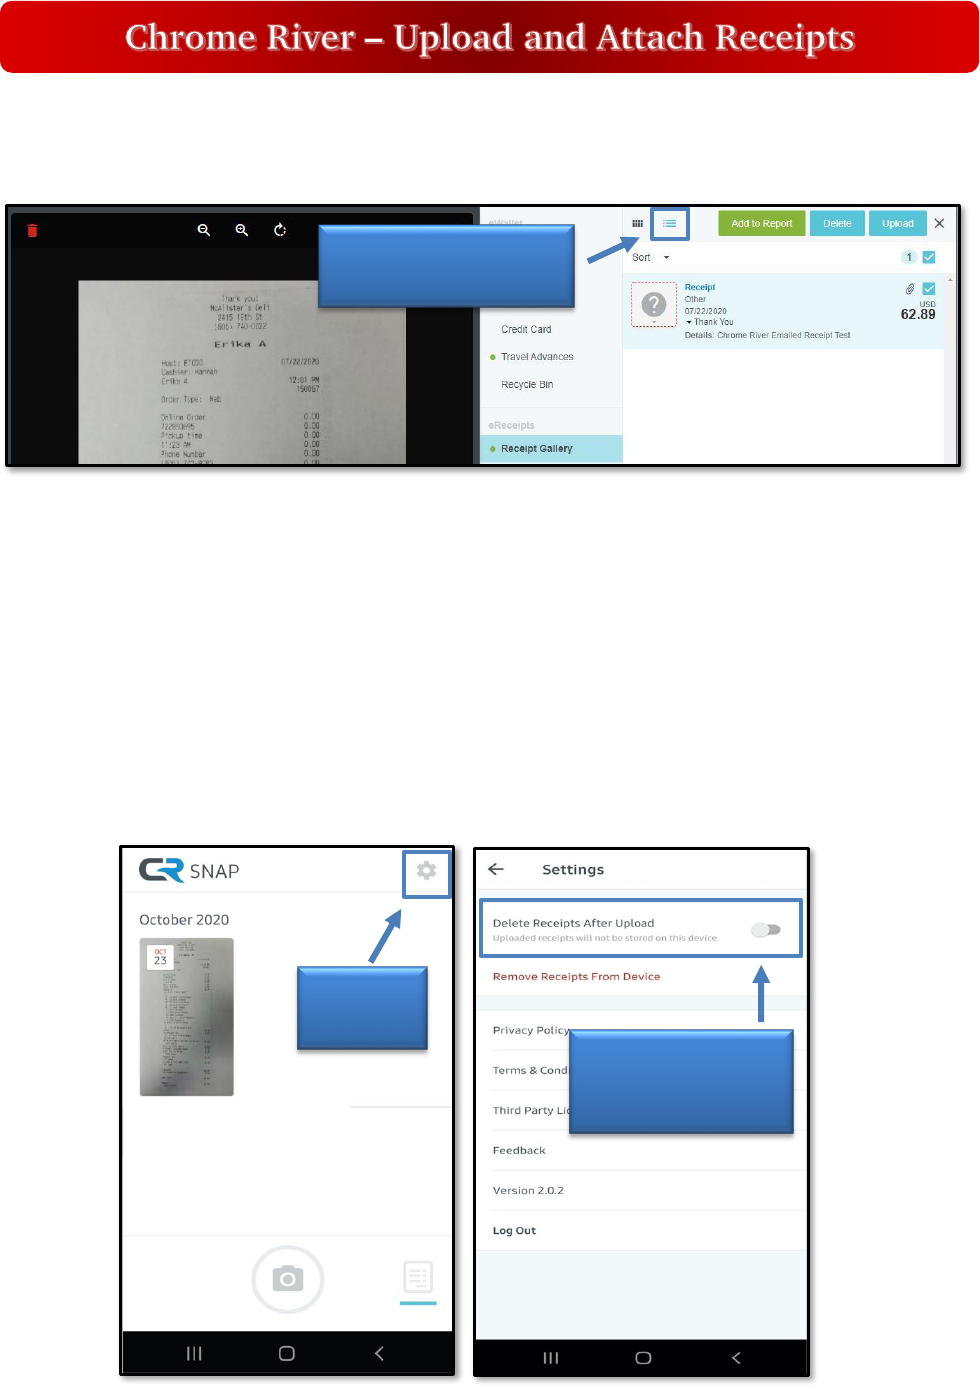
You may alter receipt view to your preference. Click a receipt to view a large preview
and rotate image (if necessary).
2. Upload to the Receipt Gallery Using Chrome River SNAP App
The free CR SNAP app for smart phone devices (available for Android
and iOS) enables expense owners to easily capture and upload
receipt images as soon as the purchase occurs. Pictures taken of
receipts with this app will be uploaded directly to the user’s Receipt
Gallery for use the next time Chrome River is accessed.
After installation, verify your primary email address in Chrome River. CR SNAP will
send a verification code to the ttuhsc.edu email address provided. When the code is
confirmed, log in using your eRaider username and password.
Use the app to take a picture of a receipt. It is recommended that you click the optional
Add More Information. You’ll be able to enter an amount and purpose before the
image is uploaded.
Click Add More
Information
Enter
Amount
Enter
Purpose
Click
Upload
Select To View
Large Preview &
Rotate Receipt
Select To
Change View of
Receipts
TTUHSC Finance Systems Management January 2023 Page 4|6
Additional information provided in the CR SNAP app can be seen in the List View of the
user’s Receipt Gallery after a successful upload.
CR SNAP can also access photos from other applications on your mobile device. If a
receipt photo was taken with the device’s regular camera app, simply find the receipt
image in the photo gallery and select the SHARE icon. The image can be shared to the
CR SNAP app and uploaded.
Photos taken with CR SNAP are not stored in a device’s default photo gallery, so they
do not mix with personal photos.
Users also have the option to automatically delete photos from the device once they
have been uploaded to the Receipt Gallery, freeing up storage space. To do so, go to
Settings and turn on the Delete Receipts After Upload feature.
Select
List View for
Receipt Gallery
Click
Settings
Select Delete
Receipts After
Upload

TTUHSC Finance Systems Management January 2023 Page 5|6
3. Upload to the Receipt Gallery Using Email
Receipt images can also be emailed to the Receipt Gallery. The message should
contain the following information:
From: [email protected]
(must be address associated with user’s
Chrome River account)
Subject: xx.xx [amount, no symbols]
(optional, can be left blank)
Body: [purpose of expense]
(optional, can be left blank)
After the message information is complete, attach the receipt and click Send.
The receipt will be uploaded to the Receipt Gallery of the sender. The dollar amount
provided in the subject line and the purpose of the expense provided in the email body
will be verified in the List View of the user’s Receipt Gallery after a successful upload. If
no amount or purpose are provided, Chrome River’s OCR functionality will attempt to
extract the basic receipt information.
NOTE to Delegates: Receipt images can be emailed directly to another user’s Receipt
Gallery by placing the other user’s ttuhsc.edu email address in the Subject line.
Attaching Receipts to an Expense Report from the Receipt Gallery
When uploaded to the Receipt Gallery, all receipt data extracted through OCR will be
used by Chrome River in an automatic matching process that attempts to pair the
receipt with the user’s PCard transaction. If a receipt is successfully matched with a
PCard transaction, it will attach itself to the credit card transaction and will be removed
from the Receipt Gallery.
Any documentation sent to the Receipt Gallery that cannot be matched to a specific
transaction may be manually added to an expense report header or expense report line
item. See page 1 for instructions.
NOTE: Receipts should never be added to a report directly from the Receipt Gallery.
This will create an expense report line item for reimbursement, which is not allowed on
a PCard expense report.

TTUHSC Finance Systems Management January 2023 Page 6|6
If you have policy questions, contact PCard at [email protected].
If you have system questions, contact [email protected].
Do NOT use the Add
to Report button in
Receipt Gallery
